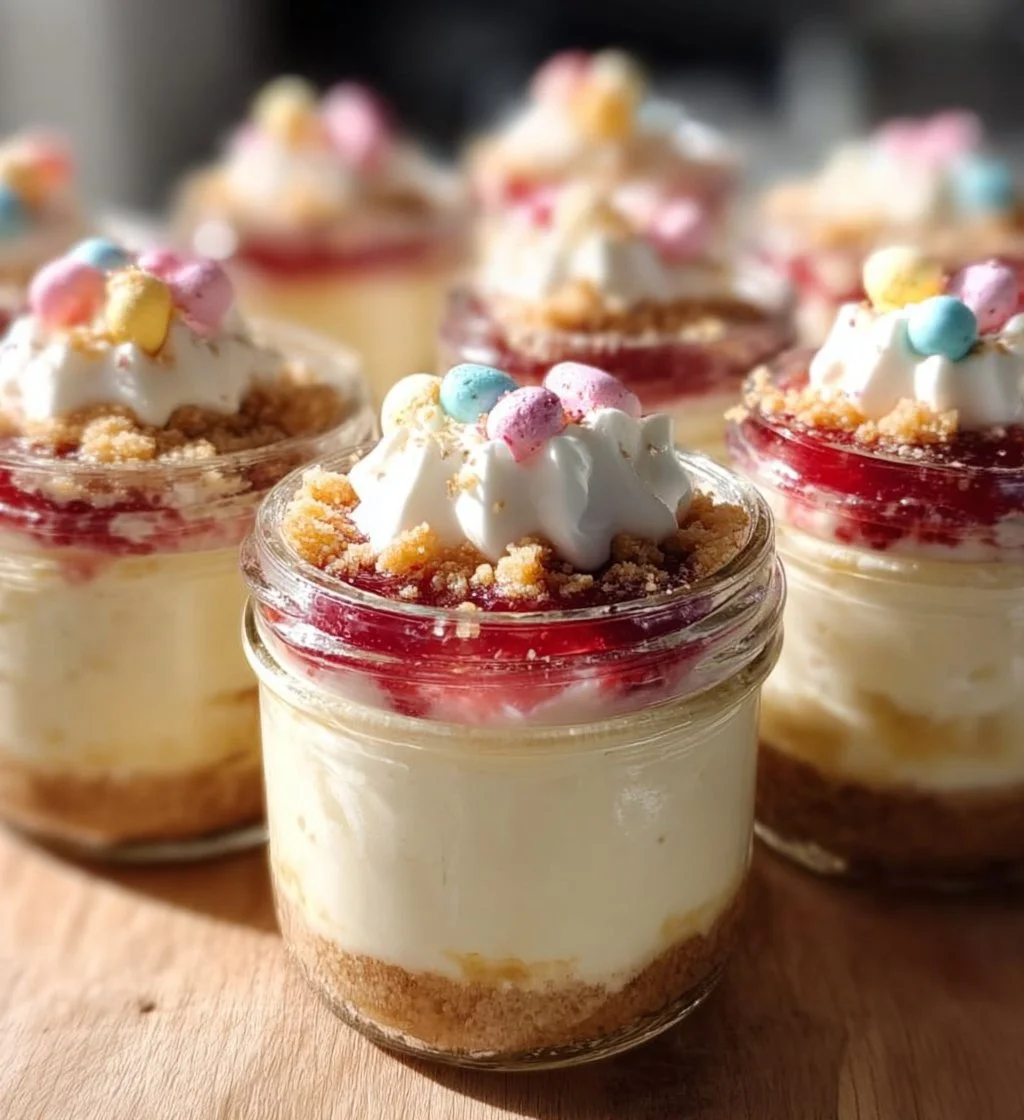
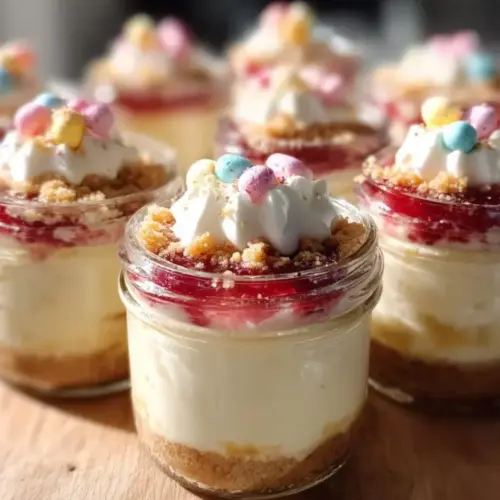
Mini Easter cheesecake jars take the classic cheesecake dessert to a delightful new level, making them perfect for spring celebrations. These individual servings are simple to make and require no baking, which means you can spend more time enjoying your holiday festivities. Layered in adorable jars, they feature a creamy cheesecake filling and a crunchy crust, all topped off with festive decorations that embody the spirit of Easter. This easy recipe offers a fun and interactive treat for you and your loved ones, ensuring sweet smiles around the table.
Why We Love This Mini Easter Cheesecake Jars
Mini Easter cheesecake jars are loved for their versatility and cuteness, serving as an ideal dessert for spring gatherings. The no-bake aspect makes it accessible for anyone, whether you’re a seasoned chef or a kitchen novice. You can whip these up quickly, allowing you to focus on other aspects of your celebration. Plus, each jar is a personal serving, adding a touch of charm to your table. The vibrant colors of the toppings, from pastel candies to seasonal fruits, create an eye-catching display that captures the essence of Easter. Additionally, these jars are super easy to customize, making it simple for you to cater to different tastes while catering to dietary preferences.


Ingredients for Mini Easter Cheesecake Jars
- 8 oz cream cheese, softened
- 1/2 cup powdered sugar
- 1 teaspoon vanilla extract
- 1 cup heavy cream
- 1 cup crushed graham crackers
- 1/2 cup unsweetened coconut flakes
- 1/4 cup melted butter
- Assorted toppings (e.g., chocolate eggs, fruit, whipped cream)
Directions
- In a mixing bowl, beat the softened cream cheese until smooth.
- Gradually add the powdered sugar and vanilla extract, mixing until well combined.
- In a separate bowl, whip the heavy cream until stiff peaks form.
- Gently fold the whipped cream into the cream cheese mixture until fully mixed, being careful not to deflate it.
- In another bowl, mix the crushed graham crackers, coconut flakes, and melted butter until you get a crumbly texture.
- Begin layering your jars. Start with a layer of the graham cracker mixture at the bottom of each jar, pressing it down gently.
- Add a layer of the cheesecake filling on top of the crust.
- Repeat the layering process until you fill the jars, finishing with a layer of cheesecake.
- Refrigerate the jars for at least four hours or overnight to allow the flavors to meld.
- Just before serving, decorate with your choice of toppings.
How to Serve Mini Easter Cheesecake Jars
Serving mini Easter cheesecake jars is as joyful as making them. Arrange the jars on a colorful platter for an eye-catching centerpiece that adds festivity to your gathering. You can personalize each jar by allowing your guests to choose their toppings, creating an interactive experience. Consider providing a selection of toppings like crushed cookies, fruits, or chocolate pieces, which will enable everyone to customize their treat. You can also label each jar with playful names or use festive ribbons to add a personal touch. Setting up a little “decorating station” will make it even more engaging for children and adults alike. These jars are perfect for picnics, brunches, and family gatherings, ensuring that everyone has an individual dessert to enjoy.
Expert Tips for Mini Easter Cheesecake Jars
To make your mini Easter cheesecake jars even more delightful, consider these expert tips. Using room temperature cream cheese helps achieve a creamy texture without lumps. When whipping the heavy cream, ensure your mixing bowl and beaters are cold for the best results. Keep the whipped cream gently folded into the cream cheese mixture for that light and fluffy texture. If you want a more vibrant look, consider adding some food coloring to the cheesecake mixture, so it reflects the cheerful colors of spring. For added depth of flavor, try infusing the cream cheese with citrus zest or spices such as cinnamon or nutmeg. Lastly, if settling on toppings proves difficult, a mix of textures can elevate the experience—think crispy wafers alongside soft fruits or creamy whipped topping.
How to Store Mini Easter Cheesecake Jars
Storing mini Easter cheesecake jars is simple and ensures they stay fresh for later enjoyment. After preparing and chilling your jars, cover them securely with lids or plastic wrap. They can typically last up to five days in the refrigerator, making them perfect for meal prep or making ahead of time. If you anticipate needing them for a longer period, you can freeze the jars without toppings for up to three months. When ready to enjoy, simply thaw them in the fridge overnight and add your desired toppings fresh before serving. Always check for any signs of spoilage, especially if you include ingredients that have shorter shelf lives.
Variations of Mini Easter Cheesecake Jars
Embracing variations can elevate your mini Easter cheesecake jars and cater to diverse taste preferences. Try incorporating different flavors by using flavored cream cheese, such as strawberry, chocolate, or lemon. You can also switch up the crust by using crushed cookies like Oreo or vanilla wafers instead of graham crackers. For a fruity twist, consider mixing in fruit purees into the cheesecake filling or adding fresh fruit layers between the cheesecake and the crust. If you’re feeling adventurous, explore alternative toppings; sprinkle chopped nuts for a crunch or go for layers of fruit compote. Non-dairy versions can feature coconut cream or cashew cream for those with dietary restrictions, allowing everyone to indulge in this charming dessert. Tailor each jar based on seasonal themes, incorporating seasonal fruits or even holiday-themed candies to ensure every occasion has a special touch.
FAQ about Mini Easter Cheesecake Jars
What are mini Easter cheesecake jars?
Mini Easter cheesecake jars are layered desserts made with creamy cheesecake filling, a crunchy crust, and festive toppings, all served in individual jars.
How long do mini Easter cheesecake jars last?
When stored in the refrigerator, mini Easter cheesecake jars can last up to five days.
Can you freeze mini Easter cheesecake jars?
Yes, you can freeze the jars without toppings for up to three months. Thaw them in the refrigerator before adding toppings and serving.
What are some topping ideas for mini Easter cheesecake jars?
You can use toppings like chocolate-covered candies, fruit, whipped cream, or crushed cookies for a fun and festive look.
Can I customize the flavors in mini Easter cheesecake jars?
Absolutely! You can use flavored cream cheese, add fruit purees, or experiment with different crust and topping options to create your own version.
Mini Easter Cheesecake Jars
Ingredients
For the cheesecake filling
- 8 oz cream cheese, softened Use room temperature for best texture.
- 1/2 cup powdered sugar
- 1 tsp vanilla extract
- 1 cup heavy cream Whip until stiff peaks form.
For the crust
- 1 cup crushed graham crackers
- 1/2 cup unsweetened coconut flakes
- 1/4 cup melted butter
Toppings
- Assorted toppings (e.g., chocolate eggs, fruit, whipped cream) Customize as desired.
Instructions
Preparation
- In a mixing bowl, beat the softened cream cheese until smooth.
- Gradually add the powdered sugar and vanilla extract, mixing until well combined.
- In a separate bowl, whip the heavy cream until stiff peaks form.
- Gently fold the whipped cream into the cream cheese mixture until fully mixed.
- In another bowl, mix the crushed graham crackers, coconut flakes, and melted butter until crumbly.
Layering
- Begin layering your jars with the graham cracker mixture at the bottom, pressing it down gently.
- Add a layer of the cheesecake filling on top of the crust.
- Repeat the layering process until you fill the jars, finishing with a layer of cheesecake.
Chill
- Refrigerate the jars for at least four hours or overnight.
Serve
- Just before serving, decorate with your choice of toppings.
Send me this recipe!
Just enter your email below and get it sent straight to your inbox!