When you’re in search of a sweet treat that offers both a creamy texture and a zesty kick, look no further than Lemon Cream Cheese Bars. These bars perfectly blend the refreshing tartness of lemon with the rich, satisfying creaminess of cream cheese, making for a dessert that’s not only delicious but also visually appealing. Whether you’re planning a family gathering, a picnic, or just looking to satisfy your sweet tooth, these bars will undoubtedly leave your guests asking for more.
Why We Love This Lemon Cream Cheese Bars Recipe
There’s something incredibly satisfying about biting into a well-made lemon cream cheese bar. The harmonious balance between the light and fluffy lemon filling and the buttery crust is simply unforgettable. The ease of preparation is another reason to love this recipe. You don’t need any complicated techniques or fancy equipment; just simple ingredients that you often have in your pantry. The vibrant flavor of fresh lemons combined with rich cream cheese makes these bars so refreshing, perfect for warm days or anytime you crave a little brightness in your dessert repertoire. When you serve these bars, you’re not just offering a dessert; you’re inviting compliments and second helpings into your kitchen.
Ingredients for Lemon Cream Cheese Bars
To make Lemon Cream Cheese Bars, you will need the following ingredients:
- 2 boxes of yellow cake mix
- 2 eggs, beaten
- 2/3 cup vegetable oil
- Zest from 2 lemons
- 2 packages (8 oz each) cream cheese, softened
- 2/3 cup sugar
- 2 eggs
- Juice from 2 fresh lemons
How to Make Lemon Cream Cheese Bars Directions
Creating Lemon Cream Cheese Bars is a straightforward process that anyone can tackle. Begin by preheating your oven to 350 degrees Fahrenheit. While waiting for the oven to heat, grab a 9×13 baking dish and spray it with nonstick cooking spray to prevent your delicious bars from sticking.
In a large mixing bowl, combine both boxes of yellow cake mix with 2 beaten eggs, vegetable oil, and the zest of two fresh lemons. Stir the mixture until it starts to come together, then dive in with your hands to ensure everything is well mixed. You want a uniform consistency throughout the mixture.
Once everything is mixed, reserve approximately one-third of the crust mixture and press the remaining two-thirds into the bottom of the prepared baking dish. Spread it evenly to create a flatbottom layer that is about ½ inch thick. Bake this crust in the preheated oven for around 15 minutes or until it turns a light golden color.
While the crust is baking, it’s time to prepare the luscious cream cheese filling. In a separate bowl, combine the softened cream cheese and sugar, using an electric mixer or a high-speed whisk to mix them together until they are well incorporated. Next, add the remaining 2 eggs and the fresh lemon juice. Mix everything together for about 5 minutes, which helps to create an airy filling. Take a moment to taste the filling; if you seek a more intense lemon flavor, feel free to adjust the lemon juice according to your preference.
Once the crust is out of the oven, pour the creamy lemon filling over the hot crust. It’s perfectly fine for the crust to be hot. After that, crumble the reserved one-third of the crust dough evenly over the top of the lemon layer. This adds a delightful texture to the bars.
Return the baking dish to the oven and bake for an additional 25–30 minutes. You will know your bars are done when the center is set, and the top crumbles turn a beautiful golden brown. After baking, let the dish cool completely at room temperature. For the best flavor, refrigerate the bars for at least 3-4 hours before cutting them into squares and serving.
How to Serve Lemon Cream Cheese Bars
Serving Lemon Cream Cheese Bars can elevate your dessert presentation. For a visually pleasing display, cut the bars into squares or rectangles, and consider garnishing them with additional lemon zest or a light dusting of powdered sugar on top. You can also pair them with fresh berries for a pop of color and flavor that complements the zestiness of the bars.
It’s best to serve these bars chilled, as the cold enhances their creamy texture and refreshing taste. Present them on a beautiful platter for a touch of elegance at a family gathering, or pack them in individual containers for a picnic. The versatility in serving allows these bars to shine in any setting.
Expert Tips for Making Lemon Cream Cheese Bars
When crafting the perfect Lemon Cream Cheese Bars, a few expert tips can ensure your dessert turns out flawlessly. Firstly, always choose fresh lemons for both zest and juice, as they truly enhance the flavor profile. Store-bought lemon juice doesn’t pack the same punch and can result in a lackluster taste.
Another tip is to ensure your cream cheese is truly softened before you begin mixing. Cold cream cheese can lead to a lumpy filling that’s difficult to smooth out. Letting it sit at room temperature for a while can make a world of difference.
When baking, check your bars a few minutes before the recommended time. Ovens vary, and you don’t want to over-bake your delicious dessert. If you see that the top is browning quickly but the center is not set yet, you can cover the baking dish with aluminum foil.
Finally, don’t skip the refrigeration step. Chilling your bars enhances the flavors and creates a firmer texture, which will make cutting them easier and neater.
How to Store Lemon Cream Cheese Bars
Storing your Lemon Cream Cheese Bars correctly allows you to enjoy their deliciousness for days. Once the bars have cooled, cut them into individual pieces and transfer them to an airtight container for storage. They can be kept in the refrigerator for up to a week, making them a great option for meal prep or snacking throughout the week.
If you want to keep them longer, consider freezing them. Wrap each bar in plastic wrap, then place them in a freezer-safe container or bag. They can be frozen for up to three months. When you’re ready to enjoy, simply take out the desired amount and let them thaw in the refrigerator for a few hours prior to serving.
Variations of Lemon Cream Cheese Bars
While the classic Lemon Cream Cheese Bars are irresistible as they are, you can experiment with several variations to keep things exciting. One delicious idea is to incorporate different citrus zests, such as lime or orange, into the filling for a unique flavor twist.
You may also add a handful of fresh blueberries or raspberries to the cream cheese mixture for a fruity surprise that pairs wonderfully with the tangy lemon. Alternatively, consider making a lemon glaze to drizzle over the top after the bars have cooled, adding extra sweetness and shine.
For those who love a little crunch, mix in some crushed nuts like almonds or macadamia nuts into the crumb topping or around the filling. This addition not only enhances the texture but also provides a delightful contrast to the creamy layer.
Frequently Asked Questions about Lemon Cream Cheese Bars
What are Lemon Cream Cheese Bars?
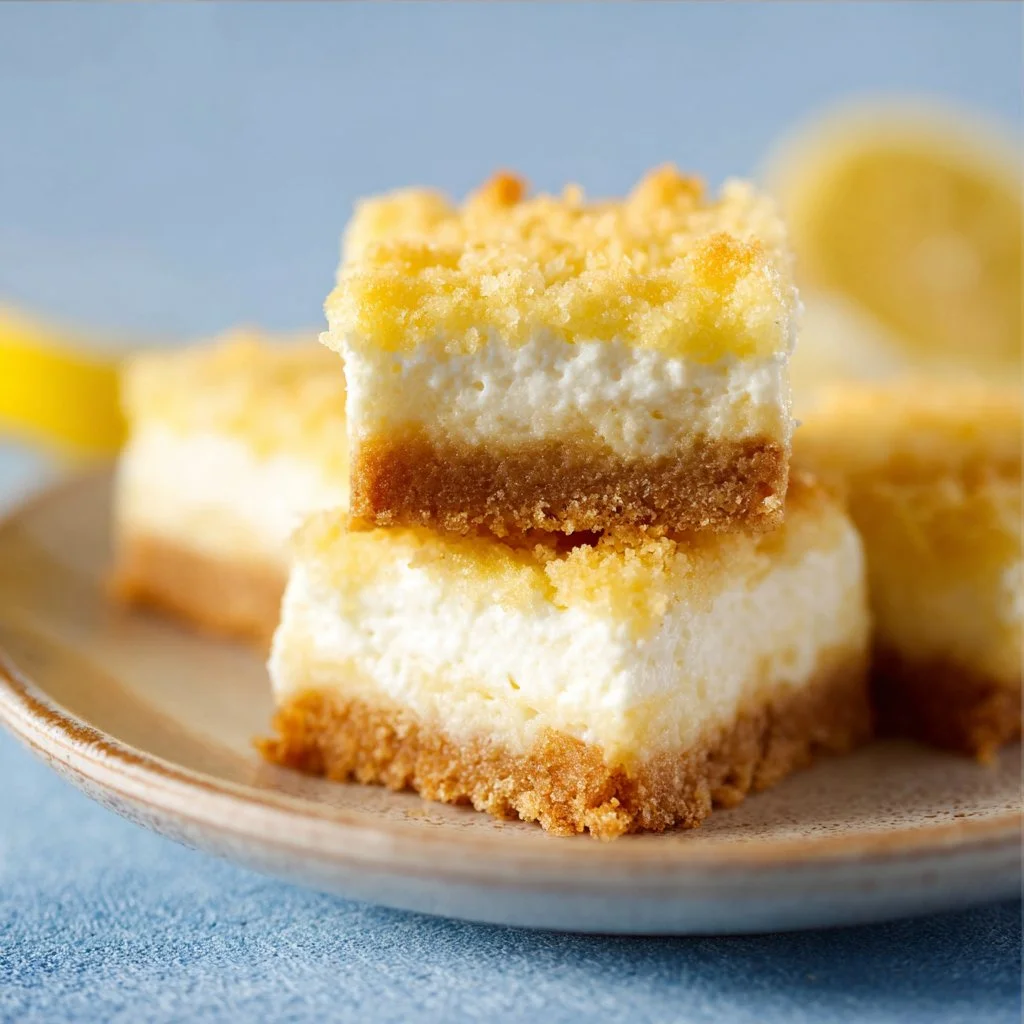
Lemon Cream Cheese Bars are a delightful dessert that features a creamy lemon filling baked on top of a buttery yellow cake crust. The contrast between the tangy, rich filling and the soft, crumbly crust makes for a perfect treat.
How long do I need to refrigerate Lemon Cream Cheese Bars before serving?
To achieve the best flavor and texture, it’s essential to refrigerate your Lemon Cream Cheese Bars for at least 3-4 hours after baking. This cooling time allows the flavors to meld perfectly and makes them easier to cut.
Can I use a different cake mix for Lemon Cream Cheese Bars?
While yellow cake mix is traditional, you can absolutely experiment with other flavors. A lemon cake mix could provide an even more intense flavor, or you might try vanilla or even orange cake mix for a different yet delightful taste.
What’s the best way to cut Lemon Cream Cheese Bars neatly?
Using a sharp knife, cut through the bars without dragging or pressing down too hard to maintain clean edges. Wiping the knife with a damp cloth between cuts can also help ensure a beautiful finish.
Can I freeze Lemon Cream Cheese Bars?
Yes, you can freeze Lemon Cream Cheese Bars for up to three months. Just be sure to wrap each bar individually in plastic wrap before placing them in a freezer-safe container.

Lemon Cream Cheese Bars
Equipment
- 9×13 inch baking dish
- Mixing Bowls:
- Electric Mixer
Ingredients
- 2 boxes yellow cake mix
- 2 large eggs, beaten
- 2/3 cup vegetable oil
- 2 packages cream cheese, softened (8 oz each)
- 2/3 cup sugar
- 2 large eggs


Instructions
- Preheat your oven to 350°F (175°C) and spray a 9×13 baking dish with nonstick spray.
- In a large mixing bowl, combine yellow cake mix, beaten eggs, vegetable oil, and lemon zest. Mix until a uniform consistency is formed.
- Reserve about one-third of the crust mixture and press the remaining two-thirds into the bottom of the prepared baking dish, creating a flat layer.
- Bake the crust for about 15 minutes or until lightly golden. While it bakes, prepare the cream cheese filling.
- In a separate bowl, beat the softened cream cheese and sugar until well combined. Add the remaining eggs and lemon juice, mixing for about 5 minutes until fluffy.
- Pour the cream cheese filling over the hot crust and crumble the reserved crust mixture on top.
- Return to the oven and bake for an additional 25-30 minutes until the center is set and the top is golden brown.
- Let the bars cool completely at room temperature, then refrigerate for at least 3-4 hours before cutting into squares.
Send me this recipe!
Just enter your email below and get it sent straight to your inbox!