When winter blankets the world in a soft layer of snow, most of us think of cozy nights by the fireplace, hot cocoa, and, of course, snowball fights. But have you ever considered turning that pristine snow into a delicious dessert? Enter snow ice cream! This delightful and easy-to-make treat taps into the joys of both childhood and the wonders of nature, transforming fresh, clean snow into a creamy dessert that will evoke nostalgia and bring smiles to faces of all ages.
Why We Love This Snow Ice Cream Recipe
The charm of snow ice cream lies in its simplicity and the sheer joy it brings. Here are a few reasons why this recipe is a beloved choice among families:
- Easy to Make: You don’t need advanced cooking skills or fancy equipment to whip up snow ice cream. With just a few ingredients and simple steps, anyone can create this delightful dessert.
- A Memorable Experience: Collecting fresh snow can be a fun family activity. You get to embrace winter and enjoy the outdoors while preparing the ingredients for your delicious treat.
- Customizable: This recipe is highly adaptable. You can adjust the sweetness, flavor, and toppings to suit your preferences. Want a richer flavor? Add chocolate syrup or fresh fruit purees.
- Fun for All Ages: Snow ice cream is not just a dessert; it’s so much more than that. It’s a playful activity that can engage kids and adults alike, making it a perfect addition to winter gatherings.
With these reasons in mind, let’s dive into the ingredients you need to make this delightful snow ice cream.
Ingredients about Snow Ice Cream
To make snow ice cream, you’ll need just a handful of ingredients. Here’s the list to get you started:
- 1 cup milk: This is the base of your snow ice cream. You can use whole milk for a creamier texture or stick to low-fat or almond milk for a lighter version.
- 1/2 cup granulated sugar: This sweetens the mixture. Feel free to adjust the quantity according to your taste preferences or substitute with a sugar alternative.
- 1 teaspoon vanilla extract: This adds a lovely, fragrant touch that enhances the flavor of your ice cream.
- Pinch of salt: Salt brings out the sweetness and balances the flavors.
- 8-10 cups fresh clean snow: Collect this snowy ingredient for the main base of your ice cream. Ensure it’s clean and free from debris for the best results.
- Sprinkles (optional): For a fun and festive touch, use sprinkles as a topping!
Now that you’ve gathered your ingredients, it’s time to learn how to make your very own snow ice cream.
How to Make Snow Ice Cream Directions
Making snow ice cream is as easy as 1-2-3! Follow these simple steps to delight yourself with this frosted treat:
Prepare the Base Mixture: In a medium-sized bowl, start by whisking together 1 cup of milk, 1/2 cup of granulated sugar, 1 teaspoon of vanilla extract, and a pinch of salt. Whisk it well until all the sugar is dissolved and the mixture is fully combined. This will create a sweet and creamy base for your snow ice cream.
Collect Fresh Snow: As you prepare your mixture, head outside with a clean bowl to collect the fresh snow. Aim for 8 cups or more to ensure you have enough snow to achieve the desired consistency of your ice cream. Remember that the snow should be fresh and clean, away from dirt or debris.
Combine: Once you have your mix prepared and snow collected, pour the milk mixture over the snow in a large bowl. Stir gently to combine. You want to fold the mixture into the snow without packing it down too much, maintaining its fluffy texture.
Adjust Consistency: If the mixture seems too liquidy or you want a thicker ice cream, carefully fold in additional snow, up to 2 cups, until you reach your desired consistence. The snow should lighten the mix and give it that delightful ice cream texture.
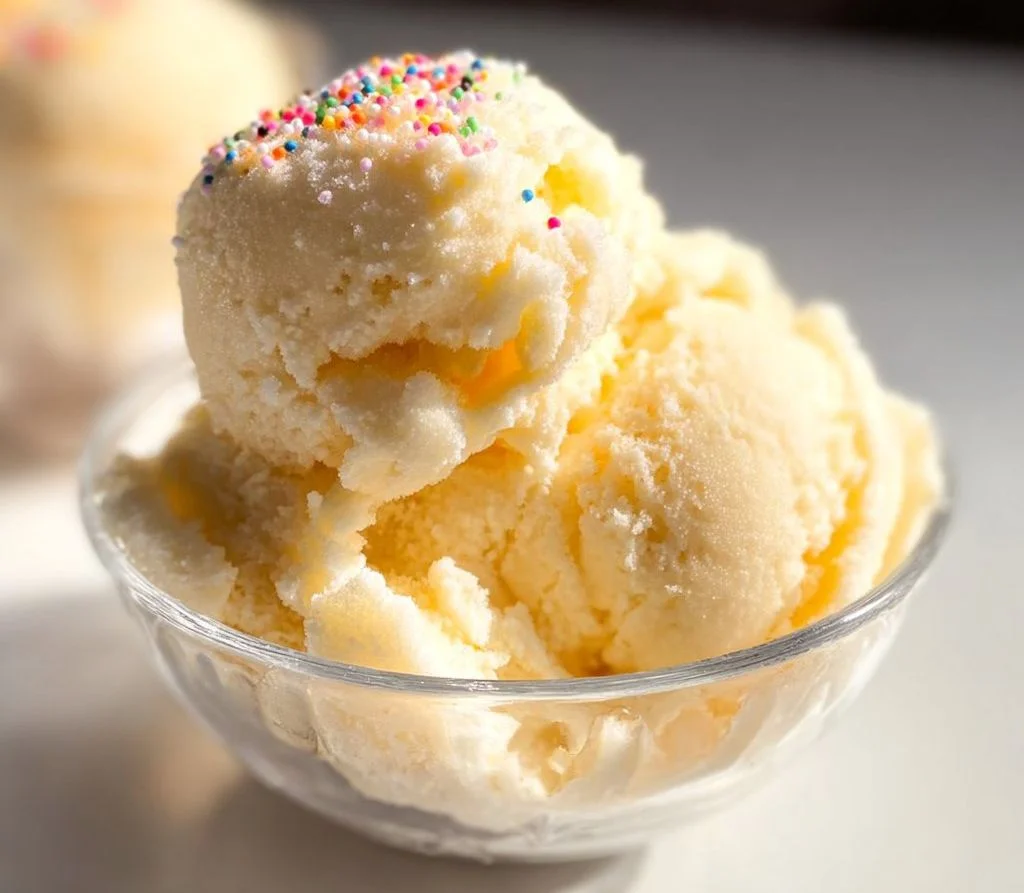
Serve and Enjoy: Once your mixture is well combined and fluffy, it’s time to scoop! Use a spoon or ice cream scoop to portion the fluffy snow ice cream into bowls. For a cheerful touch, add sprinkles on top for that perfect finishing touch.
And just like that, you have prepared a whimsical bowl of snow ice cream. It’s icy, sweet, creamy, and brings a touch of winter wonderland right into your home!
How to Serve Snow Ice Cream
Serving snow ice cream is just as fun as making it! Here are some ideas to ensure your dessert shines:
- In Fun Bowls: Use brightly colored or themed bowls to present your snow ice cream. This adds a playful touch that complements the fun nature of the treat. Kids will especially enjoy eating from their favorite designs!
- With Toppings: To make it even more appealing, offer a selection of toppings like chocolate syrup, whipped cream, or fruit. You can set up a toppings bar so everyone can customize their own bowl.
- As a Party Treat: If you’re hosting a winter gathering, serve small cups of snow ice cream as part of your dessert menu. Pair it with other winter-inspired sweets for a delightful selection.
- Accompanied by Hot Drinks: Snow ice cream makes a lovely pairing with hot cocoa or warm apple cider. The contrast of warm and cold will delight your senses, making for a cozy winter dessert experience.
Your fluffy snow ice cream is ready to be savored! Whether you enjoy it with friends or family, the joy this dessert brings makes any winter day feel special.
Expert Tips: Snow Ice Cream
To help you make the most of your snow ice cream-making experience, here are some expert tips:
- Choose the Right Snow: When collecting snow, avoid areas with yellow snow or dirt. Make sure you gather fresh snow from a clean and safe spot to ensure your dessert is safe and delicious.
- Speed Is Key: Snow can melt quickly, so try to make your snow ice cream shortly after collecting the snow. You want to retain that fluffy texture, which can be compromised if the snow begins to melt.
- Adjust Sweetness: Taste your mixture before adding it to the snow. If you prefer a sweeter ice cream, don’t hesitate to add more sugar to the milk mixture.
- Use Ice Cream Makers (Optional): If you have one, you could use an ice cream maker with your mixture and snow to create a smoother, more blended texture. Just remember that it isn’t necessary!
- Have Fun with Flavors: Don’t hesitate to experiment with flavors! Try adding cocoa powder for a chocolate version or almond extract instead of vanilla for a unique twist.
With these expert tips, you can elevate your snow ice cream making to an art, ensuring that each batch is a memorable treat.
How to Store Snow Ice Cream
Snow ice cream is best enjoyed fresh, but you might be curious about how to store it. Here are some guidelines:
- Short Storage Time: If you have leftovers, try to eat them within a few hours for the best flavor and texture. Snow ice cream doesn’t hold up well once stored for an extended duration.
- Freezing: If you must store it, place it in an airtight container and put it in the freezer for a short while. However, be aware that upon thawing, it may lose some of its fluffy texture and become icy.
- Re-chill: If it gets too soft in the freezer, you can refold some fresh snow back into it for a more desirable consistency!
Overall, plan to enjoy your snow ice cream soon after making it for the best experience.
Variation of Snow Ice Cream
The beauty of snow ice cream lies in its flexibility. Here are some fun variations you could try:
- Chocolate Snow Ice Cream: Add 1/4 cup of cocoa powder to the milk mixture for a chocolatey twist. This will turn your snowy delight into a rich chocolate treat!
- Fruity Flavors: Incorporate pureed fruits such as strawberries, mangoes, or bananas with the milk mixture. This not only lends a gorgeous color to your ice cream but also infuses it with a fruity sweetness.
- Spritz of Citrus: Try adding a splash of lemon or orange juice to your mixture for a bright and zesty flavor that cuts through the sweetness.
- Coffee Lovers Delight: For adults, mix in a bit of instant coffee or espresso powder for a flourish of coffee flavor. This makes for an exciting dessert for grown-ups!
- White Chocolate Snow Ice Cream: Mix in melted white chocolate for a rich and creamy version. Drizzle some on top for a decadent finish!
With endless possibilities, the flavors of snow ice cream can adapt to suit any palate. So, get creative and enjoy experimenting!
FAQ About Snow Ice Cream
What is snow ice cream?
Snow ice cream is a simple winter dessert made from fresh snow, milk, sugar, and flavorings. It’s a fun and playful way to enjoy the snowy weather, turning nature’s bounty into a sweet treat.
Is snow ice cream safe to eat?
Yes, as long as you collect fresh, clean snow from safe areas away from dirt or potential contaminants. Always ensure that your snow is clean to ensure it is safe for consumption.
Can you use different types of milk?
Absolutely! You can use whole milk for a creamier texture or opt for alternatives like almond milk or coconut milk for a dairy-free option.
How long does snow ice cream last?
Snow ice cream is best enjoyed immediately. If you have leftovers, you can store it in an airtight container in the freezer, but it may lose some of its original texture over time.
Can I make snow ice cream in advance?
While it’s best made fresh, you can prepare the milk mixture in advance and then combine it with snow shortly before serving. This allows for a fresher dessert experience.

Snow Ice Cream
Ingredients
Base Mixture
- 1 cup milk Use whole milk for creamier texture or alternatives like almond milk for lighter version.
- 1/2 cup granulated sugar Adjust quantity according to taste or substitute with a sugar alternative.
- 1 teaspoon vanilla extract Enhances the flavor of your ice cream.
- 1 pinch salt Balances the sweetness.
Main Ingredients
- 8-10 cups fresh clean snow Ensure it's clean and free from debris.
- sprinkles Optional, for topping.
Instructions
Preparation
- In a medium-sized bowl, whisk together the milk, sugar, vanilla extract, and salt until combined and sugar is dissolved.
- Collect fresh snow in a clean bowl, aiming for at least 8 cups.
Combine Ingredients
- Pour the milk mixture over the collected snow in a large bowl and stir gently to combine.
- Fold the mixture into the snow without packing it down too much.
- If too liquidy, carefully fold in additional snow until the desired consistency is achieved.
Serve
- Scoop the fluffy snow ice cream into bowls and add sprinkles or other toppings if desired.
Send me this recipe!
Just enter your email below and get it sent straight to your inbox!


