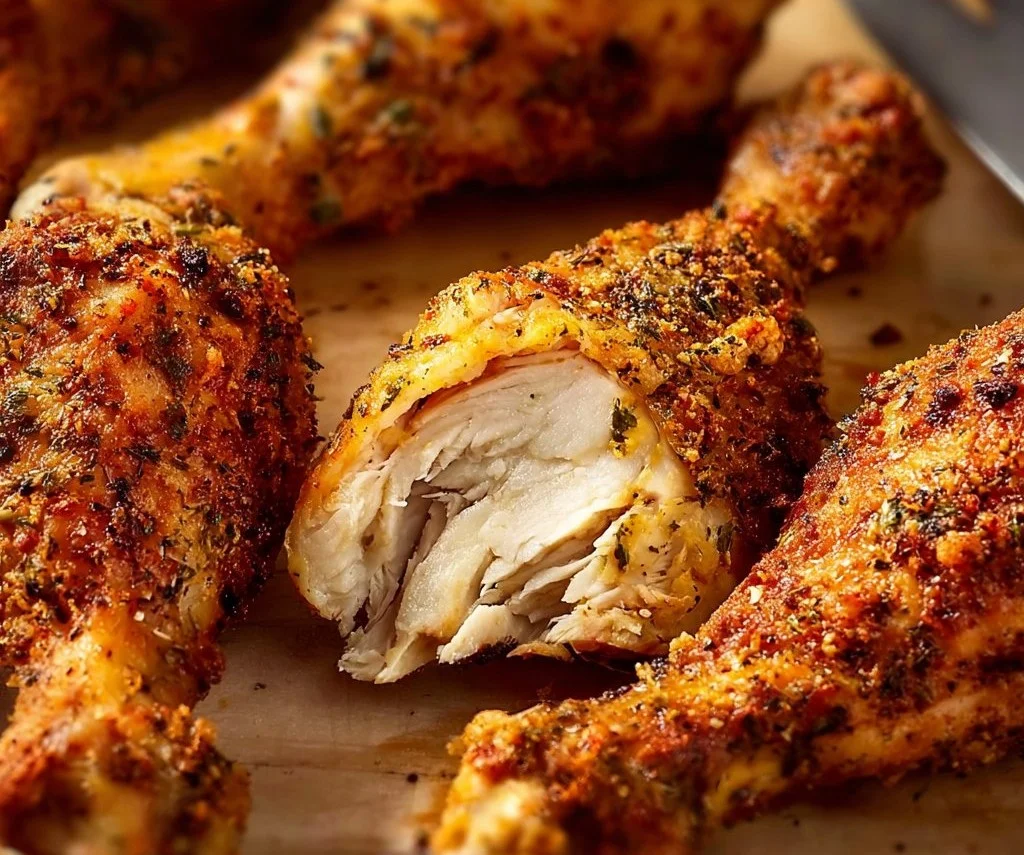
When it comes to comfort food, few things can compete with the joy of biting into a perfectly baked, seasoned chicken drumstick. This recipe for seasoned crispy chicken drumsticks takes chicken to the next level, providing a balance of flavor, texture, and ease that is perfect for any meal. Whether you’re feeding a large family or preparing a fun weekend lunch, these drumsticks will surely delight everyone at the table.
Why We Love This Seasoned Crispy Chicken Drumsticks Recipe
What makes seasoned crispy chicken drumsticks so beloved? The answer lies in their versatility and delightful taste. This recipe is not only simple to follow, but it also adapts well to various occasions, from casual weeknight dinners to special gatherings. The crunch of the skin combined with the juicy meat inside creates a perfect bite, ensuring satisfaction in every piece.
These drumsticks are also a great source of protein, making them a hearty choice for those looking to fuel their bodies without relying on heavier, more calorie-dense options. Plus, the ingredients used here are accessible, making this dish not only delicious but also budget-friendly. The use of pasture-raised chicken means you’re choosing a healthier, more humane option, resonating with those who enjoy ethically sourced meals.
Ingredients for Seasoned Crispy Chicken Drumsticks
To get started on these delicious seasoned crispy chicken drumsticks, you’ll need the following ingredients:
- 3 packs of pasture-raised chicken drumsticks (approximately 13-15 drumsticks)
- 3-4 tablespoons of extra virgin olive oil
- 2 teaspoons of sea salt
- 2 teaspoons of garlic powder
- 2 teaspoons of chili powder
- 2 teaspoons of oregano
- 1 teaspoon of paprika
- 1 teaspoon of ground pepper
With these simple ingredients, you’ll create a flavorful and enticing dish that’s sure to impress!
How to Make Seasoned Crispy Chicken Drumsticks
Creating the perfect seasoned crispy chicken drumsticks is a straightforward process that anyone can master. Here’s a step-by-step guide to help you achieve perfectly baked drumsticks.
- Preheat the Oven: Start by preheating your oven to 420 degrees Fahrenheit. This higher temperature is key to achieving that desired crispy skin.
- Prepare the Chicken: Pat the chicken drumsticks dry using a paper towel. This step is crucial as it removes excess moisture, ensuring that the skin crisps up nicely during baking. Once dried, place all drumsticks in a large mixing bowl.
- Add Olive Oil: Drizzle the extra virgin olive oil over the drumsticks. Toss them gently to coat each piece uniformly with the oil. This will help the seasonings adhere and promote browning during baking.
- Season the Chicken: In the same bowl, sprinkle all your seasonings—sea salt, garlic powder, chili powder, oregano, paprika, and ground pepper. Mix thoroughly, ensuring every drumstick is well-coated. This seasoning blend is what transforms the chicken into something special.
- Prepare Your Baking Sheet: Spray a baking sheet and rack with oil. Position the rack on top of the baking sheet. This setup allows air to circulate around the chicken, promoting even cooking and an extra crispy finish.
- Arrange Drumsticks: Place each seasoned drumstick onto the rack, ensuring they are not touching. This spacing is crucial for proper cooking.
- Bake: Transfer the baking sheet to the oven and let the drumsticks bake for about 35 minutes. After this initial time, remove the sheet and carefully flip each drumstick over to ensure even cooking. Return them to the oven for an additional 15 minutes.
- Check for Doneness: The drumsticks are done when they are golden brown and crispy. You can check their internal temperature with a meat thermometer; it should read at least 165 degrees Fahrenheit.
- Enjoy: Remove the drumsticks from the oven and let them rest for a few minutes before serving. They’re ready to be enjoyed as-is or with your favorite dipping sauce!
By following these simple steps, you’ll create deliciously seasoned and crispy chicken drumsticks that will wow your family and friends.
How to Serve Seasoned Crispy Chicken Drumsticks
Serving your seasoned crispy chicken drumsticks is just as exciting as making them. Here are a few fun and tasty ideas to elevate your serving experience:
- As an Appetizer: Serve the drumsticks as a delightful finger food for gatherings. Pair them with a variety of dipping sauces, such as barbecue, honey mustard, or a spicy ranch. This will make them enjoyable for guests who love a little extra flavor.
- With a Salad: For a lighter meal, serve the drumsticks over a bed of fresh greens. You can add cherry tomatoes, cucumber slices, and avocados to create a vibrant and nutritious salad. Drizzle with a light vinaigrette for added zest!
- On a Platter: Present the drumsticks on a beautiful serving platter at your next family dinner. Garnish with fresh herbs like parsley or cilantro to add a pop of color and flavor.
- With Sides: Pair the drumsticks with classic side dishes such as mashed potatoes, coleslaw, or grilled vegetables. This creates a complete meal that is satisfying and flavorful.
- In Tacos: Shred any leftover chicken and use it as a filling for tacos. Add some salsa, guacamole, and shredded cheese for a fun twist that everyone will love.
By utilizing these serving suggestions, you’ll make your seasoned crispy chicken drumsticks the star of any meal or event, pleasing everyone!
Expert Tips for Making Seasoned Crispy Chicken Drumsticks
Scoring superbly crispy chicken drumsticks can sometimes feel like a challenge. However, with a few expert tips, you can ensure perfect results every time. Here’s what you should keep in mind:
- Don’t Rush Drying: Ensure that the chicken is adequately dried before seasoning. This step helps the skin become crispy in the oven. A little extra effort here goes a long way.
- Quality of Ingredients Matters: Use high-quality olive oil and seasonings. Fresh spices can significantly enhance the flavor profile of your drumsticks, making for a much more enjoyable meal.
- Leave Space Between Drumsticks: It might be tempting to crowd the baking tray to fit all drumsticks, but leaving space allows for better air circulation and helps them cook evenly.
- Use a Meat Thermometer: Investing in a meat thermometer can help you achieve perfectly cooked chicken every time. It takes the guesswork out of determining doneness.
- Let Them Rest Before Serving: After baking, allow the drumsticks to rest for a few minutes. This resting period enhances the juiciness of the meat and gives your skin time to crisp up beautifully.
By incorporating these tips, you’ll ensure that each batch of seasoned crispy chicken drumsticks is as delicious as can be!
How to Store Seasoned Crispy Chicken Drumsticks
Storing any leftovers properly is essential for keeping your seasoned crispy chicken drumsticks fresh and flavorful. Here’s how to do it right:
- Cool Completely: Allow the drumsticks to cool down after cooking. This prevents condensation from forming in your storage container, which can make them soggy.
- Use an Airtight Container: Place the cooked drumsticks in an airtight container. This will preserve their moisture while preventing them from absorbing any other odors from your refrigerator.
- Refrigerate Promptly: Store the drumsticks in the refrigerator for up to 3 to 4 days. Make sure they’re sealed well to maintain their quality.
- Reheat Carefully: When you’re ready to enjoy the leftovers, reheat them in the oven at a low temperature. This method helps maintain their crispy texture. You can also use a microwave but be aware that it might not keep them crispy.
By following these storage tips, you can enjoy your seasoned crispy chicken drumsticks well beyond the initial meal!
Variations of Seasoned Crispy Chicken Drumsticks
While this seasoned crispy chicken drumsticks recipe is superb on its own, there are plenty of ways to mix it up and personalize it. Here are a few variations to consider:
- Different Spice Mixes: Experiment with other spice combinations to find your favorite flavor profile. Try cumin and coriander for a Middle Eastern twist or smoked paprika for a unique flavor.
- Add a Sweet Glaze: For those who enjoy a touch of sweetness, brush the drumsticks with a honey or maple glaze during the last few minutes of baking. This will add a delightful sticky finish.
- Spicy Heat: If you love heat, consider adding crushed red pepper flakes or cayenne pepper to the seasoning mix. This will create a spicy kick that enhances the overall flavor.
- Herbs Introduction: Incorporate fresh herbs like thyme, rosemary, or parsley for an added burst of freshness. Just be sure to chop them finely for even distribution.
- Marinate Before Cooking: Marinating the chicken for a few hours or overnight can intensify the flavors. Use ingredients such as yogurt or lemon juice as a base, mixing them with your preferred spices.
By exploring these variations, you can tailor your seasoned crispy chicken drumsticks to suit your tastes and create exciting new meals.
FAQs about Seasoned Crispy Chicken Drumsticks
If you have questions about making seasoned crispy chicken drumsticks, here are some common inquiries along with their answers:
What types of chicken can I use?
You can use any kind of chicken, but for the crispiest texture, drumsticks work best. Bone-in, skin-on chicken tends to yield the best results for crispy skin.
How can I enhance the flavor of my chicken?
Playing with your seasoning is a great way to enhance flavor. Feel free to add more spices or try different blends from various cuisines.
Can I freeze the drumsticks?
Yes! If you have leftovers, you can freeze them in an airtight container. They will last up to three months in the freezer. When ready to eat, thaw them in the refrigerator and reheat.
Why is my chicken not crispy?
There are several reasons this could happen. Make sure the chicken skin is dry before cooking, and ensure that the oven is adequately preheated. Avoid overcrowding the baking pan, as this can trap moisture and prevent crispiness.
Can I cook these on the grill instead?
Absolutely! If you prefer a smoky flavor, you can make these on the grill. Just be mindful of temperature control to create crispy skin without burning.
Seasoned Crispy Chicken Drumsticks
Equipment
- Oven
- Baking Sheet
- Rack
Ingredients
- 3 packs Pasture-Raised Chicken Drumsticks approximately 13-15 drumsticks
- 3-4 tablespoons Extra Virgin Olive Oil
- 2 teaspoons Sea Salt
- 2 teaspoons Garlic Powder
- 2 teaspoons Chili Powder
- 2 teaspoons Oregano
- 1 teaspoon Paprika
- 1 teaspoon Ground Pepper


Instructions
- Preheat your oven to 420°F (215°C).
- Pat the chicken drumsticks dry with paper towels and place them in a large mixing bowl.
- Drizzle olive oil over the drumsticks and toss to coat evenly.
- Sprinkle sea salt, garlic powder, chili powder, oregano, paprika, and ground pepper over the chicken. Mix thoroughly to ensure each drumstick is well-coated.
- Spray a baking sheet and rack with oil, then place the rack on top of the baking sheet.
- Arrange the seasoned drumsticks on the rack, ensuring they are not touching each other.
- Bake in the preheated oven for about 35 minutes. Flip the drumsticks over and return to the oven for an additional 15 minutes.
- Check for doneness; the internal temperature should reach at least 165°F (75°C) and the skin should be golden brown and crispy.
- Remove from the oven and let the drumsticks rest for a few minutes before serving.
Send me this recipe!
Just enter your email below and get it sent straight to your inbox!