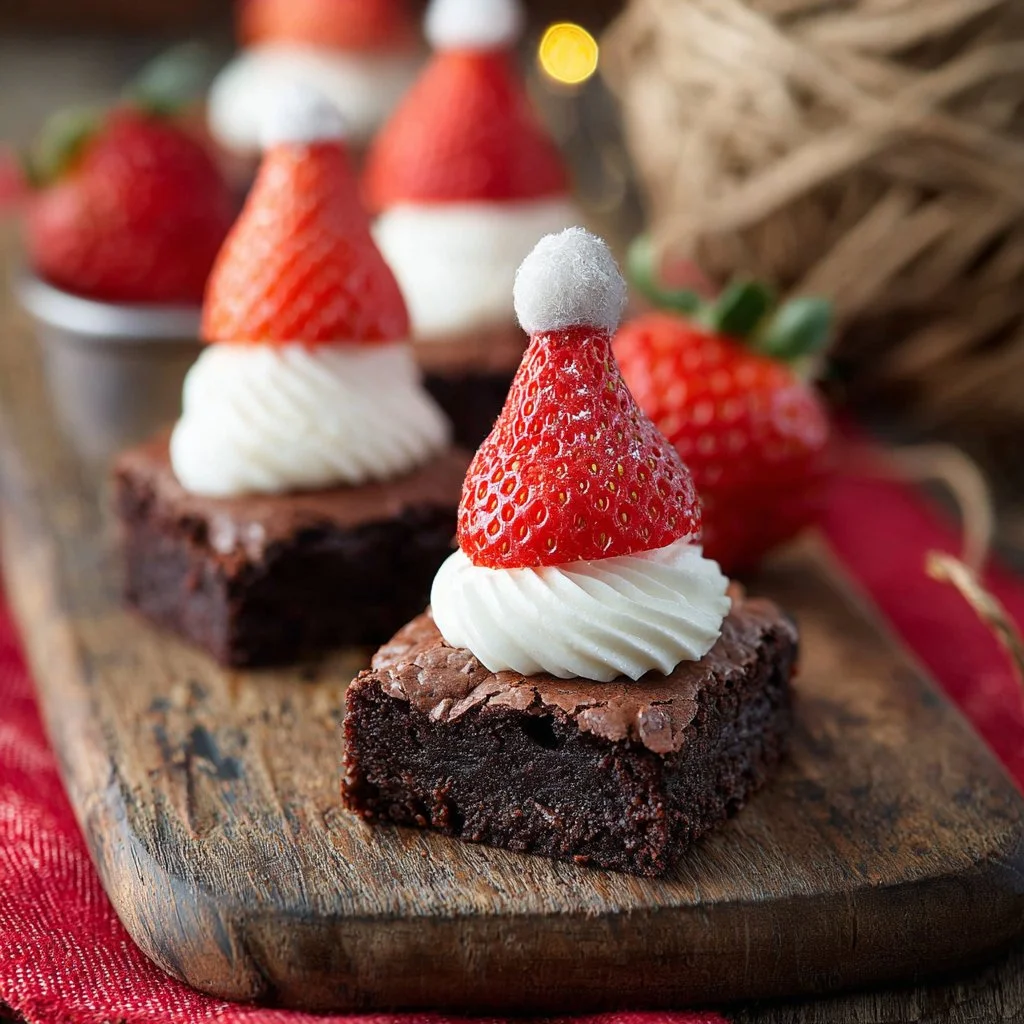
Are you ready to bring a dash of festive cheer into your kitchen? If so, Santa Hat Brownies are the perfect treat to get you into the holiday spirit! These delightful brownies not only taste fantastic but also look simply adorable—perfect for holiday parties, family gatherings, or just a fun baking project to celebrate the season.
Why We Love This Santa Hat Brownies Recipe
Christmas is a time for joy, warmth, and togetherness, and what better way to spread that joy than with a batch of festive desserts? Santa Hat Brownies capture the essence of the holiday season with their charming appearance and delectable taste. You’ll adore how the rich chocolate brownie base perfectly complements the fresh strawberries topped with creamy frosting.
Whether you’re looking to impress your guests or simply treat yourself and your family, these brownies will do the trick. They’re not only easy to make but also offer a fun activity if you have kids in the kitchen with you. Plus, they’re a great way to showcase your holiday spirit without spending hours in the kitchen. So, roll up your sleeves, gather your ingredients, and let’s bake something special!
Ingredients for Santa Hat Brownies
Here’s everything you need to whip up a batch of mouth-watering Santa Hat Brownies. Make sure you have the following ingredients on hand:
- ¾ Cup All-Purpose Flour
- ½ teaspoon Salt
- ¼ teaspoon Baking Soda
- 2 Large Eggs
- ¾ Cup Light Brown Sugar
- ¾ Cup Vegetable Oil
- 2 Tablespoons Water
- 1 teaspoon Vanilla Extract
- 1 ½ Cups Semi-Sweet Chocolate Chips (divided)
- ½ Cup Vanilla Frosting
- 9 Fresh Strawberries
Gather these ingredients together and get ready to create a dessert that’s sure to bring smiles to everyone around you!
How to Make Santa Hat Brownies
Now that you have your ingredients, it’s time to dive into the baking process. Follow these straightforward steps to whip up your Santa Hat Brownies:
- Preheat Your Oven: Start by preheating your oven to 350 degrees F. This will ensure that your brownies bake evenly.
- Prepare Your Baking Pan: Line an 8×8-inch baking pan with parchment paper. This step will make it easy to remove the brownies later.
- Mix the Dry Ingredients: In a small bowl, combine the all-purpose flour, salt, and baking soda. Whisk them together and set this mix aside for now.
- Whisk the Wet Ingredients: In a large mixing bowl, whisk together the eggs, light brown sugar, and vegetable oil. Take your time with this step; whisking for about two minutes will incorporate air, making your brownies light and airy.
- Add Water and Vanilla: Once blended, whisk in the water and vanilla extract until everything is fully incorporated and smooth.
- Combine Dry and Wet Mixtures: Gradually add the dry ingredients to the wet mixture, stirring gently until just combined. Be careful not to overmix!
- Melt the Chocolate Chips: In a microwave-safe bowl, melt 1 cup of chocolate chips. Microwave in 30-second intervals, stirring in between until melted and smooth, taking about 60 seconds total.
- Mix in the Melted Chocolate: Whisk the melted chocolate into the brownie batter until it’s fully combined and looks heavenly rich.
- Fold in Remaining Chocolate Chips: Gently mix in the remaining ½ cup of semi-sweet chocolate chips. More chocolate means more joy!
- Pour Batter into Pan: Carefully pour the batter into your prepared baking pan, spreading it evenly.
- Bake: Place your pan in the preheated oven and bake for about 50 to 55 minutes. When done, a toothpick inserted into the center should come out with a few moist crumbs—this is the perfect brownie texture.
- Cool the Brownies: Remove the pan from the oven and let it cool on a rack. Once cool, cut the brownies into nine squares.
- Decorate Your Brownies: For the final touch, pipe a circle of vanilla frosting on each brownie. Slice the stems off your strawberries and place one on top of the frosting. Pipe a small dollop of frosting on the tip of each strawberry to complete the hat effect.
And there you have it! Your Santa Hat Brownies are ready to be devoured.
How to Serve Santa Hat Brownies
When it comes to serving your Santa Hat Brownies, presentation is key. Arrange the brownies on a festive platter, or make individual servings by placing each brownie in a cupcake liner. This adds a touch of charm and makes it easy for guests to grab one.
Consider serving these brownies alongside a glass of cold milk or a warm cup of cocoa for that classic holiday feel. If you’re hosting a party, pairing them with other festive treats can create a delightful dessert table. Make sure to snap some pictures before they disappear—the vibrant red strawberries and white frosting against the dark brownie base are sure to be Instagram-worthy!
Expert Tips: Santa Hat Brownies
To make your Santa Hat Brownies even more delightful, here are a few expert tips to keep in mind:
- Don’t Overbake: Keep a close eye on the brownies as they bake. Overbaking can lead to a dry texture. Remember, they will continue to cook slightly while cooling.
- Use Quality Ingredients: Opt for quality chocolate chips and fresh strawberries. This will enhance the flavors and overall quality of your brownies.
- Chill the Strawberries: If you have time, chilling the strawberries for a bit before decorating adds a refreshing touch to your desserts.
- Customization: Feel free to get creative with your decorations! You could sprinkle festive edible glitter or add small festive candies around the edge of the brownies for an extra special appearance.
- Make Ahead: If you’re planning for a holiday gathering, you can prepare the brownies a day in advance. Just add the strawberries and frosting just before serving to keep everything fresh.
How to Store Santa Hat Brownies
If you happen to have any Santa Hat Brownies left over (though I doubt it!), storing them properly ensures they remain delicious.
- Refrigeration: Place the brownies in an airtight container in the refrigerator. They will keep well for up to a week. The cold will help maintain the fudgy texture.
- Freezing: For longer storage, you can freeze your brownies. Cut them into squares and wrap each piece tightly in plastic wrap and then foil. They can be frozen for up to three months. When you’re ready to enjoy, simply thaw them in the fridge overnight.
Variation of Santa Hat Brownies
While the classic Santa Hat Brownies are scrumptious on their own, you can easily make variations that cater to different tastes and preferences.
- Minty Twist: Add mint extract to the brownie batter for a refreshing twist. Top with chocolate mint candies instead of strawberries for a festive look.
- Nutty Surprise: Incorporate chopped nuts like walnuts or pecans into the brownie batter for added texture and flavor.
- Different Frosting Flavors: Instead of vanilla frosting, try cream cheese frosting or even chocolate frosting for a rich flavor variation.
- Fruit Alternatives: Experiment with different fruits! Bananas or raspberries can be delightful substitutes for strawberries. Use what you have on hand or what’s in season.
FAQ about Santa Hat Brownies
Can I make Santa Hat Brownies in advance?
Absolutely! You can prepare the brownies ahead of time. Just decorate them with strawberries and frosting on the day you plan to serve them for the best results.
What if I can’t find fresh strawberries?
No worries! If fresh strawberries aren’t available, consider using other types of fruit that hold their shape well, like cherries or even small dollops of whipped cream for a snowy look.
Are Santa Hat Brownies nut-free?
Yes, this recipe is nut-free as written. However, if you choose to add nuts or certain toppings, be sure to notify anyone who may have nut allergies.
Can I use gluten-free flour?
You can substitute regular flour with a 1:1 gluten-free flour blend. Just ensure it works well for baking recipes to achieve the right brownie texture!
How should I serve Santa Hat Brownies at a party?
Arrange them on a fun platter with festive decorations. You can also include a mix of other holiday treats to create a delightful dessert table.

Santa Hat Brownies
Ingredients
Brownie Ingredients
- ¾ Cup All-Purpose Flour
- ½ teaspoon Salt
- ¼ teaspoon Baking Soda
- 2 Large Eggs
- ¾ Cup Light Brown Sugar
- ¾ Cup Vegetable Oil
- 2 Tablespoons Water
- 1 teaspoon Vanilla Extract
- 1 ½ Cups Semi-Sweet Chocolate Chips (divided) 1 cup for batter, ½ cup for mixing in
Topping Ingredients
- ½ Cup Vanilla Frosting
- 9 pieces Fresh Strawberries Stems sliced off for decoration
Instructions
Preparation
- Preheat your oven to 350 degrees F.
- Line an 8x8-inch baking pan with parchment paper.
- In a small bowl, combine the all-purpose flour, salt, and baking soda. Whisk them together and set aside.
- In a large mixing bowl, whisk together the eggs, light brown sugar, and vegetable oil for about two minutes until well combined.
- Whisk in the water and vanilla extract until smooth.
- Gradually add the dry mixture to the wet mixture, stirring gently until just combined.
- In a microwave-safe bowl, melt 1 cup of chocolate chips in 30-second intervals, stirring until melted and smooth.
- Whisk the melted chocolate into the brownie batter until fully combined.
- Fold in the remaining ½ cup of chocolate chips.
- Pour the batter into the prepared baking pan, spreading it evenly.
Baking
- Bake in the preheated oven for about 50 to 55 minutes. A toothpick inserted into the center should come out with a few moist crumbs.
- Remove the pan from the oven and let it cool on a rack before cutting into nine squares.
Decoration
- Pipe a circle of vanilla frosting on each brownie.
- Place a strawberry on top of the frosting and pipe a small dollop of frosting on the tip of each strawberry.
Send me this recipe!
Just enter your email below and get it sent straight to your inbox!


