The holiday season is upon us, and what better treat to indulge in than a festive Peppermint Oreo Icebox Cake? This delightful dessert combines the rich flavors of cookies and cream with a refreshing peppermint twist, making it a perfect finale for any festive gathering. Whether you’re hosting a holiday party, celebrating a family reunion, or simply treating yourself, this icebox cake is sure to impress. With its luscious layers and creamy textures, each bite transports you to a winter wonderland, embodying the essence of the season. So why wait? Let’s dive into the world of this sweet treat and discover why it deserves a spot on your dessert table.
Why We Love This Peppermint Oreo Icebox Cake
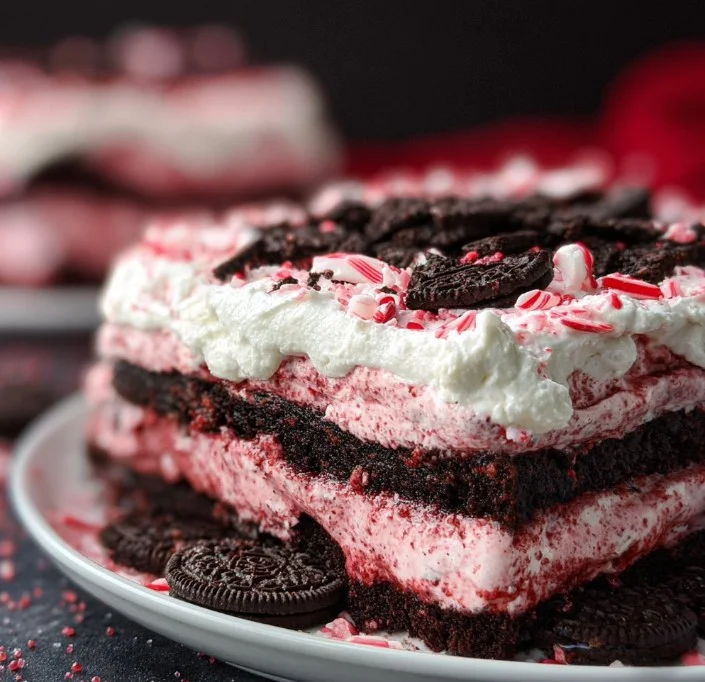
This Peppermint Oreo Icebox Cake is a favorite for many reasons. First, it combines simplicity and flavor in a way that makes it accessible to bakers of all skill levels. The use of Oreo cookies provides a familiar crunch and chocolatey flavor that creates an irresistible base for the creamy filling. Furthermore, the addition of white chocolate peppermint chunks elevates this dessert, offering a delightful sweetness paired with a refreshing minty finish.
Also, the make-ahead aspect of this icebox cake is a major win. It requires minimal hands-on time, freeing you to spend more moments with your friends and family. Once assembled, it only needs to chill in the refrigerator for a few hours, allowing the flavors to meld beautifully. When you finally reveal this showstopper at your gathering, guests will be enchanted by its stunning layers and festive appearance.
If you’re looking for a dessert that checks all the boxes—easy to prepare, visually appealing, and delicious—look no further. Your taste buds are in for a treat, and your guests will be raving about this cake long after the last slice is gone.
Ingredients for Peppermint Oreo Icebox Cake
To create this delightful Peppermint Oreo Icebox Cake, you’ll need the following ingredients:
- 1 package (8 ounces) cream cheese, softened
- 1/4 cup marshmallow fluff
- 1 cup white chocolate peppermint chunks (Ghirardelli works great)
- 1 container (8 ounces) Cool Whip, thawed and divided
- 32 Oreo cookies with red filling
- 1/2 cup milk
- Peppermint bits for garnish
Gathering these ingredients beforehand will make the preparation process smooth and enjoyable. Make sure to use fresh ingredients to ensure the best flavor and texture in your cake.
How to Make Peppermint Oreo Icebox Cake Directions
Creating your Peppermint Oreo Icebox Cake is an enjoyable and straightforward process. Start by prepping your ingredients to ensure everything is at hand.
- Prepare the Filling: In a large mixing bowl, combine the softened cream cheese and marshmallow fluff. Beat them together until they become smooth and creamy, which will form the delightful base of your filling.
- Melt the Chocolate: Take your white chocolate peppermint chunks and place them in a microwave-safe bowl. Heat the chocolate in the microwave for about 30 seconds. After heating, stir the chocolate until it’s creamy. If it’s not completely melted, heat it in additional 15-second increments, stirring after each, until you achieve a smooth consistency.
- Mix in the Chocolate: Once your chocolate is melted and creamy, add it to the cream cheese mixture. Beat well until everything is well incorporated.
- Fold in the Cool Whip: Gently fold in about 2 cups of the thawed Cool Whip into your cream cheese and chocolate mixture. This will add lightness and airiness to your filling, making it irresistible.
- Layer the Cake: To assemble your cake, start by spreading about 2 tablespoons of the filling mixture on the bottom of an 8×8 square pan. This will act as a base to hold the first layer of cookies.
- Dunk the Cookies: Take 16 of your Oreo cookies and dip each one into the milk. Make sure to dunk them quickly so they absorb a bit of moisture but don’t become soggy. Lay them in a single layer on top of the filling in the pan.
- Add More Filling: Spread half of the cheesecake filling over the cookies, ensuring an even layer.
- Repeat Layers: Dip the remaining 16 Oreo cookies into the milk and place them on top of the filling layer. Once again, spread the rest of the cheesecake filling on top gently.
- Top with Cool Whip: Finally, spoon the remaining Cool Whip on top of the cake. Use a spatula to spread it evenly, creating a smooth topping.
- Chill: Cover the pan with plastic wrap and refrigerate for at least 4 hours. This chilling time allows the flavors to meld and the cake to set perfectly.
- Garnish: Just before serving, sprinkle peppermint bits or crushed candy canes on top to enhance the festive appearance and flavor of the cake.
Now that your Peppermint Oreo Icebox Cake is ready, it’s time to serve it up and enjoy!
How to Serve Peppermint Oreo Icebox Cake
Serving this Peppermint Oreo Icebox Cake is just as easy as preparing it. Once you’re ready to indulge, follow these simple steps:
- Slice with Care: Use a sharp knife to slice the cake into squares. It’s best to dip the knife in hot water and then dry it before slicing; this ensures cleaner cuts.
- Garnish as Desired: While you can sprinkle additional peppermint bits or crushed candy canes on each slice before serving, it’s optional. You can also add a dollop of extra Cool Whip on each plate for added decadence.
- Pair with Beverages: Consider serving the cake alongside a warm beverage like hot chocolate, mocha, or even a festive punch. The combination of flavors makes for a delightful experience.
- Serve Chilled: For the best taste and texture, serve the cake chilled. The coolness contrasts beautifully with the warm flavors of the season, making each bite a delightful treat.
As you gather with friends and family, share the joy of this Peppermint Oreo Icebox Cake, creating memories and sweet moments to cherish long after the last bite is gone.
Expert Tips for Peppermint Oreo Icebox Cake
Creating the perfect Peppermint Oreo Icebox Cake may seem simple, but a few expert tips can elevate your dessert to the next level. Here’s what you should keep in mind:
- Room Temperature Ingredients: Ensure your cream cheese is at room temperature before mixing. This helps achieve a smooth filling without lumps.
- Don’t Rush the Chilling Time: Allowing the cake to refrigerate for a full 4 hours is essential. If you rush this process, the layers may not hold together when you slice into the cake.
- Use Quality Ingredients: Opt for high-quality white chocolate and peppermint chunks to enhance the flavor. The better the ingredient, the better the cake will taste.
- Customize the Cookies: While the recipe calls for Oreos with red filling for a festive touch, feel free to experiment with different flavors of Oreo cookies to create your unique twist on this dessert.
- Add a Layer of Fun: To make the dessert even more exciting, consider adding chocolate or mint-flavored drizzle on top before serving. It adds a beautiful touch and enhances the flavor profile.
Implementing these tips will not only help your Peppermint Oreo Icebox Cake taste fantastic but also impress everyone at your gathering.
How to Store Peppermint Oreo Icebox Cake
Storing your Peppermint Oreo Icebox Cake properly ensures it stays fresh, delicious, and ready to eat whenever you crave it. Follow these guidelines for the best results:
- Wrap Tightly: Once the cake has set and you plan to store it, make sure to cover the pan tightly with plastic wrap or aluminum foil. This will prevent it from absorbing any odors from your refrigerator.
- Refrigerate Promptly: Store the cake in the refrigerator if you have leftovers. It’s best enjoyed within 3 to 5 days after preparation for optimal flavor and texture.
- Freezing Options: If you want to enjoy the cake well beyond the 5-day mark, consider freezing it. Cut the cake into squares, wrap individual pieces in plastic wrap, and then place them in an airtight container or freezer bag. The cake can last in the freezer for up to 2 months. Thaw it in the refrigerator the night before you plan to enjoy it.
By following these storage tips, you can savor the delightful taste of your Peppermint Oreo Icebox Cake days after it’s made!
Variations of Peppermint Oreo Icebox Cake
While the classic Peppermint Oreo Icebox Cake is delightful on its own, there are several fun variations you can explore to customize it further to your taste. Here are some ideas to consider:
- Chocolate Mint Twist: If you’re a chocolate lover, try using chocolate pudding instead of half of the filling mixture. This adds an extra layer of rich flavor and chocolate indulgence.
- Add Fresh Mint: For a more natural peppermint flavor, toss in some finely chopped fresh mint leaves into the cheesecake mixture. This adds a bright and refreshing note.
- Seasonal Flavors: Depending on the season, swap the peppermint chunks for other flavors. Use pumpkin spice mix in the fall or berry-flavored treats in the summer for a different vibe.
- Nutty Crunch: Fold in some finely chopped nuts, such as walnuts or almonds, into the filling mixture for a delightful crunch that complements the creaminess.
- Decorative Options: Instead of just peppermint bits, consider adding a layer of berries or holiday-themed sprinkles on top of the Cool Whip for a bright and festive appearance.
Experimenting with these variations can make each Peppermint Oreo Icebox Cake unique and tailored to your guests’ preferences, making every celebration special.
Frequently Asked Questions about Peppermint Oreo Icebox Cake
What is the best way to ensure my Peppermint Oreo Icebox Cake sets properly?
The key is to allow enough chilling time. Refrigerate the cake for at least 4 hours, preferably overnight, to let the layers firm up and meld beautifully.
Can I make this dessert ahead of time?
Yes! This icebox cake is perfect for making in advance. Prepare it a day or two before your event, and it will be ready to serve when you are.
What if I can’t find peppermint Oreo cookies?
If peppermint Oreos are unavailable, you can use regular Oreos or any other flavor you like. The creamy filling will still pair wonderfully with them.
How do I know when the cake is ready to serve?
Once the cake has chilled for the recommended time, it’s ready to serve. If you gently press the top, it should feel firm but still have a bit of give.

Peppermint Oreo Icebox Cake
Ingredients
Filling Ingredients
- 1 package 8 ounces cream cheese, softened Ensure at room temperature for a smooth mixture.
- 1/4 cup marshmallow fluff
- 1 cup white chocolate peppermint chunks Ghirardelli works great.
- 1 container 8 ounces Cool Whip, thawed and divided Reserve half for topping.
Cake Layers
- 32 cookies Oreo cookies with red filling Dunk in milk.
- 1/2 cup milk For dipping the cookies.
- Peppermint bits for garnish Optional, for festive look.


Instructions
Preparation
- In a large mixing bowl, combine the softened cream cheese and marshmallow fluff. Beat until smooth.
- Melt the white chocolate peppermint chunks in a microwave-safe bowl in 30-second intervals until creamy.
- Add the melted chocolate to the cream cheese mixture and beat until combined.
- Fold in 2 cups of thawed Cool Whip until light and fluffy.
Assembling the Cake
- Spread about 2 tablespoons of the filling on the bottom of an 8x8 pan.
- Dip 16 Oreo cookies briefly in milk and place them in a single layer on top of the filling.
- Spread half of the cheesecake filling over the cookies.
- Repeat with another layer of dipped Oreo cookies followed by the remaining filling.
- Spoon the reserved Cool Whip on top and spread evenly.
- Cover with plastic wrap and refrigerate for at least 4 hours.
Serving
- Slice into squares with a sharp knife dipped in hot water for clean cuts.
- Optionally, garnish each slice with peppermint bits or extra Cool Whip.
- Serve chilled alongside warm beverages.
Send me this recipe!
Just enter your email below and get it sent straight to your inbox!