
If you’ve ever dreamed of making creamy, smooth ice cream at home without the hassle of an ice cream machine, this no-churn vanilla ice cream is the perfect choice. You don’t need special equipment, and the results are just as rich and satisfying as traditional ice cream. This recipe gives you a soft, velvety base that you can enjoy on its own or use to create fun ice cream sandwiches, sundaes, or creative dessert bowls. You’ll find that making ice cream at home can be straightforward and surprisingly fun.
Why We Love This No-Churn Vanilla Ice Cream
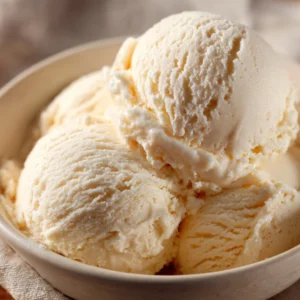
This vanilla ice cream is a classic dessert you can enjoy anytime. It’s creamy, sweet, and has a perfectly balanced flavor that appeals to both kids and adults. You’ll love how simple it is to prepare, requiring only three main ingredients. Plus, because it’s a blank canvas, you can customize it by adding chocolate chips, fruit, cookies, or candy for your own unique twist. The no-churn method saves time and effort, making it ideal for busy days or last-minute dessert cravings. Every spoonful melts smoothly in your mouth, giving you the rich taste of store-bought ice cream without any artificial additives or preservatives.
Ingredients for No-Churn Vanilla Ice Cream
- 1 (14-ounce) can sweetened condensed milk
- 2 cups heavy cream
- 2 teaspoons pure vanilla extract
- 1/4 teaspoon sea salt
How to Make No-Churn Vanilla Ice Cream
Start by preparing all your ingredients. Pour the sweetened condensed milk, heavy cream, vanilla extract, and sea salt into a blender or mixing bowl. Using a hand mixer or a stand mixer, mix the ingredients on low speed until everything is well combined and smooth. Take care not to overmix, as the goal is to create a creamy, airy texture without deflating the whipped cream too much.
Once the mixture is ready, pour it into an 8×8-inch metal pan. Smooth the top with a spatula so the surface is even, which will make scooping easier later. Cover the pan tightly with plastic wrap or aluminum foil to prevent ice crystals from forming during freezing. Place the pan in the freezer for at least five hours, or until the ice cream is fully frozen. You can prepare it the night before if you want it ready for dessert the next day.
Once frozen, remove the ice cream from the freezer and let it sit at room temperature for a few minutes before scooping. This short wait helps soften the ice cream slightly, making it easier to serve. Use an ice cream scooper to create perfect rounds, and get creative with toppings, sauces, or mix-ins. You now have a creamy, homemade ice cream that rivals anything from the store.
How to Serve No-Churn Vanilla Ice Cream
Serving this ice cream is as simple as scooping it into bowls or cones. You can top it with chocolate syrup, caramel sauce, fresh fruit, or crushed cookies to add texture and extra flavor. For a fun twist, layer scoops between cookies to make homemade ice cream sandwiches. You can also serve it alongside warm desserts like brownies or fruit crisps for a classic combination of hot and cold. No matter how you choose to serve it, this vanilla ice cream looks appealing and tastes delicious. Its smooth texture and subtle sweetness make it perfect for summer gatherings, family dinners, or just a special treat for yourself.
Expert Tips for No-Churn Vanilla Ice Cream
To get the best results, start with cold ingredients. Chilling your heavy cream before whipping helps it reach its full volume and creates a lighter ice cream. When whipping the cream, aim for soft peaks; over-whipping can make the mixture grainy and less smooth. Use a metal pan for freezing, as it conducts cold better than glass or plastic, helping the ice cream set more evenly. Cover the pan tightly to prevent freezer burn and ice crystals, which can affect texture. Finally, if you want to add mix-ins like chocolate chips, fruit, or nuts, fold them in gently after combining the base to maintain the creamy texture.
How to Store No-Churn Vanilla Ice Cream
Store your homemade ice cream in an airtight container in the freezer. Keep it at a consistent temperature to maintain smoothness. It is best enjoyed within two weeks for optimal texture and flavor. When storing for longer periods, press a layer of plastic wrap directly on the ice cream’s surface before sealing the container; this helps prevent ice crystals from forming. To serve after storage, allow the ice cream to sit at room temperature for a few minutes to soften slightly, making scooping effortless and maintaining its creamy consistency.
Variation of No-Churn Vanilla Ice Cream
This basic vanilla ice cream can easily be transformed into other flavors and desserts. For chocolate lovers, add cocoa powder or melted chocolate to the mixture for a rich chocolate version. Fruit lovers can fold in fresh berries, mango, or crushed pineapple for a refreshing twist. You can also create fun swirls by mixing caramel or chocolate sauce into the base before freezing. Another option is to fold in cookie crumbles, candy pieces, or coffee for unique flavor combinations. The possibilities are endless, allowing you to experiment and create a new version each time.
FAQ About No-Churn Vanilla Ice Cream
Can I make this ice cream without a blender?
Yes, you can whisk the ingredients together using a hand or stand mixer. The key is to combine the sweetened condensed milk and whipped cream thoroughly to achieve a smooth texture.
How long does it take to freeze?
It typically takes at least five hours to freeze completely. For best results, freeze overnight to ensure it sets fully.
Can I make it ahead of time?
Absolutely. This ice cream stores well in the freezer for up to two weeks. Cover it tightly to maintain its creamy texture.
Can I add toppings before freezing?
It’s better to add toppings after the ice cream has frozen to keep them fresh and maintain texture. Mix-ins like chocolate chips or cookie pieces can be folded in before freezing.
Is this recipe dairy-free?
This specific recipe uses heavy cream and sweetened condensed milk, so it is not dairy-free. You can experiment with plant-based alternatives for a vegan version, but results may vary.
No-Churn Vanilla Ice Cream
Equipment
- Blender or mixing bowl
- 8×8-inch metal pan
Ingredients
- 1 can sweetened condensed milk (14-ounce)
- 2 cups heavy cream
- 2 teaspoons pure vanilla extract
- 1/4 teaspoon sea salt


Instructions
- In a blender or mixing bowl, combine sweetened condensed milk, heavy cream, vanilla extract, and sea salt.
- Mix on low speed until well combined and smooth, being careful not to overmix.
- Pour the mixture into an 8×8-inch metal pan and smooth the top with a spatula.
- Cover the pan tightly with plastic wrap or aluminum foil and freeze for at least 5 hours, or until fully frozen.
- Let the ice cream sit at room temperature for a few minutes before scooping for easier serving.
Send me this recipe!
Just enter your email below and get it sent straight to your inbox!