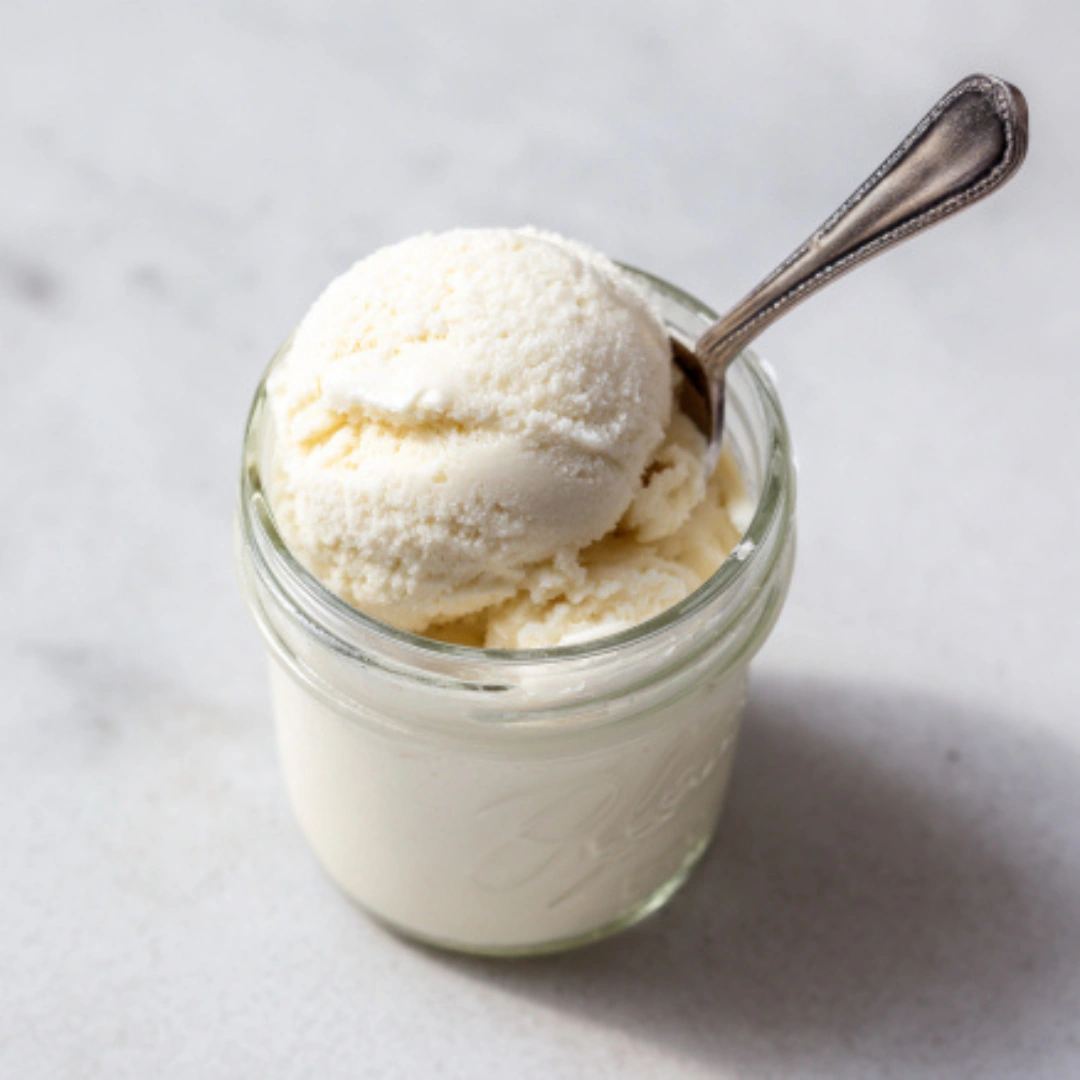
If you’ve ever dreamed of making your own ice cream at home without complicated machines or endless ingredients, Mason Jar Ice Cream is your answer. This simple, no-churn recipe allows you to create creamy, smooth ice cream using just a few basic ingredients. Perfect for hot summer days, after-dinner desserts, or a fun activity with kids, this ice cream brings both convenience and delight. Using a half-pint mason jar, you can shake your way to a delicious frozen treat in just a few minutes. No need to worry about bulky equipment or long wait times; your creamy dessert is just a jar away. With endless possibilities to customize the flavor, Mason Jar Ice Cream makes homemade indulgence approachable and fun for everyone.
Why We Love This Mason Jar Ice Cream Recipe
There’s something uniquely satisfying about making your own ice cream, and Mason Jar Ice Cream makes it easier than ever. First, it’s incredibly simple—requiring only three main ingredients plus a pinch of salt. No ice cream machines, no lengthy preparation, just you, a jar, and your favorite flavors. Second, it’s fast. While traditional ice cream recipes can take hours or even a full day, this recipe only needs a quick shake and a few hours in the freezer. Third, it’s versatile. Vanilla is just the beginning; you can mix in cookies, chocolate, fruit, or extracts to create your own signature flavor. Finally, it’s fun. Shaking the jar and watching the cream turn into ice cream is a rewarding experience that makes this recipe feel like a small celebration. Whether you’re treating yourself or making a fun activity for kids, this simple dessert is a winner every time.
Ingredients for Mason Jar Ice Cream
To make Mason Jar Ice Cream, you’ll need a few basic ingredients that you likely already have in your kitchen.
- ½ cup heavy cream
- 2 teaspoons white sugar
- ¼ teaspoon vanilla extract
- Pinch of salt
How to Make Mason Jar Ice Cream
Making Mason Jar Ice Cream is as fun as it is simple. Start by gathering all your ingredients and a half-pint mason jar. Pour ½ cup of heavy cream into the jar, followed by 2 teaspoons of white sugar, ¼ teaspoon of vanilla extract, and a small pinch of salt. Seal the lid tightly to prevent any spills.
Next, shake the jar vigorously for about three minutes. This is where the magic happens. The cream begins to thicken, turning into a texture similar to soft ice cream. Open the jar and check with a spoon; the mixture should coat the back of the spoon and drip off slightly, indicating it’s perfectly ready to freeze. It shouldn’t be as thick as whipped cream, nor as dense as butter—just a creamy, flowing consistency.
Once you’ve achieved the right texture, reseal the jar and place it in the freezer for three hours. This allows the ice cream to firm up while keeping it smooth and creamy. After the three hours are up, remove the lid and dig in! Your homemade ice cream is ready to enjoy.
What’s especially exciting about this recipe is how customizable it is. You can add mix-ins like crushed cookies, chocolate chips, cocoa powder, or flavor extracts before shaking to create your favorite ice cream variations. The jar method makes it easy to experiment, and each batch can be a new flavor adventure.
How to Serve Mason Jar Ice Cream
Serving Mason Jar Ice Cream is simple and can be as fun or as elegant as you like. You can eat it straight from the jar for a casual, on-the-go treat, or scoop it into bowls for a more traditional presentation. Consider topping it with fresh fruit, sprinkles, chocolate syrup, or crushed nuts for extra flair.
If you’re serving guests, you can use small bowls or dessert cups to create individual portions. A little mint leaf or fruit garnish on top can make it look festive without any extra effort. For kids, let them choose their favorite toppings or add mix-ins to their portion of ice cream before freezing. You can even use the Mason Jar as part of the presentation—stack jars in a freezer-safe tray for a fun, DIY ice cream bar.
One of the best things about this recipe is that the ice cream stays creamy and soft even after freezing, so you don’t need to wait for it to soften before serving. It’s the perfect dessert for spontaneous sweet cravings or for impressing guests with a homemade touch.
Expert Tips for Mason Jar Ice Cream
Here are some professional tips to help you get the best results from your Mason Jar Ice Cream:
- Use cold ingredients. Make sure your cream is chilled before starting, as this helps it thicken faster and improves the texture.
- Don’t overfill the jar. Leave some space at the top to allow the cream to expand while shaking.
- Shake evenly. Rotate the jar while shaking to ensure all the cream thickens uniformly.
- Experiment with flavors. Add your favorite extracts, cocoa, or crushed cookies before shaking to create unique ice cream flavors.
- Use a sturdy jar. A good-quality mason jar prevents leaks and makes shaking easier.
- Check texture before freezing. The mixture should coat the spoon lightly but not be too thick; this ensures a smooth ice cream after freezing.
Following these tips ensures a consistent, creamy result every time. Once you get the hang of the shaking method, you can create endless flavor combinations that rival traditional ice cream without ever needing an ice cream machine.
How to Store Mason Jar Ice Cream
Storing Mason Jar Ice Cream is simple and convenient. Keep it in the same jar in the freezer, and it will remain fresh for up to one week. Make sure the lid is tightly sealed to prevent freezer burn and maintain the ice cream’s creamy texture.
If you want to make multiple jars, you can prepare them in advance and store them in the freezer until ready to enjoy. When ready to serve, you can either eat it directly from the jar or scoop portions into bowls. The beauty of this recipe is that it retains its creamy texture well, so you won’t need to thaw it extensively before serving.
Variation of Mason Jar Ice Cream
One of the most exciting aspects of Mason Jar Ice Cream is its versatility. You can transform this basic vanilla recipe into an endless variety of flavors with simple add-ins:
- Cookies and Cream: Mix in ¼ cup of crushed sandwich cookies before shaking.
- Chocolate: Add a teaspoon of unsweetened cocoa powder to the cream mixture.
- Mint Chocolate Chip: Add peppermint extract and mini chocolate chips for a refreshing twist.
- Fruit Swirl: Mix in fresh berries or fruit puree for a natural, fruity flavor.
- Caramel Crunch: Drizzle caramel sauce and sprinkle crushed nuts into the jar before shaking.
These variations allow you to create new flavors for every occasion or personalize ice cream to match your taste. The simplicity of the jar method makes experimentation easy and fun, so don’t be afraid to get creative.
FAQ About Mason Jar Ice Cream
Is Mason Jar Ice Cream really easy to make?
Yes, it’s one of the simplest ice cream recipes you can try. All you need is a jar, heavy cream, sugar, vanilla, and a pinch of salt. Shake for a few minutes, freeze, and you have homemade ice cream.
Can I make different flavors?
Absolutely! You can mix in cookies, cocoa, extracts, or fruit before shaking to create any flavor you want.
How long does it take to make?
Prep time is just 5 minutes, shaking takes about 3 minutes, and freezing for 3 hours gives you perfect ice cream.
Do I need an ice cream machine?
No ice cream machine is required. The shaking method in a mason jar is all you need to create creamy, smooth ice cream.
Can I store Mason Jar Ice Cream for later?
Yes, keep it in the freezer with the lid tightly sealed. It stays fresh for up to a week while maintaining its creamy texture.
Can kids make it?
Definitely! The recipe is safe and fun for kids. They can shake the jar with supervision and enjoy making their own flavors.

Mason Jar Ice Cream
Equipment
- Mason jar
Ingredients
- 1/2 cup heavy cream
- 2 tsp white sugar
- 1/4 tsp vanilla extract
- pinch of salt
Instructions
- In a half-pint mason jar, combine heavy cream, sugar, vanilla extract, and a pinch of salt.
- Seal the jar tightly and shake vigorously for about 3 minutes until the mixture thickens.
- Check the texture; it should coat the back of a spoon. If ready, reseal the jar and place it in the freezer.
- Freeze for 3 hours until firm. Enjoy directly from the jar or scoop into bowls.
Send me this recipe!
Just enter your email below and get it sent straight to your inbox!


