Baking your own bread at home can feel like a daunting task, but with the right approach, you can create delicious, artisanal rolls that impress anyone fortunate enough to taste them. One of the most rewarding methods to achieve a perfect loaf is by using a Dutch oven. This trusty kitchen tool not only helps in achieving a beautiful crust but also locks in moisture, creating that bakery-quality softness inside.
Why We Love This Dutch Oven Bread Recipe
The beauty of this Dutch Oven Bread recipe lies in its simplicity and the remarkable results it delivers. You may wonder, why go through the trouble? Well, here’s why this particular recipe stands out. It’s made with just five basic ingredients, making it easy for anyone to get started. You don’t need any special skills or fancy equipment; just a few bowls, a spoon, and your hands will do the magic.
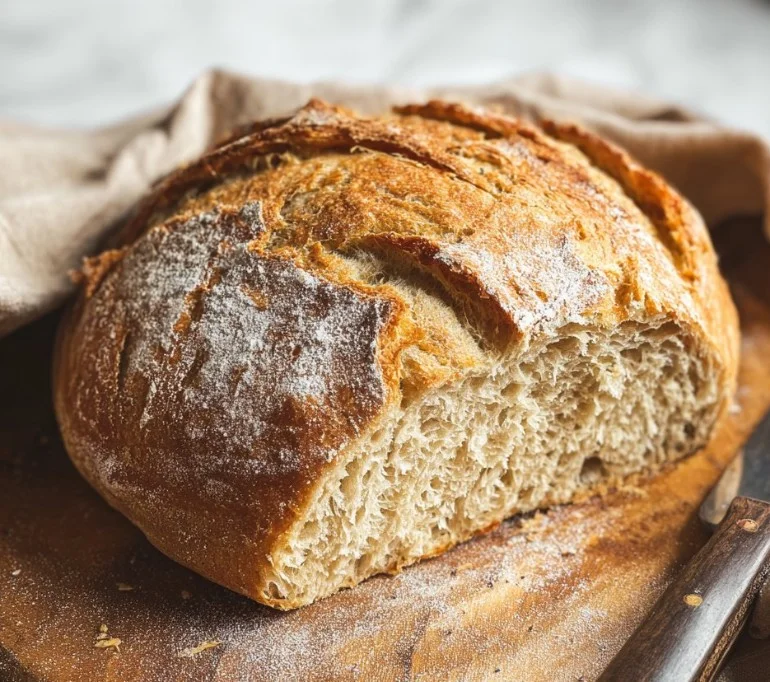
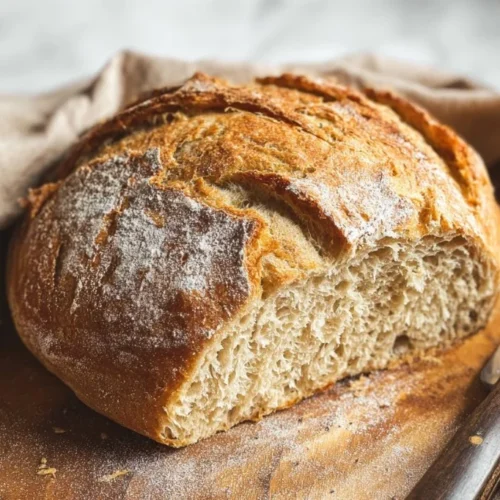
This method also allows for long fermentation, unlocking rich flavors and textures that store-bought bread just cannot match. As the dough rises, it develops an incredible depth of flavor that makes each bite memorable. Plus, the smell that fills your kitchen while baking is simply irresistible. With a crispy crust and a soft, airy crumb, this bread can elevate any meal or occasion.
Ingredients
To craft this delightful Dutch Oven Bread, gather the following ingredients:
- 6 cups of bread flour
- 3 cups of lukewarm water
- 1 tablespoon of dry active yeast
- 1.5 tablespoons of finely ground salt
- 1 tablespoon of honey or sugar
How to Make Dutch Oven Bread Directions
Creating your own Dutch Oven Bread begins with some initial steps that set the foundation for your loaf. Here is how to make this incredible bread from start to finish.
Start by combining the yeast, lukewarm water, and honey (or sugar) in a small bowl. Allow this mixture to sit for about five minutes. During this time, the yeast will activate and get frothy, which is essential for a good rise in your bread.
In a large mixing bowl, combine the bread flour and finely ground salt. Mix them together to ensure the salt is evenly distributed throughout the flour. Once mixed, create a well in the center of the flour mixture.
Pour the activated yeast mixture into the well you’ve made in the flour. Using a spoon or your hands, mix the ingredients together until there’s no visible flour left. This process should take about two to three minutes.
Cover the bowl with a cloth or plastic wrap and place it in a warm environment to proof for two hours. This long fermentation will develop the flavor and texture of your bread.
After the initial proofing, you’ll need to stretch and fold the dough. Lightly flour your work surface, then turn the dough out. Gently stretch one side of the dough and fold it over to the center. Repeat this action eight times, rotating the dough for even folding. After this, recover the dough and allow it to proof for an additional hour.
Preheat your oven to 220°C (430°F), placing the Dutch oven inside as it preheats. This step is crucial for achieving that perfect crust.
Once the dough has finished its second proofing, carefully shape it into a tight ball. You can use flour on your hands and the surface to prevent sticking. Place the shaped dough into a floured banneton or an oiled bowl.
When the oven is fully preheated, carefully transfer the dough into the Dutch oven. Score the top with a sharp knife to create patterns; this allows the bread to expand properly while baking.
Cover the Dutch oven with its lid and bake the bread for 40 minutes. After this, uncover the pot and bake for another 10-15 minutes until the crust has turned a beautiful golden brown.
Once baked, let the bread cool in the Dutch oven for about 15 minutes. Then, transfer it to a cutting board to cool for an additional 30 minutes. This step ensures that the bread finishes cooking and makes slicing easier.
Making your own Dutch Oven Bread may take some time, but the reward is well worth it. You’ll be left with a warm, scrumptious loaf that you can enjoy fresh from the oven.
How to Serve Dutch Oven Bread
There are numerous ways to serve your freshly baked Dutch oven bread, and it truly complements any meal. Here are some popular suggestions:
With butter: A simple classic, slathering warm slices with butter makes for a delightful pairing. You can use salted or unsalted butter, depending on your preference.
As sandwiches: Use it as the base for any sandwich, from classic BLTs to gourmet grilled cheese. The sturdy crust and soft inside hold up beautifully against various fillings.
With dips: Serve your bread alongside dips like hummus, tzatziki, or a hearty bean dip for a perfect appetizer or snack.
As a side: Pair it with soups or stews, letting the bread soak up the delicious broth. A slice of this bread is the perfect accompaniment to a cozy bowl of soup.
Toast it: For a delightful breakfast, toast your slices and top them with avocado, eggs, or a sprinkle of cinnamon and sugar for something sweet.
Whatever way you choose to serve your Dutch Oven Bread, every bite will be a reminder of the love and effort that went into making it.
Expert Tips: Dutch Oven Bread
For those looking to elevate their baking skills, consider these expert tips to ensure your Dutch Oven Bread comes out perfectly every time:
Quality ingredients: Always use high-quality bread flour for the best texture. The high protein content allows for the formation of gluten, contributing to a chewier crust.
Get the temperature right: Measuring water temperature is crucial. It should be lukewarm, not hot, to ensure that you don’t kill the yeast.
Allow for proper proofing: Be patient during the proofing stages. If it’s a colder day, try placing the bowl in a slightly warm oven or near a source of heat to encourage fermentation.
Preheat the Dutch oven thoroughly: This step is vital for a crispy crust. Ensure your pot is preheated for at least 45-60 minutes before adding the dough.
Don’t skip the scoring: Scoring helps control how the bread rises in the oven, allowing for a beautiful and professional-looking loaf.
By following these expert tips, you’ll find that you can consistently create a delightful loaf of Dutch Oven Bread that impresses your family and friends.
How to Store Dutch Oven Bread
To keep your bread tasting fresh longer, proper storage is essential. Here are some guiding principles to consider:
Room temperature: Store your Dutch Oven Bread at room temperature in a cool, dark place. Use a bread box or a paper bag to protect it from moisture. Avoid sealing it in plastic, as this can cause the crust to become soft.
Slicing: Wait until the bread has completely cooled before slicing. This helps prevent a gummy texture inside and keeps the loaf intact for longer.
Freezing: If you have leftover bread, consider freezing it. Wrap the sliced bread in plastic wrap, then foil, and place it in a freezer-safe bag. It can last up to three months in the freezer. To thaw, simply leave it out at room temperature or lightly toast slices.
By storing your bread properly, you can enjoy its deliciousness for days to come.
Variation of Dutch Oven Bread
This recipe serves as a fantastic base, but don’t be afraid to experiment with variations to suit your taste preferences. Here are a few ideas to inspire you:
Herb-infused: Add fresh or dried herbs such as rosemary, thyme, or oregano to the dough for a fragrant twist. Just mix these in when combining the flour and salt.
Cheesy Delight: Incorporate shredded cheese into the dough for a cheesy version. Cheddar, mozzarella, or your favorite cheese can give the loaf a deliciously savory flavor.
Seeds and Nuts: Adding seeds like sunflower, sesame, or pumpkin seeds can add crunch and nutrition. Additionally, chopped nuts can lend a delightful texture.
Sweet Options: To take a sweet approach, mix in dried fruits like cranberries, raisins, or chopped apricots. You can also sprinkle cinnamon and sugar into the dough for a lightly sweetened result.
Whole Wheat: For a healthier version, experiment with incorporating whole wheat flour. You might want to mix it half and half with bread flour to maintain that loaf structure.
Feel free to get creative and make the bread your own. Each variation brings a unique flavor profile and character, allowing your Dutch Oven Bread to stand out!
FAQ Section
What is Dutch Oven Bread?
Dutch Oven Bread is a rustic, crusty bread that you bake in a Dutch oven. The pot traps steam during baking, helping to achieve that perfect crust and soft crumb inside.
How long does Dutch Oven Bread stay fresh?
When stored properly at room temperature, the bread remains fresh for about three to four days. If you choose to freeze it, it can last for up to three months.
Can I use all-purpose flour instead of bread flour?
While it is possible to use all-purpose flour, bread flour yields better results due to its higher protein content, which helps develop gluten for that ideal chewy crust.
Why is my Dutch Oven Bread dense?
A dense loaf is often a result of insufficient proofing time or not using enough yeast. Ensure the yeast is active, and allow the dough enough time to rise.
Can I make variations in my Dutch Oven Bread recipe?
Absolutely! You can add herbs, cheese, nuts, or seeds to personalize your bread. Feel free to be creative and experiment with flavors and ingredients.
Dutch Oven Bread
Equipment
- Dutch Oven
- Mixing Bowls:
- Measuring Cups
- Measuring Spoons
Ingredients
- 6 cups bread flour
- 3 cups lukewarm water
- 1 Tbsp dry active yeast
- 1.5 Tbsp finely ground salt
- 1 Tbsp honey or sugar


Instructions
- In a small bowl, combine yeast, lukewarm water, and honey. Let it sit for 5 minutes until frothy.
- In a large mixing bowl, combine bread flour and salt. Create a well in the center.
- Pour the activated yeast mixture into the well and mix until no visible flour remains.
- Cover the bowl with a cloth and let it proof in a warm place for 2 hours.
- On a floured surface, stretch and fold the dough eight times, rotating for even folding. Let it proof for another hour.
- Preheat the oven to 220°C (430°F) with the Dutch oven inside.
- Shape the dough into a tight ball and place it in a floured banneton or oiled bowl.
- Once preheated, transfer the dough into the Dutch oven and score the top with a sharp knife.
- Cover and bake for 40 minutes, then uncover and bake for an additional 10-15 minutes until golden brown.
- Let the bread cool in the Dutch oven for 15 minutes before transferring to a cutting board to cool completely.
Send me this recipe!
Just enter your email below and get it sent straight to your inbox!