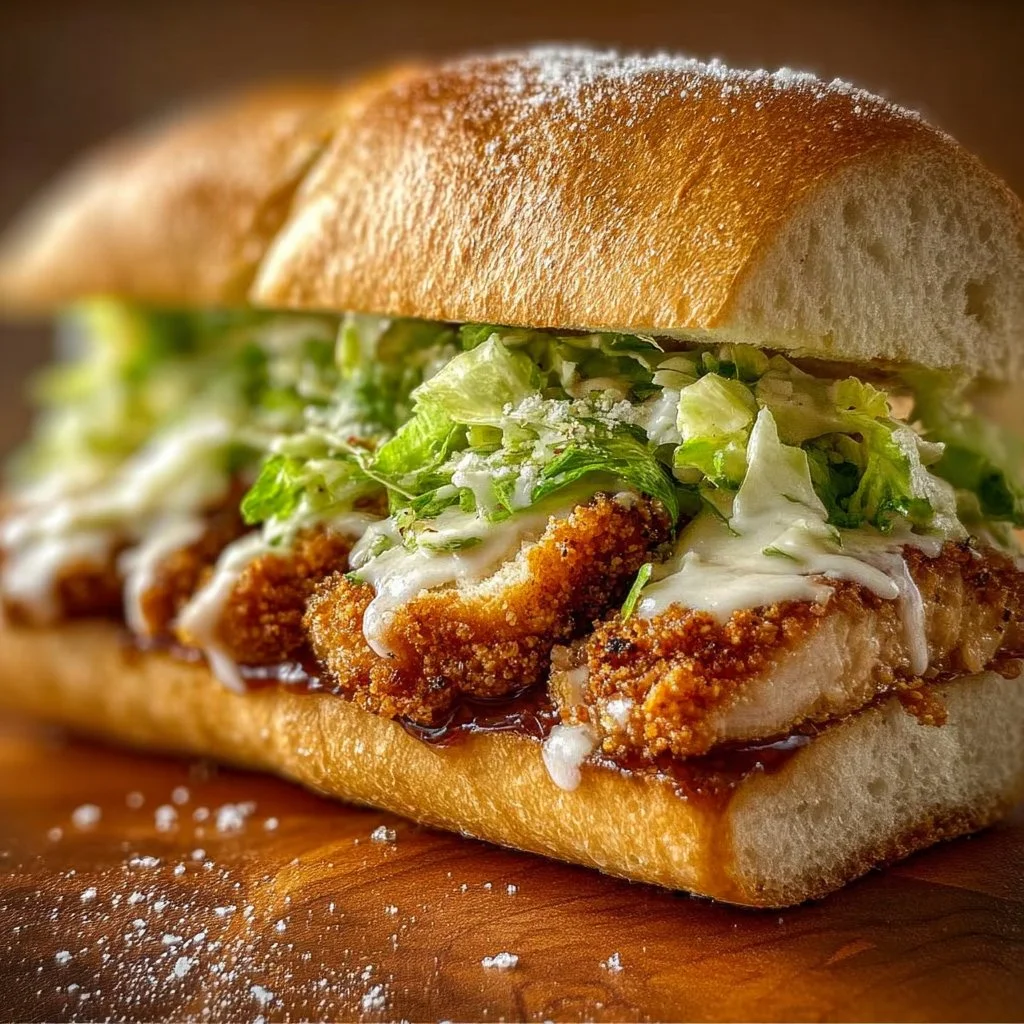
Imagine sinking your teeth into a sandwich that combines the crunch of crispy chicken, the freshness of romaine lettuce, and the rich creaminess of Caesar dressing all nestled between warm, toasted rolls. The Crispy Chicken Caesar Sandwich brings together these delightful components in a way that will have you coming back for seconds. Perfect for a quick lunch, a picnic, or a casual dinner, this sandwich is not only satisfying but also surprisingly simple to prepare.
Why We Love This Crispy Chicken Caesar Sandwich Recipe
This Crispy Chicken Caesar Sandwich is more than just a meal; it’s a celebration of flavors and textures that people of all ages will adore. The combination of juicy chicken, a savory coating, fresh greens, and zesty dressing creates an experience that tantalizes your taste buds. You will love how the crispy exterior of the chicken contrasts beautifully with the soft, toasted sandwich roll, while the romaine adds a refreshing crunch. Plus, it’s an easy-to-follow recipe that doesn’t require a culinary degree, making it accessible for everyone from beginner cooks to seasoned chefs. Whether you’re serving it at a gathering or enjoying it solo, this sandwich is bound to impress.
Ingredients about Crispy Chicken Caesar Sandwich
List of ingredients with measurements
- 4 boneless, skinless chicken breasts
- 1 cup all-purpose flour
- Salt, to taste
- Black pepper, to taste
- 1 teaspoon garlic powder
- 1 teaspoon onion powder
- 1 cup buttermilk
- 2 cups panko breadcrumbs
- 1/2 cup grated Parmesan cheese
- 1/4 cup olive oil, for frying
- 4 large sandwich rolls, split
- 1 cup Romaine lettuce, shredded
- 1/2 cup Caesar dressing
- 1/4 cup shaved Parmesan cheese
- 2 tablespoons melted butter
- 1 clove, minced
How to Make Crispy Chicken Caesar Sandwich Directions
To create your Crispy Chicken Caesar Sandwich, start by preheating your oven to 400°F (200°C). One of the keys to perfectly cooked chicken is ensuring that it has an even thickness. Take a meat mallet and pound the chicken breasts until you achieve an even thickness throughout. This step will help in cooking the chicken more uniformly.
Next, prepare three shallow dishes. In the first dish, mix flour, salt, black pepper, garlic powder, and onion powder. These spices will add a base layer of flavor to your chicken. In the second dish, pour in the buttermilk; this will help create a moist and flavorful coating. The third dish is where the magic happens—combine panko breadcrumbs with grated Parmesan cheese, giving your chicken a deliciously crunchy crust.
Now that your setup is ready, it’s time to coat the chicken. Take each breast and dredge it in the flour mixture, ensuring you shake off the excess. Next, dip it into the buttermilk, allowing any extra liquid to drip off. Finally, fully coat the chicken in the breadcrumb mixture, pressing gently to ensure that the crumbs adhere well.
In a large skillet, heat olive oil over medium heat. Once the oil is shimmering, add the coated chicken breasts. Fry them for about 4 minutes on each side, or until they turn golden brown and crispy. Once they are cooked, transfer the chicken to a baking sheet. Finish cooking them in the preheated oven for about 15 minutes, allowing the meat to become tender and fully cooked.
While the chicken finishes baking, prepare a simple garlic butter mixture by combining melted butter and minced garlic in a small bowl. Brush this mixture onto the split sides of your sandwich rolls and place them on a baking sheet. Toast the rolls in the oven for about 5 minutes, or until they become golden brown.
Now the time has come to assemble your sandwiches! Start with the bottom half of each toasted roll and place a crispy chicken breast on top. Layer on a generous portion of shredded romaine lettuce. Drizzle the Caesar dressing over the lettuce, and for an added touch of luxury, sprinkle some shaved Parmesan cheese on top. Cap it off with the top half of the roll, and your delicious Crispy Chicken Caesar Sandwich is ready to be enjoyed!
How to Serve Crispy Chicken Caesar Sandwich
Serving your Crispy Chicken Caesar Sandwich can be as simple or as elaborate as you choose. For a relaxed meal, slice the sandwich in half and serve it alongside some crispy homemade fries or a fresh salad. You may also want to consider offering additional Caesar dressing on the side for those who prefer a richer flavor.
If you’re hosting a gathering, consider laying out a spread with various sandwich toppings. Allow your guests to customize their sandwiches with extra lettuce, tomatoes, or even avocado. Pair it with some refreshing beverages, and your casual meal becomes a delightful feast. This recipe is also excellent for meal prep. Wrap leftover sandwiches in parchment paper, and store them in the refrigerator for quick access to lunch or dinner throughout the week.
Expert Tips: Crispy Chicken Caesar Sandwich
Creating a standout Crispy Chicken Caesar Sandwich requires attention to detail. Here are some expert tips to elevate your dish. Firstly, ensure that your oil is properly heated before frying; this will give you that gratifying crunch. A good test is to add a small piece of bread to the oil; if it sizzles, you’re ready to go.
Additionally, you can experiment with the seasoning in the flour mixture. Adding paprika or cayenne pepper can introduce a touch of heat if you so desire. If you aren’t a fan of buttermilk, you can make a substitute using regular milk combined with a splash of vinegar or lemon juice.
For an extra gourmet touch, consider using a garlic aioli instead of Caesar dressing. You can also incorporate roasted vegetables, like peppers or zucchini, for some vibrant color and added nutrients. Lastly, don’t be afraid to get creative with your choice of bread; brioche, ciabatta, or whole-grain rolls can all impart their unique flavors.
How to Store Crispy Chicken Caesar Sandwich
Storing your Crispy Chicken Caesar Sandwich properly will keep it delicious for days. If you have leftover sandwiches, remove any fresh produce like lettuce before storing to prevent sogginess. Wrap the sandwich tightly in plastic wrap or aluminum foil, or place it in an airtight container. Your sandwich can be refrigerated for up to 3 days.
If you want to freeze your sandwiches, wrap them tightly in foil or plastic wrap, and then store them in a freezer-safe container. When ready to eat, thaw in the refrigerator overnight and reheat in the oven or toaster for the best results. Simply heat the chicken until it’s warmed through and serve it on freshly toasted rolls with your desired toppings.
Variation of Crispy Chicken Caesar Sandwich
There are many ways to mix it up with your Crispy Chicken Caesar Sandwich. If you’re following a gluten-free diet, substitute the all-purpose flour and panko breadcrumbs with gluten-free alternatives. Almond flour or a gluten-free breadcrumbs blend will work wonders.
For different flavor profiles, try marinating your chicken in a mixture of lemon juice and herbs before breading. This will add a fresh brightness that complements the other ingredients. If you’re a fan of adding heat, consider incorporating jalapeños or a spicy sauce into your assembly for a fiery twist.
Vegetarian or vegan options are equally delightful. Use eggplant or portobello mushrooms as the base for a meat substitute. Bread and fry the vegetables the same way as the chicken for an immensely satisfying sandwich without meat.
Experimenting with different cheeses, such as feta or goat cheese, can also add an interesting zing to your sandwich. You can truly customize the recipe to cater to your taste and dietary preferences.
FAQ
What makes the Crispy Chicken Caesar Sandwich so special?
The combination of crispy chicken, fresh romaine, and creamy Caesar dressing in a toasted roll creates a delicious experience. Each bite offers contrasting textures and rich flavors, making it a crowd-pleaser.
How can I ensure my chicken is perfectly crispy?
Make sure to coat the chicken well in the breadcrumb mixture and fry it in hot oil. This will create that signature crunch. Also, finishing it in the oven ensures that the inside remains juicy.
Can I make the Crispy Chicken Caesar Sandwich in advance?
Yes, you can prep individual elements ahead of time. Store the cooked chicken separately and assemble the sandwich fresh when you’re ready to serve for the best taste.
What side dishes pair well with the Crispy Chicken Caesar Sandwich?
Crispy fries, salad, or vegetable chips make excellent companions. You could also serve it with a light soup for a more filling meal.
Can I use store-bought Caesar dressing for the sandwich?
Absolutely! Using store-bought dressing can save time. Just make sure to choose one you enjoy, as it is a key flavor element in the sandwich.

Crispy Chicken Caesar Sandwich
Ingredients
For the Chicken
- 4 pieces boneless, skinless chicken breasts Ensure even thickness for uniform cooking.
- 1 cup all-purpose flour
- to taste salt
- to taste black pepper
- 1 teaspoon garlic powder
- 1 teaspoon onion powder
- 1 cup buttermilk Can substitute with regular milk and vinegar.
- 2 cups panko breadcrumbs
- 1/2 cup grated Parmesan cheese
- 1/4 cup olive oil For frying.
For Assembling
- 4 large sandwich rolls Split for easy assembly.
- 1 cup Romaine lettuce Shredded.
- 1/2 cup Caesar dressing Use your preferred brand.
- 1/4 cup shaved Parmesan cheese For topping.
- 2 tablespoons melted butter For toasting the rolls.
- 1 clove minced garlic


Instructions
Preparation
- Preheat your oven to 400°F (200°C).
- Pound the chicken breasts to an even thickness.
- In a shallow dish, mix flour, salt, black pepper, garlic powder, and onion powder.
- Pour buttermilk into a second dish.
- In a third dish, combine panko breadcrumbs and grated Parmesan cheese.
Coating the Chicken
- Dredge chicken in the flour mixture, shake off excess.
- Dip in buttermilk and let excess drip off.
- Coat in the breadcrumb mixture, pressing gently to adhere.
Cooking the Chicken
- Heat olive oil in a large skillet over medium heat.
- Fry chicken for about 4 minutes on each side until golden brown.
- Transfer to a baking sheet and finish cooking in the oven for 15 minutes.
Preparing the Rolls
- Combine melted butter and minced garlic in a small bowl.
- Brush the mixture onto the split sides of the sandwich rolls.
- Toast the rolls in the oven for about 5 minutes until golden brown.
Assembling the Sandwiches
- Place a crispy chicken breast on the bottom half of each toasted roll.
- Layer on shredded Romaine lettuce.
- Drizzle Caesar dressing and sprinkle shaved Parmesan on top.
- Cap with the top half of the roll.
Send me this recipe!
Just enter your email below and get it sent straight to your inbox!