
Homemade grilled cheese burritos combine the perfect comfort of a classic grilled cheese with the fun and flair of a burrito. This delightful dish takes melted cheese, savory fillings, and a crispy tortilla wrap, creating the ideal hand-held meal. Whether you’re looking for a satisfying lunch or a scrumptious snack, this dish offers creamy perfection in every bite, all while being easy to make at home.
Why We Love This Homemade Grilled Cheese Burrito
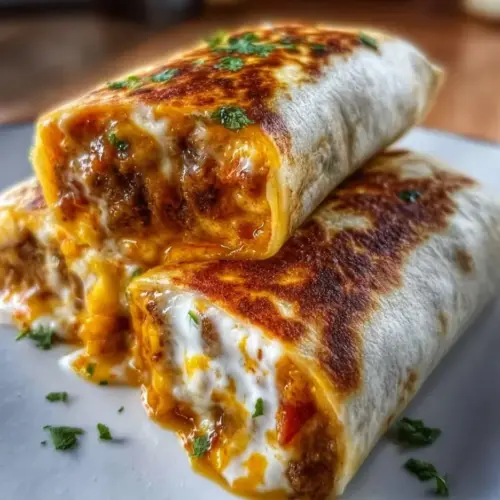
This homemade grilled cheese burrito brings together the best of both worlds: the gooey goodness of melted cheese and the satisfying warmth of a burrito. The crispy exterior makes every bite a pleasure, while the inside bursts with flavor. It’s a versatile dish, allowing you to customize the filling to suit your taste. You can pack in veggies, proteins, or even your favorite sauces. Plus, it’s quick to whip up, making it an excellent choice for busy weeknights or lazy weekends. The melting cheese oozing out adds a rustic charm that brings smiles to everyone at the table.
Ingredients for Homemade Grilled Cheese Burrito
- 2 large flour tortillas
- 1 cup shredded cheese (like cheddar, Monterey Jack, or a blend)
- ½ cup cooked and shredded chicken or beans (optional)
- ¼ cup cooked vegetables (like bell peppers or onions)
- 2 tablespoons butter
- Salsa, for serving (optional)
- Sour cream, for serving (optional)
Directions
- Begin by heating a skillet over medium heat. Add a small amount of butter to the pan and let it melt.
- Place one tortilla in the skillet and sprinkle half of the shredded cheese evenly over the surface.
- If you are using additional fillings like chicken or beans, add them on top of the cheese. Follow with your cooked vegetables.
- Sprinkle the remaining cheese over the fillings and top with the second tortilla.
- Cook for about 3-5 minutes or until the bottom tortilla is golden brown and crispy.
- Carefully flip the entire burrito using a spatula. Add more butter to the skillet, if desired. Cook the other side until it’s golden and the cheese has melted, about another 3-5 minutes.
- Remove the burrito from the heat and let it rest for a minute before slicing it in half. Serve it warm with salsa or sour cream if desired.
How to Serve Homemade Grilled Cheese Burrito
When serving your homemade grilled cheese burrito, presentation can enhance the experience. Start by slicing the burrito in half to reveal the delicious gooey interior. You can arrange the halves on a plate and drizzle them with a bit of salsa or a dollop of sour cream for added flavor. Consider pairing it with a light side salad or some crunchy tortilla chips for a delightful crunch. If you want to take it up a notch, serve the burrito with fresh avocado slices or guacamole. The combination of textures and flavors creates a well-rounded meal. You can also enjoy it as a quick on-the-go lunch by wrapping the burrito in foil after cooking. It makes for an excellent handheld treat that you can munch on during a busy day.
Expert Tips for Homemade Grilled Cheese Burrito
Perfecting your homemade grilled cheese burrito involves a few expert tips that can elevate your cooking experience. First, choose a good melting cheese; not all cheeses work the same way. Cheddar and Monterey Jack are great options for their stretch and flavor. When preparing your fillings, try to keep them dry to avoid sogginess in your burrito. If you are using juicy ingredients like tomatoes, consider patting them dry first. Also, don’t rush the cooking process; medium heat helps ensure that your tortillas don’t burn while allowing the cheese to melt perfectly. You can experiment with different flavors by adding spices like cumin or chili powder to your fillings for a kick. If you want a crunchier texture, you can use a panini press instead of a skillet. Lastly, feel free to play with the ingredient quantities based on your preference—this dish adapts wonderfully to what you have on hand.
How to Store Homemade Grilled Cheese Burrito
Storing homemade grilled cheese burritos is quite simple and can help you save leftovers for later enjoyment. Once your burrito has cooled to room temperature, wrap it tightly in aluminum foil or plastic wrap to preserve its freshness. Place it in an airtight container or a resealable bag before refrigerating. Proper storage can keep it fresh for about 3-4 days in the refrigerator. For longer storage, you may consider freezing it. Wrap the burrito well in foil, and then place it in a freezer-safe bag. Properly stored, it can last up to 2-3 months in the freezer. When you’re ready to enjoy it again, simply reheat it in the oven or on a skillet until warmed through.
Variations of Homemade Grilled Cheese Burrito
The beauty of a homemade grilled cheese burrito lies in its adaptability. You can create various variations based on your preferences and dietary needs. For a vegetarian version, fill your burrito with a hearty mixture of black beans, corn, and sautéed peppers with cheese. If you’re in the mood for some spice, try adding jalapeños or chipotle sauce to your fillings. For a twist, consider adding a breakfast element—mix scrambled eggs, cheese, and diced tomatoes for a breakfast burrito that’s delightful any time of day. You can also experiment with different types of wraps; try using whole wheat or corn tortillas for a different flavor profile. For a loaded option, add a mix of grilled vegetables, such as zucchini or mushrooms, along with your cheese. The possibilities are endless, so feel free to get creative and make it your own.
FAQ about Homemade Grilled Cheese Burrito
Can I use other types of cheese for my homemade grilled cheese burrito?
Yes, you can use a variety of cheeses! Try mozzarella, gouda, or pepper jack for different flavors.
What fillings work best in a homemade grilled cheese burrito?
You can use cooked chicken, beans, vegetables, or even rice. Get creative with your favorite ingredients!
Can I make homemade grilled cheese burritos ahead of time?
Absolutely! You can prepare and assemble them a day ahead, then cook them just before serving.
How do I reheat leftover homemade grilled cheese burritos?
Reheat in a skillet on medium heat until warmed through, or use an oven at 350°F for about 15 minutes.
Can I freeze homemade grilled cheese burritos?
Yes, you can freeze them. Wrap tightly and store in a freezer-safe container for up to 2-3 months.
Do homemade grilled cheese burritos get soggy in the fridge?
As long as you cool them completely before wrapping and store them properly, they should not get too soggy in the fridge.
Are homemade grilled cheese burritos suitable for kids?
Yes, they’re a fun and customizable meal that kids usually love. You can adjust the fillings to suit their tastes.
Homemade Grilled Cheese Burrito
Ingredients
For the Burrito
- 2 large large flour tortillas
- 1 cup shredded cheese (like cheddar, Monterey Jack, or a blend) Choose good melting cheese
- ½ cup cooked and shredded chicken or beans (optional) Choose one or the other
- ¼ cup cooked vegetables (like bell peppers or onions) Can be customized
- 2 tablespoons butter For frying
- to taste salsa, for serving (optional)
- to taste sour cream, for serving (optional)


Instructions
Preparation
- Begin by heating a skillet over medium heat. Add a small amount of butter to the pan and let it melt.
- Place one tortilla in the skillet and sprinkle half of the shredded cheese evenly over the surface.
- If you are using additional fillings like chicken or beans, add them on top of the cheese. Follow with your cooked vegetables.
- Sprinkle the remaining cheese over the fillings and top with the second tortilla.
Cooking
- Cook for about 3-5 minutes or until the bottom tortilla is golden brown and crispy.
- Carefully flip the entire burrito using a spatula. Add more butter to the skillet, if desired. Cook the other side until it’s golden and the cheese has melted, about another 3-5 minutes.
Serving
- Remove the burrito from the heat and let it rest for a minute before slicing it in half. Serve it warm with salsa or sour cream if desired.
Send me this recipe!
Just enter your email below and get it sent straight to your inbox!