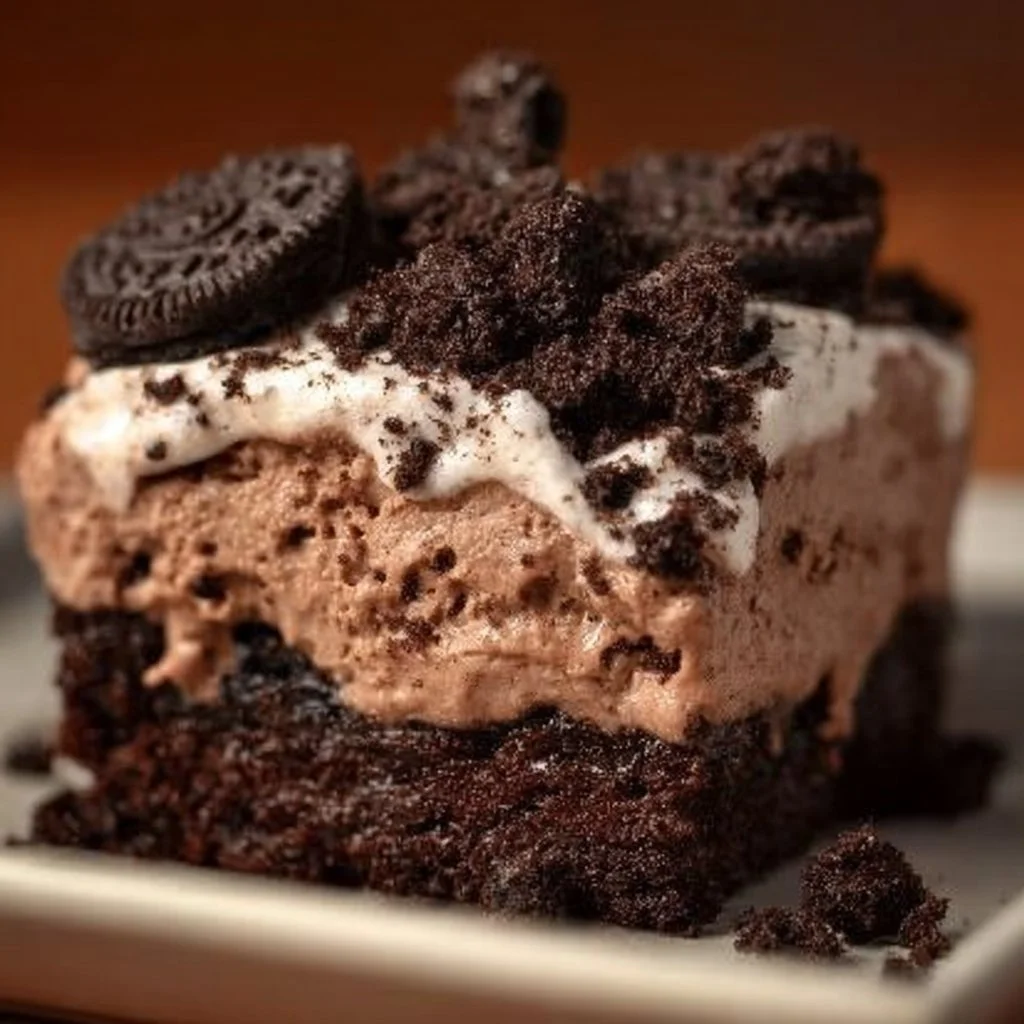
When you think of a dessert that brings smiles and joy, Oreo Dirt Cake undoubtedly tops the list. This delightful treat not only looks whimsical but tastes incredibly indulgent. You might be imagining a cupcake or a cheesecake, but dirt cake presents a fun and unique take on dessert that everyone loves. It combines the rich chocolate flavor of Oreos with smooth layers of creamy goodness, creating a dessert that’s perfect for any occasion. Whether you’re hosting a birthday party, picnic, or simply inviting friends over for coffee, Oreo Dirt Cake is always a crowd-pleaser.
Why We Love This OREO DIRT CAKE
Oreo Dirt Cake is one of those rare desserts that appeals to both kids and adults alike. Its playful presentation, layered texture, and incredible taste make it a go-to dessert for various festivities. One of the best things about this cake is how easy it is to make. You don’t need any baking skills to whip this up—just a few simple ingredients and the willingness to have some fun! The combination of crushed Oreos mimicking dirt and the creamy filling resembling a decadent mousse makes it visually captivating and delectable. This dessert invites creativity, as you can personalize the toppings or presentation to suit any theme or event. From birthday parties to casual summer get-togethers, no one can resist the charm of this dirt dessert!
Ingredients for OREO DIRT CAKE
To create your own Oreo Dirt Cake, you’ll need a selection of delightful and easily sourced ingredients. Here’s what you’ll need:
- 2 packages (14.3 oz each) Oreo cookies
- 1 cup unsalted butter, softened
- 8 oz cream cheese, softened
- 1 cup powdered sugar
- 2 cups whipped topping (like Cool Whip)
- 3 cups milk
- 2 packages (3.4 oz each) instant chocolate pudding mix
- Gummy worms and edible soil (optional for decoration)
This straightforward ingredient list will ensure that you have everything at hand to create an unforgettable dessert that your guests will adore!
How to Make OREO DIRT CAKE
Making Oreo Dirt Cake is not only easy but also a great activity to involve friends or family members. Below are the step-by-step directions that will guide you in crafting this delightful dessert.
- Crush the Oreos: Start by placing the Oreo cookies in a food processor. Pulse them until they’re finely crushed into a crumb-like texture. You can also place them in a zip-top bag and crush them with a rolling pin if you don’t have a food processor. Set aside about 1 cup of the crumbs for garnish.
- Prepare the Cream Mixture: In a large mixing bowl, beat the softened cream cheese and butter together using an electric mixer until smooth and creamy. Gradually add the powdered sugar while continuing to mix until fully combined.
- Add Whipped Topping: Fold in the whipped topping gently until it’s thoroughly mixed. This will create a light and airy filling for your cake. Make sure to avoid over-mixing.
- Create the Pudding Layer: In another bowl, combine the instant chocolate pudding mix with the milk. Whisk the mixture until it thickens, which should take about 2 minutes.
- Combine Layers: Carefully fold the pudding mixture into the whipped topping mixture until well incorporated.
- Layer the Cake: In a large trifle dish or individual cups, begin to layer the dessert. Start with a layer of crushed Oreo cookies, followed by a layer of the cream mixture. Repeat these layers until you run out of ingredients, finishing with a top layer of crushed Oreos.
- Chill: Cover the dish with plastic wrap and refrigerate for at least 4 hours, or overnight if possible. This allows the flavors to meld together beautifully.
- Garnish: Once chilled, take the dessert out and sprinkle the reserved Oreo crumbs on top. You can also add gummy worms for a fun touch, making it look like it’s straight out of a garden!
Now, your Oreo Dirt Cake is complete and ready to impress!
How to Serve OREO DIRT CAKE
Serving Oreo Dirt Cake can be as fun as making it. The dessert’s visual appeal is part of its charm, so consider these tips for presenting it:
- Trifle Dish: If you’ve prepared it in a large trifle dish, serving it directly from there creates a stunning centerpiece. Use a large spoon to scoop out the layers, allowing everyone to see the deliciousness inside.
- Individual Cups: Alternatively, dividing the dirt cake into small cups is great for portion control and easy serving. Guests can grab their cup and enjoy without any fuss.
- Add Toppings: Finish with a creative touch, such as additional gummy worms, edible flowers, or even chocolate shavings. This not only enhances the presentation but also invites conversation about the dessert’s fun theme.
Remember, the goal is to have fun and celebrate togetherness, so don’t hesitate to get creative with your serving method!
Expert Tips for Making OREO DIRT CAKE
- Quality Cookies: Use genuine Oreos for the best flavor. The original chocolate has the right balance of sweetness and cocoa that complements the cream perfectly.
- Chill Time: The longer you let your cake chill, the better the flavor and texture will be. Overnight chilling is ideal, as it allows the layers to fully integrate and develop.
- Texture Variations: If you want a bit of crunch in your dessert, consider incorporating chopped nuts between the layers for a surprising twist.
- Cream Cheese Temperature: Make sure the cream cheese is softened to avoid lumps and ensure a smooth mix. You can place it out of the fridge for an hour or microwave it for a few seconds if you’re short on time.
- Garnishing: Experiment with various garnishes, such as crushed candy bars, sprinkles, or use a themed topping based on seasonal events (like small pumpkin candies for Halloween).
How to Store OREO DIRT CAKE
To keep your delicious Oreo Dirt Cake fresh, consider the following storage tips:
- Refrigeration: Store any leftover dirt cake in the refrigerator. Ensure it’s covered with plastic wrap or in an airtight container to keep it fresh and maintain its creamy texture.
- Shelf Life: Properly stored, your Oreo Dirt Cake can last for about 3 to 5 days in the fridge. If you notice any separation or off smells, it’s best to discard it.
- Freezing: While it’s not recommended to freeze the entire cake as it can alter the texture, you can freeze individual portions. Just make sure they are well-wrapped. When you’re ready to enjoy it, thaw it in the refrigerator overnight.
Variations of OREO DIRT CAKE
One of the best things about Oreo Dirt Cake is its versatility. Here are some creative variations you can try:
- Peanut Butter Chocolate Dirt Cake: Mix in peanut butter into the cream mixture for a nutty twist. Peanut butter pairs beautifully with chocolate, making each bite even richer.
- Mint Chocolate Dirt Cake: Add a few drops of mint extract to the cream mixture for a refreshing flavor. You can also use mint-flavored Oreos for an additional minty kick.
- Fruit Infusion: Layer some fresh strawberries or raspberries between the Oreo and cream layers. The fruit adds a burst of freshness that balances the richness of the dessert.
- Cookies and Cream Variation: Combine crushed Oreos with other cookie types like chocolate chip or double-stuffed for a multi-textured treat that is sure to delight.
- Seasonal Themes: Decorate based on seasons or holidays. Use Halloween-themed sprinkles, Easter eggs, or festive fruits during summer to make the dessert fitting for the occasion.
FAQ About OREO DIRT CAKE
What makes Oreo Dirt Cake a crowd favorite? Oreo Dirt Cake stands out because of its playful presentation, easy preparation, and rich flavor that appeals to both adults and children alike.
Can I use different kinds of cookies besides Oreos for dirt cake? Absolutely! You can experiment with various cookies like chocolate wafer cookies, graham crackers, or even flavored cookies to create a unique twist on this classic dessert.
How long does it take to prepare Oreo Dirt Cake? The preparation time is quite quick, typically taking around 30 minutes, but don’t forget to factor in the chilling time, which should be a few hours for optimal flavor.
Is it necessary to use cream cheese in the recipe? The cream cheese provides a rich texture and improves the flavor, but you may substitute it with Greek yogurt or a non-dairy alternative for a lighter option.

OREO Dirt Cake
Equipment
- Food Processor
- Mixing Bowls:
- Trifle Dish or Individual Cups
Ingredients
- 2 packages Oreo Cookies 14.3 oz each
- 1 cup Unsalted Butter softened
- 8 oz Cream Cheese softened
- 1 cup Powdered Sugar
- 2 cups Whipped Topping like Cool Whip
- 3 cups Milk
- 2 packages Instant Chocolate Pudding Mix 3.4 oz each


Instructions
- Crush the Oreo cookies in a food processor until finely crumbed. Reserve 1 cup of the crumbs for garnish.
- In a large mixing bowl, beat together the softened cream cheese and butter until smooth. Gradually add powdered sugar and mix until fully combined.
- Fold in the whipped topping gently until well mixed.
- In another bowl, whisk the instant chocolate pudding mix with the milk until thickened, about 2 minutes.
- Fold the pudding mixture into the whipped topping mixture until well combined.
- In a trifle dish or individual cups, layer crushed Oreos, the cream mixture, and repeat until ingredients are used up, finishing with a layer of crushed Oreos on top.
- Cover with plastic wrap and refrigerate for at least 4 hours, or overnight.
- Before serving, garnish with reserved Oreo crumbs and optional gummy worms for a fun touch.
Send me this recipe!
Just enter your email below and get it sent straight to your inbox!