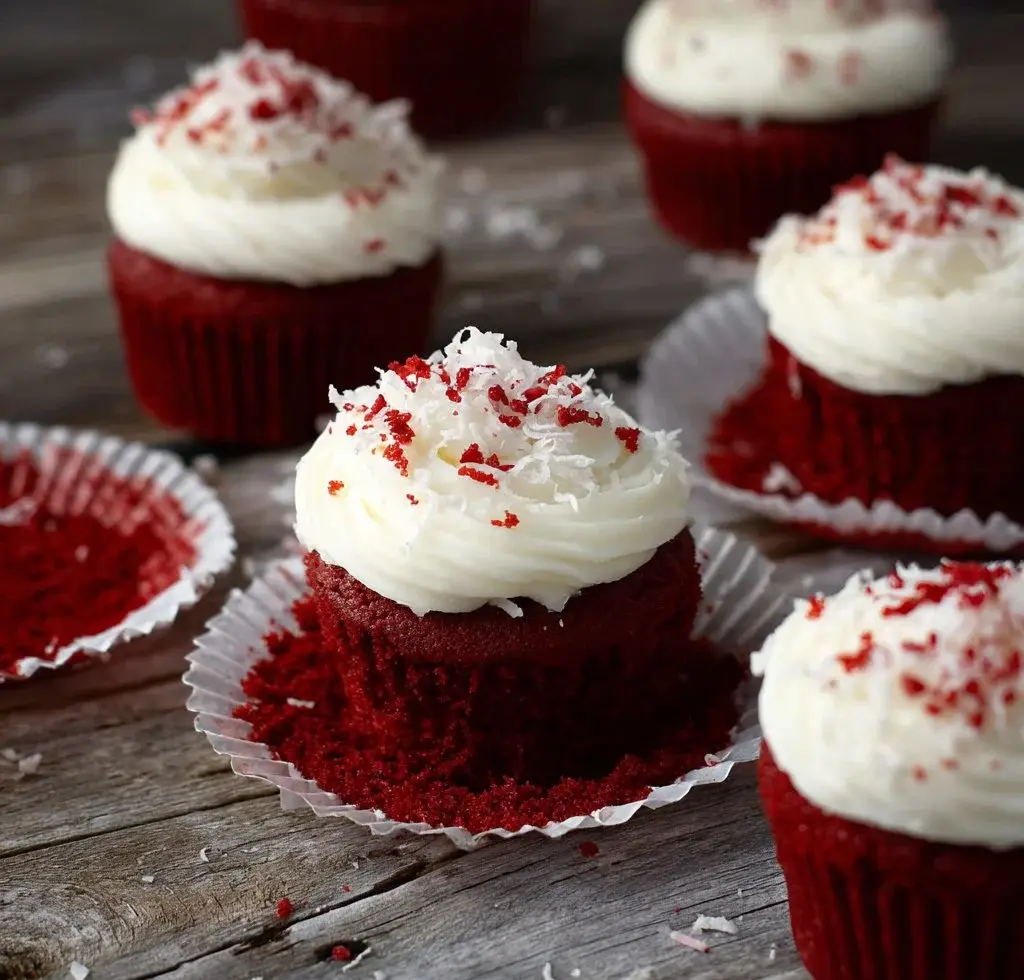
Red velvet cupcakes bring a delightful twist to your dessert table, blending a rich, velvety texture with a striking appearance. Their iconic red hue, contrasted with creamy frosting, makes them not only delicious to taste but visually stunning as well. Whether you’re hosting a party, celebrating a birthday, or just in the mood for something sweet, red velvet cupcakes are sure to impress.
Why We Love This Red Velvet Cupcake Recipe
What makes this red velvet cupcake recipe stand out? It’s a perfect blend of simplicity and flavor. Even if you’re a beginner in the kitchen, this recipe encourages you to create something truly special. The ingredients are easily accessible, and the steps are straightforward, ensuring that anyone can whip up a batch of these delightful cupcakes without trouble.
Another aspect that adds to the charm of these cupcakes is their versatility. You can make them for various occasions, from Valentine’s Day to Christmas parties, or just as an everyday treat. Pair them with a variety of frostings, sprinkles, or toppings based on your personal preference. The frosting can be the traditional cream cheese or something different like whipped cream or buttercream, which allows you to customize it to your liking.
So, get ready to bring some joy into your kitchen as you explore why these cupcakes are loved by many. They are not just treats; they can also be a conversation starter at your next gathering, and that makes baking them even more enjoyable.
Ingredients for Red Velvet Cupcakes
To create these scrumptious red velvet cupcakes, you will need the following ingredients. Here’s the perfect list to get you started.
- 2 1/2 cups all-purpose flour
- 2 tablespoons cocoa powder
- 1 teaspoon salt
- 1 1/2 teaspoons baking powder
- 1/2 cup butter or margarine, softened
- 1 1/2 cups sugar
- 2 eggs
- 1/2 teaspoon Wilton No-Taste Icing Color
- 1 teaspoon vanilla extract
- 1 cup buttermilk
- 2 tablespoons water
- 1 1/2 teaspoons white vinegar
- 1 teaspoon baking soda
Having these ingredients on hand will set you up for success in your cupcake-making journey. Plus, they come together quickly, making your baking experience enjoyable and efficient.
How to Make Red Velvet Cupcakes
Now that you have your ingredients ready, it’s time to get into the exciting part—baking! Follow these straightforward directions to achieve those delicious cupcakes:
- Start by preheating your oven to 350 degrees Fahrenheit. Ensure your muffin tins are lined with cupcake liners, as this will help with easy removal once they’re baked.
- In a medium-sized bowl, combine the all-purpose flour, cocoa powder, baking powder, and salt. Whisk them together until well mixed and then set aside.
- In a large mixing bowl, use an electric mixer to cream the softened butter and sugar together. Beat them until the mixture becomes light and fluffy, which usually takes about 3-4 minutes.
- Next, add in your eggs, Wilton No-Taste Icing Color, and vanilla extract. Mix on medium speed until everything is well blended.
- Gradually introduce the dry ingredients from your earlier bowl into the wet mixture. Alternate this with buttermilk, mixing well after each addition. The goal is to create a smooth, homogenous batter.
- Once everything is mixed, carefully add the water and continue to mix until fully combined.
- In a separate small bowl, combine white vinegar and baking soda. Allow it to fizz for a moment before folding it into your batter. This step is essential as it helps your cupcakes rise nicely.
- Fill the prepared muffin tins with the batter, ensuring each cup is about two-thirds full. This will allow adequate room for the cupcakes to rise.
- Pop your muffin tins into the preheated oven and bake for about 15 minutes. Check for doneness with a toothpick—if it comes out clean or with a few crumbs, your cupcakes are ready.
- Once they’re done, take them out of the oven and let them cool in the pans for a few minutes before transferring them to a wire rack. Allow them to cool completely before frosting.
- Finally, once your red velvet cupcakes have cooled, it’s time to top them with your choice of frosting. Cream cheese frosting is a popular option, pairing beautifully with the cocoa notes of the cupcakes.
Now you have a batch of delicious red velvet cupcakes to enjoy. Take a moment to relish in your accomplishment—you’ve just created something special!
How to Serve Red Velvet Cupcakes
Presentation goes hand in hand with enjoyment, especially when it comes to desserts. When serving your red velvet cupcakes, consider the occasion and the people you’re sharing them with. Here are a few ideas to ensure they make a memorable impression:
- On a Cake Stand: Arrange your cupcakes on a decorative cake stand, allowing them to take center stage. Whether it’s a casual family gathering or a formal event, this setup adds elegance.
- Garnish: You can elevate the look of your cupcakes with garnishes. Consider adding small chocolate shavings, sprinkles, or even a fresh berry on top of the cream cheese frosting for an extra touch.
- Accompanying Drinks: Pair your cupcakes with drinks that complement their flavors. A glass of cold milk or a cup of coffee can enhance the overall tasting experience.
- Event Themes: Match your cupcake décor with the theme of your event. For example, during holidays, you might opt for festive toppings or colored sprinkles that reflect the season.
Regardless of how you choose to serve them, your guests will appreciate the effort you put into making these beautiful red velvet cupcakes.
Expert Tips for Red Velvet Cupcakes
To ensure that your red velvet cupcakes turn out perfect, here are some expert tips to keep in mind:
- Room Temperature Ingredients: Use eggs and butter at room temperature. This helps create a more uniform mix, giving your cupcakes a better texture.
- Don’t Overmix: While mixing, be cautious not to overmix the batter after adding the dry ingredients. Overmixing can lead to denser cupcakes, while under-mixing may leave lumps.
- Sift Ingredients: Sifting your cocoa powder and flour together can prevent lumps and ensure a fluffier batter.
- Cool Completely: Make sure your cupcakes are completely cooled before frosting. If you frost warm cupcakes, the frosting may melt and lose its shape.
- Customize Frosting: Don’t hesitate to customize your frosting to meet your taste. You can blend different flavors or types of frosting to find your perfect match.
By following these tips, you’ll be well on your way to baking exceptional red velvet cupcakes that everyone will be raving about.
How to Store Red Velvet Cupcakes
If you find yourself with leftover cupcakes or want to prepare ahead of time, storing them correctly is key to maintaining their freshness. Here’s how to store your red velvet cupcakes:
- Room Temperature: If you plan to consume the cupcakes within a day or two, you can store them at room temperature. Keep them in an airtight container, which will help maintain their moisture.
- Refrigeration: If you wish to keep them for longer, store them in the refrigerator. Again, use an airtight container to prevent them from drying out. They can stay fresh in the fridge for up to a week.
- Freezing: For extended storage, freezing is an excellent option. Wrap each cupcake tightly in plastic wrap, then place them in a freezer-safe container. They can be frozen for up to three months. To enjoy, simply thaw them at room temperature.
By storing your cupcakes properly, you’ll ensure that they retain their delightful flavor and soft texture for you to enjoy later.
Variations of Red Velvet Cupcakes
Experimenting with variations of your red velvet cupcakes can be a fun way to change things up. Here are some ideas to inspire your next baking adventure:
- Chocolate Chip Red Velvet Cupcakes: Add chocolate chips to the batter for an extra layer of sweetness and texture. The chocolate flavor pairs wonderfully with the red velvet base.
- Red Velvet Whoopie Pies: Transform your cupcake batter into whoopie pies. Bake the batter in flat rounds and then sandwich cream cheese frosting between two pieces.
- Layered Red Velvet Cake: If you prefer cakes over cupcakes, use the same recipe to create a stunning layered red velvet cake. Frost between the layers and on top for a head-turning dessert.
- Additional Flavorings: Add a twist by infusing the batter with orange or almond extract for a unique flavor profile that stands out from traditional red velvet.
- Gluten-Free Version: Swap out the all-purpose flour with gluten-free flour to make this recipe accessible for those with gluten sensitivities.
With a few adjustments, you can create entirely new treats that maintain the essence of red velvet but offer fresh experiences.
FAQs About Red Velvet Cupcakes
What makes red velvet cupcakes red?
The color of red velvet cupcakes comes from either red food coloring or cocoa powder. Traditional recipes often featured a more natural red hue, but the addition of food coloring boosts the vibrancy.
Can I use regular milk instead of buttermilk?
While buttermilk adds a tangy flavor and tenderizes the cake, you can substitute it with regular milk. To mimic buttermilk’s acidic properties, add a tablespoon of vinegar or lemon juice to your milk and let it sit for a few minutes before using it in the recipe.
Is it necessary to use cream cheese frosting?
No, while cream cheese frosting is traditional and highly recommended for red velvet cupcakes, you can also experiment with other frostings like vanilla buttercream or even whipped cream.
How can I enhance the flavor of my red velvet cupcakes?
You can enhance the flavor by adding a bit of espresso powder to the batter, which deepens the chocolate flavor without making it taste like coffee.
What’s the best way to frost red velvet cupcakes?
Using a piping bag with a star tip can create beautiful swirls. Alternatively, you can use a spatula to spread frosting in a more rustic way, depending on your preference.

Red Velvet Cupcakes
Ingredients
Dry Ingredients
- 2 1/2 cups all-purpose flour
- 2 tablespoons cocoa powder
- 1 teaspoon salt
- 1 1/2 teaspoons baking powder
- 1 teaspoon baking soda
Wet Ingredients
- 1/2 cup butter or margarine, softened
- 1 1/2 cups sugar
- 2 pieces eggs
- 1/2 teaspoon Wilton No-Taste Icing Color
- 1 teaspoon vanilla extract
- 1 cup buttermilk
- 2 tablespoons water
- 1 1/2 teaspoons white vinegar


Instructions
Preparation
- Preheat your oven to 350°F (175°C) and line muffin tins with cupcake liners.
- In a medium bowl, whisk together the flour, cocoa powder, baking powder, and salt. Set aside.
Mixing Batter
- In a large mixing bowl, cream the softened butter and sugar together using an electric mixer until light and fluffy, about 3-4 minutes.
- Add the eggs, Wilton No-Taste Icing Color, and vanilla extract, mixing until well blended.
- Gradually add the dry mixture to the wet mixture, alternating with the buttermilk, mixing well after each addition.
- Add the water and mix until fully combined.
Final Preparation
- In a small bowl, combine white vinegar and baking soda; fold it into the batter once it fizzes.
- Fill muffin tins two-thirds full with batter and bake for about 15 minutes.
- Check for doneness with a toothpick; if it comes out clean, remove from the oven and cool on a wire rack.
Frosting
- Once completely cooled, top with cream cheese frosting or your choice of frosting.
Send me this recipe!
Just enter your email below and get it sent straight to your inbox!