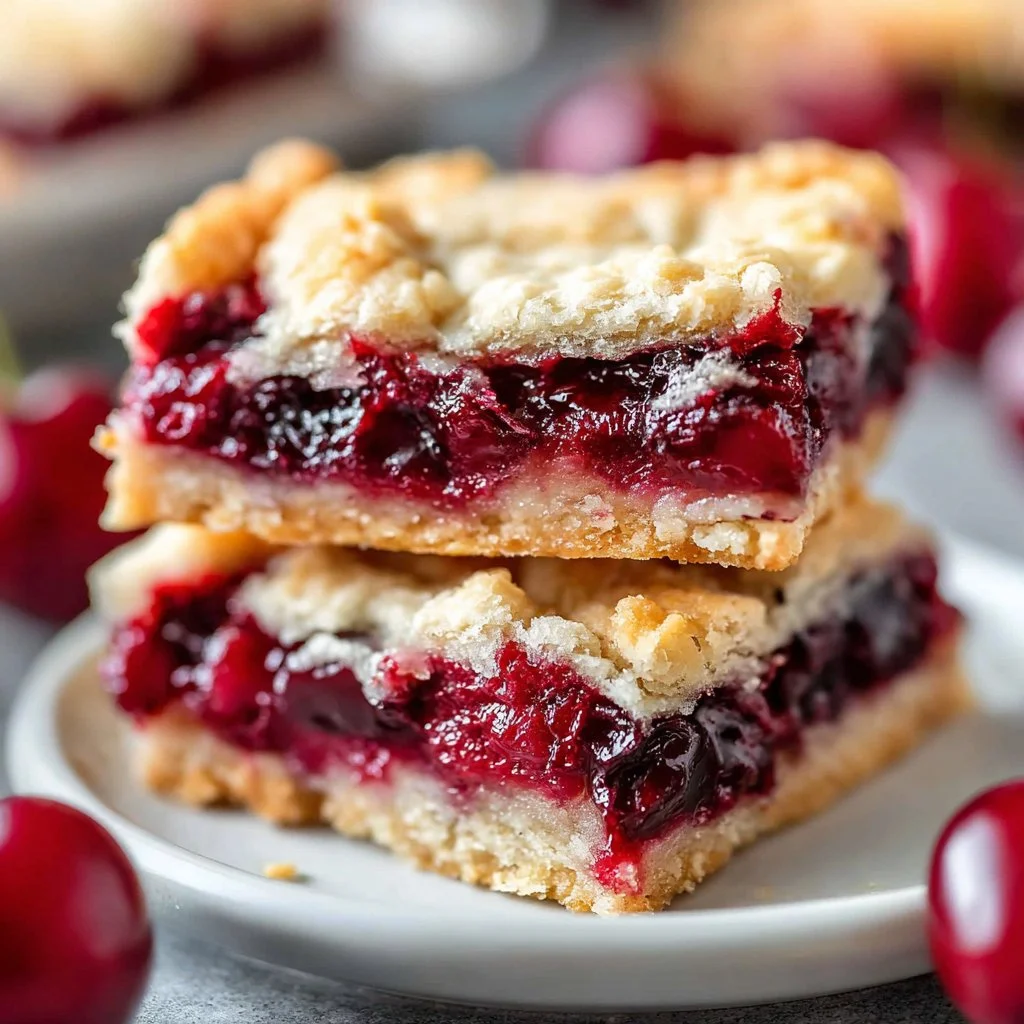
Christmas is a season filled with joy, lights, and delectable treats. Among the countless desserts that grace our holiday tables, Christmas Cherry Bars stand out as a vibrant and festive option. These scrumptious treats combine the luscious flavor of cherries with a buttery, crumbly base, creating a delightful dessert that is loved by many. Not only do these bars look inviting, with their bright red cherry filling, but they also bring a nostalgic sweetness that feels like home.
Why We Love This Christmas Cherry Bars Recipe
The charm of Christmas Cherry Bars is evident in every bite. Their burst of cherry flavor combined with the soft, buttery texture creates a perfect harmony. You’ll find that these bars are not just another sweet treat; they represent the spirit of Christmas in a way that resonates with everyone.
One of the best aspects of this recipe is its simplicity. You don’t need to be a professional baker to achieve something truly delicious. With everyday ingredients and easy-to-follow steps, you can make a batch that will impress your guests and keep everyone coming back for more.
Moreover, the bright red of the cherries adds a festive flair to your holiday dessert spread, making them an eye-catching addition. Not only do they taste great, but they also look stunning on your dessert table!
Ingredients for Christmas Cherry Bars
To whip up a batch of these festive bars, here’s what you will need:
- 1 cup butter, softened
- 2 cups sugar
- 1 teaspoon salt
- 4 large eggs (room temperature)
- 1 teaspoon vanilla extract
- 1/4 teaspoon almond extract
- 3 cups flour
- 2 cans cherry pie filling (21 ounces each)
- 1 cup confectioners’ sugar
- 1/2 teaspoon vanilla extract
- 1/2 teaspoon almond extract
- 2-3 tablespoons whole milk
Gathering these ingredients is the first step to bringing the spirit of Christmas into your home!
How to Make Christmas Cherry Bars Directions
Now that you have your ingredients, it’s time to get to work! Here’s a step-by-step guide to making these delightful bars that will fill your home with the sweet scent of Christmas.
- Preheat the Oven: Begin by preheating your oven to 350°F (175°C). This ensures that the bars bake evenly and achieve that perfect golden brown color.
- Prepare Your Pan: Take a 15×10-inch sheet pan and spray it with baking spray. This will prevent the bars from sticking and make for easy removal later.
- Make the Dough: In a large mixing bowl, cream together the softened butter, sugar, and salt using a mixer. Beat these together until the mixture is light and fluffy, which usually takes about 2-3 minutes.
- Incorporate the Eggs: Next, add the eggs one at a time, ensuring each one is fully incorporated before adding the next. This step is crucial for achieving a smooth and well-blended dough.
- Flavor it Up: Stir in the vanilla and almond extracts. These flavors will give your bars a lovely depth that complements the cherries.
- Add the Flour: Gradually mix in the flour; this is where you’ll start to see your dough come together. Mix until a soft dough forms.
- Press the Dough into the Pan: Take approximately 3 cups of the dough and press it evenly into the bottom of your prepared pan. This layer serves as the base for your bars.
- Spread the Filling: Open the two cans of cherry pie filling and spread it evenly over the dough. This fruity layer is what makes these bars so irresistible!
- Add the Topping: Take spoonfuls of the remaining dough and drop them over the cherry filling. You want to create a rustic, crumbly topping that’s visually appealing.
- Bake: Place the pan in the preheated oven and bake for 35 to 40 minutes, or until the top is golden brown. The aroma will fill your kitchen, making it hard to wait!
- Cool the Bars: Once baked, allow the bars to cool completely while still in the pan. This waiting period not only helps them set but also intensifies the flavors.
- Prepare the Glaze: While the bars are cooling, you can prepare the glaze. In a small bowl, combine the confectioners’ sugar, vanilla extract, almond extract, and enough milk to achieve a smooth consistency.
- Drizzle the Glaze: Once the bars are cool, gently drizzle the glaze over the top. This adds a lovely sweetness and a touch of elegance to your Christmas Cherry Bars.
Enjoy them fresh, share them with loved ones, and watch as they disappear from the plate!
How to Serve Christmas Cherry Bars
When it comes to serving your Christmas Cherry Bars, the presentation can really elevate the experience! Consider cutting them into neat squares or rectangles for a clean look.
You can serve them on a beautiful dessert platter, perhaps alongside other holiday treats like cookies and brownies. If you want to get creative, adding a sprinkle of powdered sugar on top just before serving can offer a snowy touch, perfect for the festive season.
Pair these bars with a warm cup of hot cocoa or coffee for a delightful treat any time of the day. They work as an afternoon snack or as a sweet after-dinner dessert. Don’t forget to invite your friends and family to help you enjoy them, as sharing good food during the holidays is what it’s all about.
Expert Tips for Making Christmas Cherry Bars
- Use Room Temperature Eggs: Having your eggs at room temperature aids in better aeration when mixing, resulting in a fluffier texture in the finished bars.
- Don’t Overmix the Dough: Combine the flour just until you see it disappear. Overmixing can lead to dense bars, which isn’t the goal here. You want them light and crumbly!
- Chill the Dough if Needed: If the dough feels too soft to press into the pan, you can chill it in the refrigerator for about 30 minutes to make it easier to manage.
- Add a Personal Touch: Feel free to mix in chocolate chips or nuts if you’d like to add some extra flavor and texture to your bars.
- Keep an Eye on Baking Time: Ovens can vary, so check on your bars around the 30-minute mark to avoid overbaking. You want them golden brown but not dry.
These simple yet impactful tips will help you create the best Christmas Cherry Bars that are sure to impress!
How to Store Christmas Cherry Bars
Storing your delicious Christmas Cherry Bars properly will ensure they retain their freshness and flavor. Once they have cooled completely, cut them into squares and transfer them to an airtight container.
You can keep them at room temperature for a few days if you plan to enjoy them soon. However, if you want to keep them for longer, it’s best to store them in the refrigerator, where they can last up to a week. Just make sure to separate layers with parchment paper to avoid sticking.
Want to save them for another occasion? You can freeze them! Place the bars in a freezer-safe container, layering parchment paper between them. They can last in the freezer for up to three months. When you’re ready to indulge again, simply thaw them at room temperature.
Variations of Christmas Cherry Bars
While the classic version of Christmas Cherry Bars is a joy in itself, you might want to try out some variations for a twist on the traditional recipe. Here are a few ideas to inspire you:
- Use Different Fruit Fillings: While cherries are festive and delicious, you can experiment with other fruits as well, such as blueberry or apple pie filling. These alternatives can give your bars a different flavor profile.
- Add Nuts: For an extra crunch, mix in chopped nuts like pecans or walnuts into the dough. This will add texture that complements the soft cherry filling beautifully.
- Combine Chocolates: If you’re a chocolate lover, consider adding chocolate chips to your dough or drizzling melted chocolate over the top instead of glaze for a richer dessert.
- Make a Cheesecake Layer: For a decadent twist, you can incorporate a layer of cheesecake filling in between the dough and cherry filling. Just mix cream cheese with sugar and eggs until smooth and spread it over the base before adding the cherries.
- Adjust Spices: Experiment with spices; a pinch of cinnamon or nutmeg can add a warm, festive flavor that matches well with the cherries.
Each variation offers a new way to enjoy the wonderful flavors of the festive season!
Frequently Asked Questions about Christmas Cherry Bars
What are Christmas Cherry Bars?
Christmas Cherry Bars are a delightful dessert made with a buttery, crumbly dough layered with sweet cherry pie filling and topped with a sweet glaze. They are a popular treat during the holiday season and are loved for their festive appearance and delicious taste.
How do I know when my Christmas Cherry Bars are done baking?
Your Christmas Cherry Bars are ready when the top is a lovely golden brown. You can also test them by inserting a toothpick into the center; if it comes out clean or with a few crumbs, they’re good to go.
Can I use fresh cherries instead of canned cherry pie filling?
Absolutely! While canned cherry pie filling is convenient, you can use fresh cherries. Just make sure to cook them down with some sugar and cornstarch to create a filling-like consistency before spreading them on the dough.
How long will the Christmas Cherry Bars last?
If stored properly, the bars can last for up to a week in the refrigerator. If you freeze them, they can maintain their quality for up to three months.
Can I make these bars gluten-free?
Certainly! You can substitute all-purpose flour with a gluten-free flour blend that measures similarly to regular flour. Just ensure that all other ingredients are also gluten-free.
How can I make the glaze for my Christmas Cherry Bars?
To make the glaze, simply mix together confectioners’ sugar, vanilla extract, almond extract, and enough milk to achieve a smooth drizzling consistency. Adjust the milk as needed to get your desired thickness.

Christmas Cherry Bars
Ingredients
For the Base and Topping
- 1 cup butter, softened Make sure the butter is softened for easier mixing.
- 2 cups sugar
- 1 teaspoon salt
- 4 large eggs (room temperature) Room temperature eggs help with better aeration.
- 1 teaspoon vanilla extract
- 1/4 teaspoon almond extract
- 3 cups flour All-purpose flour.
For the Filling and Glaze
- 2 cans cherry pie filling (21 ounces each) You can substitute with fresh cherries if desired.
- 1 cup confectioners’ sugar For the glaze.
- 1/2 teaspoon vanilla extract For the glaze.
- 1/2 teaspoon almond extract For the glaze.
- 2-3 tablespoons whole milk Adjust to achieve desired consistency for the glaze.


Instructions
Preparation
- Preheat your oven to 350°F (175°C).
- Spray a 15x10-inch sheet pan with baking spray.
- In a large mixing bowl, cream together the softened butter, sugar, and salt until light and fluffy (about 2-3 minutes).
- Add the eggs one at a time, ensuring each one is fully incorporated before adding the next.
- Stir in the vanilla and almond extracts.
- Gradually mix in the flour until a soft dough forms.
- Press approximately 3 cups of the dough evenly into the bottom of your prepared pan.
Assembly and Baking
- Spread the cherry pie filling evenly over the dough.
- Drop spoonfuls of the remaining dough over the cherry filling to create a rustic topping.
- Bake for 35 to 40 minutes or until the top is golden brown.
Cooling and Glazing
- Allow the bars to cool completely in the pan.
- Prepare the glaze by mixing the confectioners' sugar, vanilla extract, almond extract, and enough milk to achieve a smooth consistency.
- Drizzle the glaze over the cooled bars.
Send me this recipe!
Just enter your email below and get it sent straight to your inbox!