Fall is a time for cozy sweaters, colorful leaves, and of course, delightful pumpkin desserts. Among the treasures of seasonal baking, Pumpkin Cream Cheese Bars stand out as a must-try treat. These bars combine the rich, warm flavor of pumpkin with the creamy sweetness of cream cheese, creating a dessert that is not only delicious but also perfect for sharing at gatherings or enjoying at home.
Why We Love This Pumpkin Cream Cheese Bars Recipe
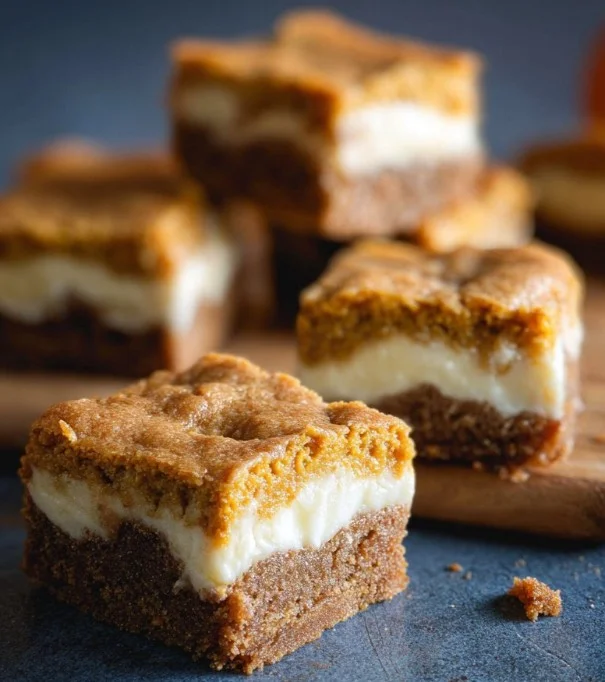
Pumpkin Cream Cheese Bars are a delightful blend of flavors and textures. The moist, spiced pumpkin base pairs beautifully with the creamy filling, offering a taste experience that captivates your taste buds. Whether you’re hosting a fall gathering, celebrating Thanksgiving, or simply craving something sweet, these bars are immensely satisfying.
What makes them even better is their easy preparation. With simple ingredients that you likely have in your pantry, you can create a stunning dessert that will impress family and friends. Not to mention, the vibrant orange hue and creamy swirls make them visually appealing, too.
Moreover, these bars are versatile—a perfect dessert for any occasion, from potlucks to cozy family dinners. And if you’re someone who loves sharing, they cut into perfect squares, making them easy to serve or pack for on-the-go treats.
Ingredients for Pumpkin Cream Cheese Bars
To craft these delightful Pumpkin Cream Cheese Bars, gather the following ingredients:
- 1 (8 ounce) package cream cheese, softened
- 1/4 cup sugar
- 1 egg
- 1/2 teaspoon vanilla extract
- 1 cup canned pumpkin puree
- 1 cup sugar
- 1 egg
- 1/3 cup vegetable oil
- 1 cup all-purpose flour
- 1 1/2 teaspoons pumpkin pie spice
- 1 teaspoon baking powder
- 1/2 teaspoon baking soda
- 1/2 teaspoon salt
- 1/2 cup chopped pecan pieces (optional)
Having these ingredients on hand will prepare you to whip up a batch of these delightful bars that will leave everyone asking for the recipe.
How to Make Pumpkin Cream Cheese Bars
Now that you have your ingredients ready, it’s time to bring these Pumpkin Cream Cheese Bars to life. Follow these straightforward directions for success.
- Preheat Your Oven: Begin by preheating your oven to 375°F (190°C). Preheating ensures that your bars bake evenly.
- Prepare the Baking Pan: Grab a 9×13-inch baking pan and spray it with cooking spray. This will help the bars come out easily once they are baked.
- Making the Cream Cheese Filling: In one mixing bowl, combine the softened cream cheese, 1/4 cup of sugar, 1 egg, and 1/2 teaspoon of vanilla extract. Use a mixer or whisk to blend until the mixture is smooth and creamy. Set this bowl aside while you prepare the pumpkin mixture.
- Prepare the Pumpkin Mixture: In a separate bowl, mix 1 cup of canned pumpkin puree, 1 cup of sugar, 1 egg, and 1/3 cup of vegetable oil. Stir until all ingredients are well combined.
- Combine Dry Ingredients: Add 1 cup of all-purpose flour, 1 1/2 teaspoons of pumpkin pie spice, 1 teaspoon of baking powder, 1/2 teaspoon of baking soda, and 1/2 teaspoon of salt to the pumpkin mixture. Stir until just combined, being careful not to overmix.
- Assemble the Bars: Pour the pumpkin batter into the prepared baking dish and spread it into an even layer. Next, take dollops of the cream cheese mixture and place them on top of the pumpkin layer. Using a knife, create a marbled effect by swirling the two mixtures together.
- Add Pecans (Optional): If you love the crunch and flavor of nuts, sprinkle 1/2 cup of chopped pecans on top.
- Bake: Place the baking dish in the preheated oven and bake for 25 to 28 minutes. To check for doneness, insert a toothpick into the center; it should come out clean.
- Cool and Cut: Once baked, remove the bars from the oven and allow them to cool in the pan. After they cool to room temperature, cut them into squares.
These Pumpkin Cream Cheese Bars are a true testament to fall baking and are bound to become a staple in your kitchen.
How to Serve Pumpkin Cream Cheese Bars
Serving these Pumpkin Cream Cheese Bars can be as simple or sophisticated as you wish. Slice the cooled bars into squares and arrange them on a lovely platter.
You can serve them as is, or for a special touch, drizzle some caramel sauce over the top or dust them with powdered sugar. For an extra indulgence, a dollop of whipped cream on the side can elevate the experience even more.
If you’re hosting a gathering, consider pairing these bars with warm beverages like apple cider or a comforting cup of tea. The flavors complement the essence of fall beautifully, creating a cozy atmosphere for your guests.
Regardless of how you choose to serve them, these bars are sure to bring smiles and warmth to any occasion.
Expert Tips: Pumpkin Cream Cheese Bars
Making Pumpkin Cream Cheese Bars can be straightforward, but here are some expert tips to ensure your bars turn out perfectly every time:
- Use Room Temperature Ingredients: Ensure your cream cheese and eggs are at room temperature. This helps create a smooth filling without lumps.
- Don’t Overmix: When combining your dry ingredients with the wet ones, mix just until incorporated. Overmixing can lead to dense bars.
- Check for Doneness Early: Every oven is different. Start checking your bars a few minutes before the suggested baking time to avoid overbaking.
- Cool Completely: Allow your bars to cool completely before cutting. This will help them hold their shape and make for cleaner cuts.
- Feel Free to Experiment: If pecans are not your favorite, consider substituting with walnuts or omitting them altogether. You can also add chocolate chips for a sweet twist.
By keeping these tips in mind, you’ll create Pumpkin Cream Cheese Bars that are not only delicious but also beautifully presented.
How to Store Pumpkin Cream Cheese Bars
Storing your Pumpkin Cream Cheese Bars correctly will keep them fresh for longer. After they’ve cooled completely, place them in an airtight container. These bars can be stored in the refrigerator for up to a week.
If you’d like to store them for a more extended period, consider freezing. Wrap each bar tightly in plastic wrap and place them in a freezer-safe container or bag. They can be frozen for up to three months. When you’re ready to enjoy them, simply thaw them overnight in the refrigerator.
Variations of Pumpkin Cream Cheese Bars
While the classic Pumpkin Cream Cheese Bars are delightful, exploring variations can bring a new twist to this beloved treat. Here are a few ideas:
- Chocolate Swirl: Add chocolate chips to your cream cheese filling and create a marbled effect for a rich and decadent twist.
- Spiced Streusel Topping: Mix oats, brown sugar, and cinnamon with butter to create a crunchy topping that you can sprinkle over the bars before baking.
- Maple Cream Cheese Frosting: Once baked and cooled, top the bars with a drizzle of maple cream cheese frosting for an extra layer of flavor.
- Gluten-Free Version: Swap all-purpose flour with a gluten-free baking blend to accommodate gluten sensitivities.
These variations not only elevate the classic recipe but also offer you endless opportunities to customize and enjoy your Pumpkin Cream Cheese Bars.
Frequently Asked Questions about Pumpkin Cream Cheese Bars
What can I substitute for cream cheese in Pumpkin Cream Cheese Bars?
If you’re looking to substitute cream cheese, consider using mascarpone cheese or Greek yogurt. Both options will still provide a creamy texture, though the flavor might slightly differ.
Can I make these bars ahead of time?
Absolutely! Pumpkin Cream Cheese Bars can be made a day or two in advance. Just ensure they are stored correctly in the refrigerator.
Are Pumpkin Cream Cheese Bars suitable for freezing?
Yes, these bars freeze well! Wrap each piece securely and place them in a freezer-safe container to preserve their freshness.
Can I use fresh pumpkin instead of canned pumpkin puree?
While canned pumpkin puree offers convenience and consistency, you can certainly roast and puree fresh pumpkin. Just be sure it’s well-drained to avoid excess moisture.