Halloween is a time for fun, creativity, and of course, delicious treats! Among the sea of seasonal goodies, Halloween Pop Tarts stand out as a delightful way to celebrate the holiday. These charming pastries, adorned with ghostly shapes and vibrant colors, are not only incredibly tasty but also a fantastic project you can embark on with family or friends. If you’re ready to impress your guests or just indulge in a festive snack, let’s explore why Halloween Pop Tarts are a must-try treat and how to make them!
Why We Love This Halloween Pop Tarts Recipe
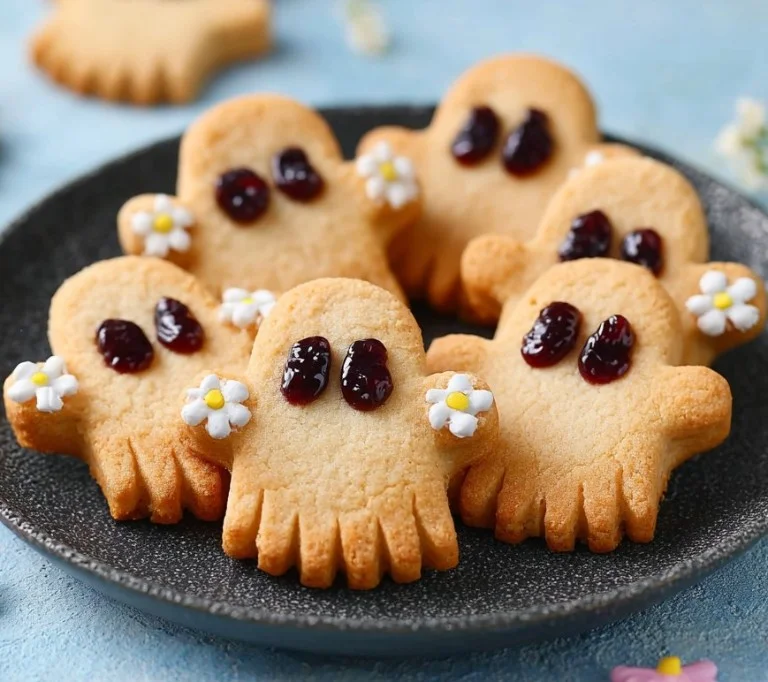
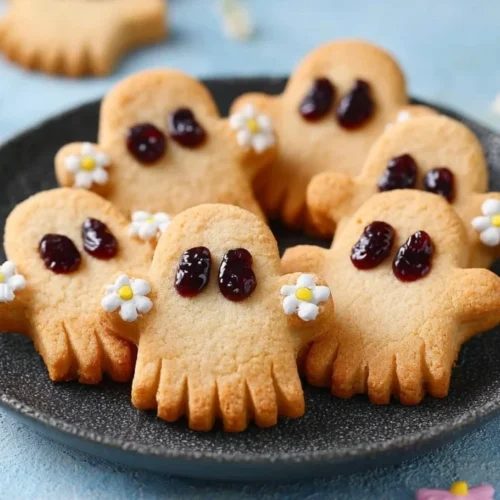
There’s something special about Halloween Pop Tarts that evokes the spirit of the holiday. They combine the charm of homemade goodness with the whimsy of Halloween, making them perfect for both kids and adults. You’ll love the contrast of sweet raspberry jam nestled in a flaky and golden crust, creating a delightful bite with each mouthful. Plus, the ability to shape them into little ghosts not only adds a fun element but also provides a creative outlet for your decorating skills. Whether you’re hosting a Halloween party, preparing classroom treats, or simply craving something festive, these pop tarts deliver on both taste and presentation.
Ingredients for Halloween Pop Tarts
Creating these spooky yet scrumptious treats requires just a handful of ingredients that are simple to find. Gather the following items before you get started:
- 1 package rolled pie crust.
- 3 tablespoons raspberry jam.
- 1/4 cup confectioners sugar (optional).
- 1/2 to 1 teaspoon water (optional).
- 8 candy flowers (optional).
With these ingredients on hand, you’re well on your way to crafting delightful Halloween Pop Tarts that will delight anyone who sees (and tastes) them!
How to Make Halloween Pop Tarts
Now comes the fun part—making your Halloween Pop Tarts! Follow these simple steps to create magical treats that look as good as they taste:
Preheat the oven: Start by preheating your oven to 400°F (200°C). This ensures that your pop tarts bake evenly and turn golden brown.
Prepare your baking sheet: Line a baking sheet with parchment paper. This will help prevent the pop tarts from sticking and make cleanup easier.
Roll out the pie crust: Lightly flour a clean surface and roll out the pie crust to about 1/8-inch thickness. The thinner you’re able to roll it, the crispier your crust will be!
Cut out the shapes: Using a ghost-shaped cookie cutter, cut out as many ghost shapes as you can. You may want to make some extras just in case some break during the process.
Assemble the pop tarts: Take one ghost cutout and carefully cut out eyes for the face. On another cutout, spread a tablespoon of raspberry jam while leaving a border around the edges to ensure it doesn’t spill out during baking.
Seal the edges: Brush a tiny amount of water along the edges of the jam-covered ghost cutout. Place the ghost face cutout on top and press the edges to seal. Make sure they are tightly sealed to contain the delicious filling.
Chill before baking: Place your assembled pop tarts on the lined baking sheet and refrigerate them for 15 minutes. This helps them maintain their shape during baking.
Bake the pop tarts: Bake in the preheated oven for 20 to 25 minutes or until the tops are a lovely golden brown.
Prepare the glaze (optional): While the pop tarts bake, you can make a simple sugar glaze. Mix the confectioners sugar with enough water to reach your desired thickness. Once the pop tarts are out of the oven and cooled slightly, drizzle or spread the glaze over the top. If you’re feeling extra creative, press a candy flower on top for a charming decoration!
Now, your Halloween Pop Tarts are ready to delight everyone around. Grab some festive plates, and let’s serve them up!
How to Serve Halloween Pop Tarts
When it comes to serving your Halloween Pop Tarts, presentation can enhance the spooky experience. Here are a few ideas on how to present them:
Spooky platter: Arrange the pop tarts on a spooky-themed platter, perhaps one featuring haunted houses or ghost designs to complement the treats.
Decorative accents: Add small decorative items, like faux cobwebs or plastic spiders, around the tray to elevate the Halloween atmosphere and create a fun vibe.
Individual servings: For a more personal touch, serve each pop tart individually on small plates with a little bit of Halloween flair. You can include a festive napkin or a small decorative pumpkin for extra charm.
Accompanying drinks: Pair your Halloween Pop Tarts with a festive beverage like apple cider or a fun Halloween punch to enhance the seasonal experience.
Your guests, whether young or old, are sure to enjoy the thoughtful presentation along with the delightful taste of these pop tarts!
Expert Tips: Halloween Pop Tarts
To ensure your Halloween Pop Tarts are nothing short of perfect, here are some expert tips to keep in mind:
Chill the dough: If your pie crust gets too warm while working with it, it can become sticky. Chilling the dough before handling can make it easier to work with and improve the final texture.
Experiment with filling: While raspberry jam is an excellent choice for flavor, feel free to experiment with other fruit jams like strawberry, blueberry, or even pumpkin pie filling for a seasonal twist!
Use a fork for sealing: If you want to add a decorative touch to the edges of your sealed pop tarts, use the tines of a fork to press down along the edges before baking.
Watch the baking time: Keep an eye on your pop tarts as they bake, as oven temperatures can vary. Ideally, you’ll want them golden but not overly browned.
Make ahead: If you’re short on time, prepare your Halloween Pop Tarts ahead of the festivities, wrap them tightly, and store them in the fridge until you’re ready to bake.
With these tips in mind, you will nail the process and wow your family and friends with your baking skills!
How to Store Halloween Pop Tarts
If you find yourself with leftover Halloween Pop Tarts (which is rare but can happen), storing them correctly can help maintain their flavor and texture. Here’s how to do it:
Cool completely: Allow the pop tarts to cool completely after baking. This will prevent condensation from forming that can make them soggy.
Wrap tightly: Use plastic wrap or aluminum foil to wrap each pop tart individually. This keeps them fresh and reduces the risk of them sticking together.
Use an airtight container: Place the wrapped pop tarts in an airtight container or resealable bag. Be sure to squeeze out any air to help preserve their freshness.
Refrigerate for longer shelf life: You can store them at room temperature for a day or two, but for longer storage, keep them in the fridge, where they will last up to a week.
To enjoy your pop tarts at a later time, you can reheat them in the oven or microwave for a few seconds to bring back some of their original flaky goodness.
Variation of Halloween Pop Tarts
Feel free to get creative with recipes! Here are some fun variations for your Halloween Pop Tarts to try:
Chocolate-filled pop tarts: Instead of jam, fill the pop tarts with chocolate hazelnut spread. The rich chocolate flavor will be a big hit among the chocolate lovers!
Pumpkin spice filling: Use pumpkin puree mixed with sugar and pumpkin spice for a seasonal twist that embodies the essence of fall.
Decorative themes: Experiment with different shapes like bats or Jack-o’-lanterns. Each shape can have different fillings to match the spooky character.
Sprinkles and toppings: Instead of just using the candy flower on top, add colorful sprinkles, edible glitter, or even chocolate drizzles to enhance the appearance and bring more fun!
With these variations, you can keep the Halloween spirit alive and surprise your guests with something new every time.
FAQ about Halloween Pop Tarts
Here are some frequently asked questions that can help answer any lingering queries you might have regarding Halloween Pop Tarts:
Can you freeze Halloween Pop Tarts?
Absolutely! You can freeze unbaked pop tarts. Just assemble the shapes, wrap them tightly in plastic wrap, and place them in the freezer. When you’re ready, bake them straight from the freezer—just add a few extra minutes to the baking time.
How can I make the filling not ooze out?
To prevent the filling from bursting out during the baking process, make sure you create a good seal on the edges by pressing firmly and consider chilling the assembled pop tarts for at least 15 minutes before baking.
Can I make these pop tarts gluten-free?
Yes! You can swap the rolled pie crust with a gluten-free pie crust option available in stores, or you can make your own with gluten-free flour.
What if I don’t have a ghost cookie cutter?
No worries! You can utilize any shape you prefer. Use a sharp knife to create your desired pop tart shapes or make rectangular ones for a classic look.
Halloween Pop Tarts
Equipment
- Oven
- Baking Sheet
- Parchment Paper
- Rolling Pin
- Ghost-shaped cookie cutter
Ingredients
- 1 package rolled pie crust
- 3 tbsp raspberry jam
- 1/4 cup confectioners sugar optional
- 1/2 to 1 tsp water optional
- 8 candy flowers optional


Instructions
- Preheat the oven to 400°F (200°C) and line a baking sheet with parchment paper.
- Roll out the pie crust to about 1/8-inch thickness and cut out ghost shapes using a cookie cutter.
- On one ghost cutout, cut out eyes for the face. On another, spread a tablespoon of raspberry jam, leaving a border.
- Brush water along the edges of the jam-covered ghost cutout, place the face cutout on top, and press to seal.
- Chill assembled pop tarts for 15 minutes, then bake for 20-25 minutes until golden brown.
- Prepare a glaze with confectioners sugar and water, drizzle over cooled pop tarts, and add candy flowers if desired.
Send me this recipe!
Just enter your email below and get it sent straight to your inbox!