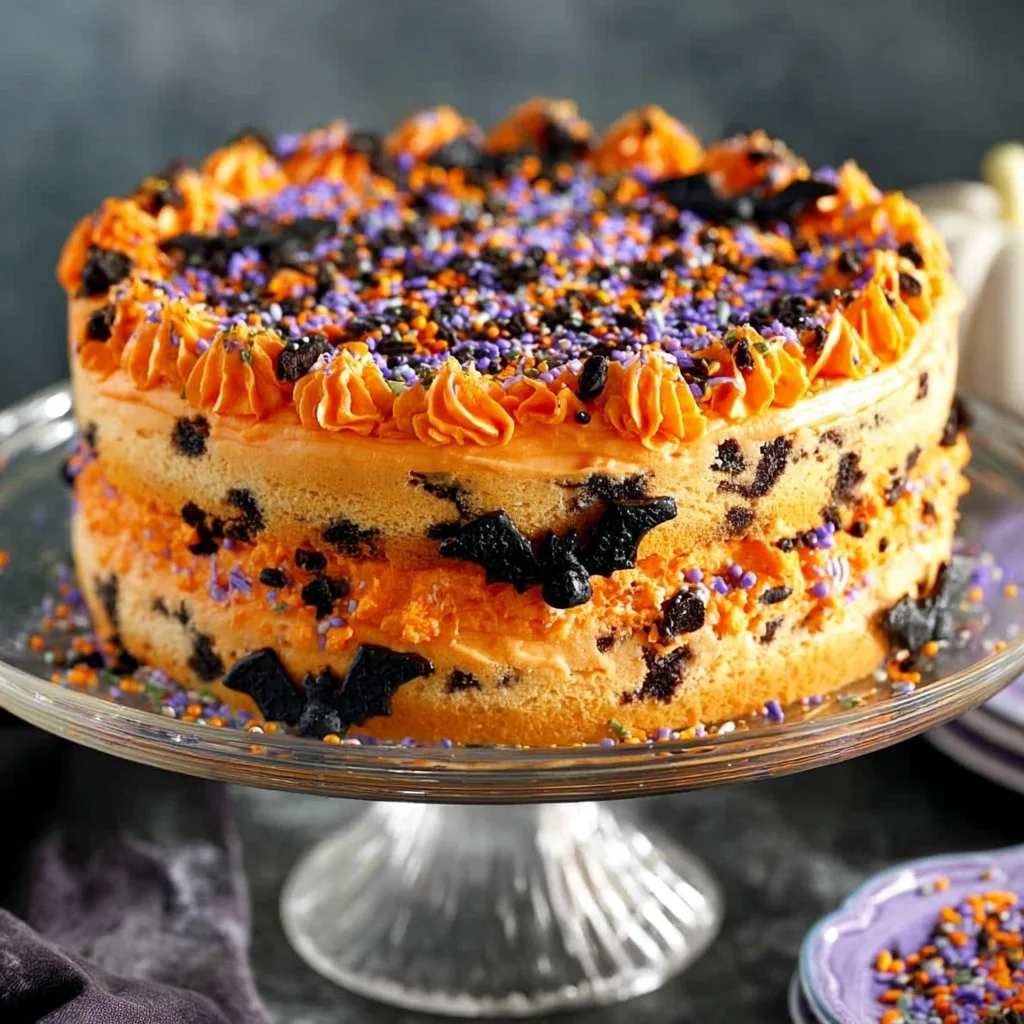
As the leaves turn and the air gets a little crisper, Halloween approaches with its whimsical charm and delicious treats. One dessert that perfectly captures the spirit of the season is the Halloween Icebox Cake. This dreamy, layered delight combines creamy whipped goodness with the beloved crunch of Oreo cookies, dressed up in festive shades of orange. If you’re looking for a show-stopping dessert that not only tastes incredible but also brings joy to your Halloween gatherings, you’ve found your match. Let’s dive into the enticing world of this Halloween Icebox Cake.
Why We Love This Halloween Icebox Cake Recipe
There’s something magical about desserts that summon nostalgia while introducing a twist. The Halloween Icebox Cake is one such creation, effortlessly blending simplicity with creativity. You’ll appreciate how easy it is to whip up this cake, requiring just a handful of ingredients and minimal baking skills. It offers a deliciously sweet and creamy flavor profile that everyone will adore. The best part? You can prepare it in advance, allowing for more time to enjoy your Halloween festivities with friends and family. With its striking appearance and delightful taste, it’s bound to be the highlight of your Halloween celebration!
Ingredients about Halloween Icebox Cake
To create your very own Halloween Icebox Cake, you’ll need the following ingredients:
- 4 cups of heavy whipping cream: This will be your base for the luscious whipped topping.
- 1 teaspoon of vanilla extract: A touch of vanilla offers a fragrant flavor to compliment the cream.
- 1 cup of powdered sugar: This sweetener adds just the right amount of sweetness to the whipped cream.
- Orange food coloring: This ingredient is essential for achieving that festive Halloween hue.
- 2 (14.5-ounce) packages of Oreo cookies: These iconic cookies provide a crunchy and chocolaty layer.
- Orange icing (for decoration): This is used to give your cake a charming, spooky finish.
- Sprinkles (for decoration): Rainbow sprinkles or Halloween-themed sprinkles will add a splash of joy!
How to Make Halloween Icebox Cake Directions
Creating your Halloween Icebox Cake can be an exciting adventure in the kitchen! Begin by gathering your ingredients and following these straightforward steps:
Prepare the Pan: Start by lining a 9-inch springform pan with plastic wrap or parchment paper. Be sure to let it extend about an inch above the sides. This will make it easier to remove your cake later on.
Whip the Cream: In the bowl of your electric mixer, attach the whisk and pour in the heavy cream, vanilla extract, and powdered sugar. Turn up the speed and whisk on high for about 5 minutes, or until stiff peaks form. You want that perfect fluffy texture that will hold your cake layers together beautifully!
Color the Cream: Divide your whipped cream into three equal bowls. Now for the fun part—grab that orange food coloring and add a few drops to each bowl. Gently fold the coloring in until you achieve different shades of orange. This variety of colors will make your cake look stunning!
Layer the Cake: Now, it’s time to build your cake. Start by placing a single layer of Oreo cookies at the bottom of your prepared pan. If you have any gaps, feel free to break up some extra cookies to fill them in.
First Layer of Whipped Cream: Take one of the bowls with the darker shade of whipped cream and spread a third of it evenly over the layer of cookies.
Repeat the Process: Add another layer of Oreo cookies on top of the whipped cream. Follow this with another third of the whipped cream, spreading it out evenly.
Final Layer: Add even more Oreo cookies on top, followed by the final third of whipped cream. Smooth it out to create a beautiful top layer.
Chill the Cake: Cover your masterpiece with plastic wrap and place it in the refrigerator. Allow it to chill for at least 6 hours or, better yet, overnight. This chilling time lets the flavors meld together and the cookies soften for the perfect texture.
Decorate and Serve: When you’re ready to serve, take your cake out of the fridge. Carefully remove the springform pan and peel away the plastic wrap or parchment. Decorate the top with orange icing and a sprinkle of colorful sprinkles to bring your Halloween Icebox Cake to life.
How to Serve Halloween Icebox Cake
As you prepare to dazzle your guests with the delightful Halloween Icebox Cake, consider a few serving suggestions to enhance the experience. Slice the cake into generous wedges, allowing everyone to enjoy a piece of this creamy wonder. Pair each slice with a scoop of vanilla ice cream for an indulgent treat that contrasts beautifully with the crispness of the cookies.
For added flair, consider presenting your cake on a themed platter surrounded by decorative items like mini pumpkins or spooky décor. You can also serve a mini version in small cups or jars for an easy grab-and-go dessert for kids and adults alike. This is perfect for Halloween parties where dessert can double as decoration!
Expert Tips: Halloween Icebox Cake
To make your Halloween Icebox Cake the best it can be, keep these expert tips in mind:
- Use chilled bowls and beaters: For the best whipped cream texture, chill your mixing bowl and whisk attachment in the refrigerator before whipping. This helps the cream whip faster and achieve those stiff peaks you desire.
- Don’t skimp on chilling time: Although you can technically eat the cake after just a few hours, letting it chill overnight allows the flavors to deepen and the cookies to soften to achieve the right texture.
- Be creative with decorations: Use mini Halloween-themed candies, edible glitter, or even chocolate spiders to spice up your cake decorations. The more creative you get, the more impressive the presentation will be!
How to Store Halloween Icebox Cake
After putting in all that effort to create your festive masterpiece, you’ll want to know how to keep it fresh. The Halloween Icebox Cake is best stored in the refrigerator. If you have leftovers, ensure they are tightly covered with plastic wrap or aluminum foil to maintain freshness. It will keep well in the fridge for up to four days, making it a fantastic option for meal prep or festive snacking long after Halloween is over!
Variation of Halloween Icebox Cake
While this recipe is delightful as it is, consider experimenting with variations to tailor it to your taste or dietary needs. Here are a few ideas:
- Add Flavor Variety: Instead of just vanilla, consider adding a splash of almond extract for a unique twist. You can also incorporate flavored extracts like orange or pumpkin spice for a seasonal spin that ties in with the Halloween theme!
- Swap the Cookies: If you’re looking for a slight change, consider using different cookies like chocolate chip, peanut butter, or even gluten-free options. Each type will bring its unique flavor and crunch.
- Incorporate Layers: For an extra indulgent treat, layer in some chocolate or pumpkin puree between the layers of whipped cream. This will add a new flavor dimension that brings festive flair!
FAQ: Halloween Icebox Cake
What is a Halloween Icebox Cake?
A Halloween Icebox Cake is a delicious layered dessert made with whipped cream and Oreo cookies, colored in festive shades of orange. It’s a no-bake cake that requires chilling time to set.
Can I make this cake ahead of time?
Absolutely! In fact, this cake tastes even better when made a day ahead. Chilling it overnight allows the flavors to meld and the cookies to soften perfectly.
How long can I keep the Halloween Icebox Cake?
You can store it in the refrigerator for up to four days. Just be sure to cover it properly to retain freshness.
What other toppings can I use?
Feel free to get creative! You can use Halloween-themed sprinkles, candies, or even whipped topping for added texture and fun.

Halloween Icebox Cake
Equipment
- 9-inch Springform Pan
- Electric Mixer
Ingredients
- 4 cups heavy whipping cream
- 1 teaspoon vanilla extract
- 1 cup powdered sugar
- orange food coloring
- 2 packages Oreo cookies 14.5 ounces each
- orange icing for decoration
- sprinkles for decoration


Instructions
- Line a 9-inch springform pan with plastic wrap or parchment paper, letting it extend above the edges.
- In a mixing bowl, combine heavy cream, vanilla extract, and powdered sugar. Whip on high for about 5 minutes until stiff peaks form.
- Divide the whipped cream into three bowls. Add orange food coloring to each bowl and fold until you achieve different shades of orange.
- Layer Oreo cookies in the bottom of the prepared pan, filling any gaps as necessary.
- Spread a third of the darker shade of whipped cream over the cookies.
- Add another layer of Oreo cookies, followed by another third of whipped cream. Repeat with more cookies and the final third of whipped cream on top.
- Cover with plastic wrap and refrigerate for at least 6 hours or overnight.
- Once set, remove the pan and plastic wrap. Decorate the top with orange icing and sprinkles.
Send me this recipe!
Just enter your email below and get it sent straight to your inbox!