
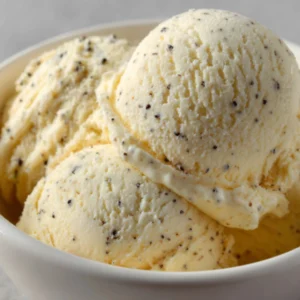
This vanilla bean ice cream is simple to make with just a few ingredients. It is creamy, smooth, and full of natural vanilla flavor. Making it at home gives you a fresh, rich dessert that tastes better than store-bought ice cream.
Why We Love This Vanilla Bean Ice Cream Recipe
This vanilla bean ice cream is a favorite because it’s simple, elegant, and incredibly creamy. The recipe requires just six ingredients, yet it delivers a luxurious taste that feels like it belongs in a gourmet dessert shop. By making your own ice cream, you control the sweetness, texture, and freshness of every scoop. You also get to enjoy the rich, natural flavor of real vanilla beans rather than artificial flavoring. This recipe is versatile too—you can serve it on its own, pair it with fruit or cake, or use it as a base for other dessert creations. The process is rewarding, and the result is a dessert that feels like a special treat every time.
Ingredients for Vanilla Bean Ice Cream
- 1 ½ cups whole milk
- 1 ½ cups heavy cream
- ⅔ cup granulated sugar, divided
- 1 vanilla bean, split and scraped
- 1 teaspoon kosher salt
- 5 egg yolks
How to Make Vanilla Bean Ice Cream
Making vanilla bean ice cream might seem complicated, but if you follow each step carefully, you’ll be rewarded with smooth, creamy results. Start by ensuring your ice cream maker’s bowl and storage container are pre-frozen. This helps prevent the ice cream from freezing unevenly.
Begin by making the custard base. Place a fine mesh strainer over a medium bowl, and set that bowl over a larger bowl filled with ice. In a heavy saucepot, combine the milk, cream, one-third of the sugar, and the kosher salt. Using a paring knife, split the vanilla bean and scrape out the seeds. Add both the seeds and the pod into the cream mixture. Heat over medium heat, stirring occasionally, until the sugar dissolves and the mixture begins to steam. Be careful not to overheat at this stage.
While the cream is heating, whisk the egg yolks with the remaining sugar in a separate bowl until the mixture turns pale yellow and lightens in texture. Slowly pour the warm cream mixture into the egg yolks while whisking constantly to prevent the eggs from curdling. Once combined, pour everything back into the pot and return it to medium heat. Stir constantly until the custard thickens enough to coat the back of a wooden spoon. You’re aiming for about 85°C (180°F) for the perfect texture.
Once thickened, strain the custard through the prepared mesh into the ice-filled bowl. Stir occasionally as it cools, and then wrap it tightly in plastic wrap. Chill in the refrigerator for at least three hours or overnight for the best results.
When your custard is fully chilled, it’s time to churn. Pour the mixture into your ice cream machine following the manufacturer’s instructions. Always add the custard while the machine is running to avoid sticking. Churn until the ice cream increases in volume by about one-third and pulls away from the sides, holding its shape when scooped. In a standard Cuisinart machine, this takes around 25 minutes. Transfer the ice cream to a quart-sized container and cover with plastic wrap, making sure it touches the ice cream to prevent ice crystals. Freeze for at least three hours, but overnight is ideal for a thicker texture.
How to Serve Vanilla Bean Ice Cream
Serving vanilla bean ice cream is a chance to get creative. You can enjoy it straight from the freezer in a classic bowl or cone for a simple treat. For a more indulgent dessert, serve scoops alongside fresh berries, chocolate sauce, or warm fruit cobblers. Vanilla bean ice cream is also perfect for pairing with cakes or pies—its creamy texture balances dense, sweet desserts beautifully. Consider adding a sprinkle of toasted nuts or a drizzle of caramel for added flavor and texture. Your guests will appreciate the attention to detail, and you’ll enjoy the satisfaction of serving a dessert that feels both homemade and luxurious.
Expert Tips for Vanilla Bean Ice Cream
There are a few tricks to ensure your vanilla bean ice cream turns out perfectly every time. First, always pre-freeze your ice cream maker’s bowl. This helps the custard freeze evenly and prevents it from becoming icy. When scraping your vanilla bean, don’t discard the pod; adding it to the cream while heating infuses even more flavor. Be careful with the heat when cooking the custard—too hot and you’ll scramble the eggs, too cool and the ice cream won’t thicken properly. Churning time varies by machine, so keep an eye on the texture rather than the clock. Finally, storing the ice cream with plastic wrap directly on the surface prevents ice crystals and preserves its creamy texture.
How to Store Vanilla Bean Ice Cream
Storing homemade ice cream correctly is essential for maintaining its flavor and texture. Always use an airtight container to prevent freezer burn and off-flavors. Place plastic wrap directly on the surface of the ice cream before sealing the container. Keep it in the coldest part of your freezer, ideally away from the door. Properly stored, your vanilla bean ice cream can last up to one month. Avoid repeated thawing and refreezing, as this will affect its smooth consistency.
Variations of Vanilla Bean Ice Cream
While this recipe is delicious on its own, you can experiment with flavors and mix-ins to create unique variations. Add chopped chocolate, caramel swirls, or crushed cookies for a personalized touch. Fresh fruit like strawberries or peaches can be folded in after churning for a refreshing twist. For a richer texture, substitute part of the cream with sweetened condensed milk. You can also infuse the custard with flavors like cinnamon, coffee, or citrus zest while heating the cream. These variations allow you to make the ice cream uniquely yours while maintaining the classic vanilla bean base.
Frequently Asked Questions About Vanilla Bean Ice Cream
What makes homemade vanilla bean ice cream different from store-bought?
Homemade ice cream uses fresh ingredients and real vanilla beans, resulting in a richer flavor and smoother texture without artificial additives.
Can I make this recipe without an ice cream machine?
Yes, you can pour the custard into a freezer-safe container and stir every 30 minutes until it’s fully frozen to achieve a creamy texture.
How long should I chill the custard before churning?
For the best results, chill the custard for at least three hours or overnight. The colder the base, the smoother the ice cream.
Can I use vanilla extract instead of a vanilla bean?
Yes, you can use 1 tablespoon of vanilla extract as a substitute, though the flavor will be slightly less intense than using real beans.
How do I prevent ice crystals in my ice cream?
Place plastic wrap directly on the surface before sealing the container and avoid thawing and refreezing the ice cream. Churning properly also helps prevent crystals.
What can I serve with vanilla bean ice cream?
You can pair it with fruit, pie, cake, chocolate sauce, caramel, or toasted nuts for a simple yet elegant dessert combination.
Vanilla Bean Ice Cream
Equipment
- Ice Cream Maker
- Medium saucepot
- Fine Mesh Strainer
- Mixing Bowls:
Ingredients
- 1 ½ cups whole milk
- 1 ½ cups heavy cream
- ⅔ cup granulated sugar divided
- 1 vanilla bean split and scraped
- 1 teaspoon kosher salt
- 5 large egg yolks


Instructions
- Pre-freeze your ice cream maker’s bowl and storage container. In a medium saucepot, combine milk, cream, one-third of the sugar, and salt.
- Scrape the seeds from the vanilla bean and add both seeds and pod to the cream mixture. Heat over medium heat until steaming.
- In a separate bowl, whisk egg yolks with the remaining sugar until pale. Slowly whisk in warm cream mixture to temper the eggs.
- Return the mixture to the pot and cook over medium heat until thickened and coats the back of a spoon (about 85°C or 180°F).
- Strain the custard through a fine mesh strainer into a bowl set over ice. Stir occasionally as it cools, then wrap tightly and chill for at least three hours or overnight.
- Churn the chilled custard in your ice cream maker according to the manufacturer’s instructions until thickened. Transfer to a quart-sized container and freeze for at least three hours.
Send me this recipe!
Just enter your email below and get it sent straight to your inbox!