Banana Pudding Ice Cream combines the best of two worlds: the creamy richness of ice cream and the sweet, comforting flavors of classic banana pudding. You get the smooth, velvety texture of a frozen treat while enjoying the familiar taste of bananas, vanilla, and crunchy wafers. This no-churn dessert is surprisingly simple to make, yet it feels indulgent and luxurious.
Why We Love This Banana Pudding Ice Cream Recipe
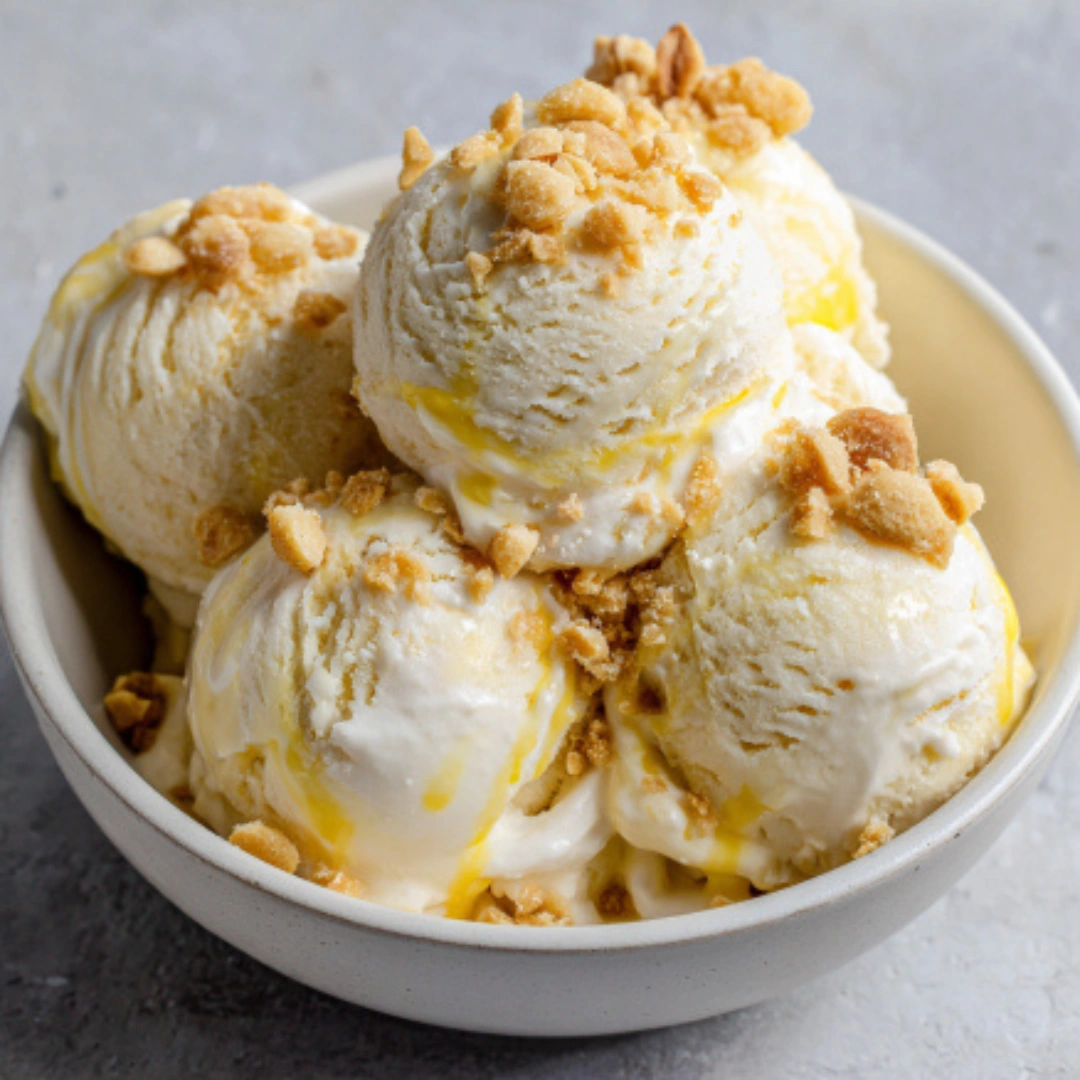
There are a few reasons this Banana Pudding Ice Cream stands out as a favorite. First, it’s incredibly easy to make, even if you’ve never made ice cream before. There’s no churning machine required, and you can assemble it in under 20 minutes before letting it set overnight. Second, it’s versatile. You can use traditional dairy ingredients or switch to plant-based alternatives for a vegan or lactose-free version. Third, it hits all the flavor notes you love about banana pudding: sweet bananas, smooth vanilla, and crunchy wafers folded throughout. Each bite delivers a perfect balance of creamy ice cream and light crunch, creating an irresistible texture that keeps everyone coming back for more. Finally, it’s a dessert that looks as good as it tastes. The golden hue of the bananas, the soft whipped ribbons, and the scattered wafers on top make it a visually appealing treat that you’ll be proud to serve.
Ingredients for Banana Pudding Ice Cream
- 2 yellow bananas (not fully ripe)
- 1 can (11 oz) sweetened condensed coconut milk, or 14 oz can sweetened condensed milk minus ⅓ cup
- Pinch of kosher salt
- 1 tsp vanilla bean paste or vanilla extract
- Yellow gel food coloring (optional)
- 8–9 oz container whipped topping, thawed (Cool Whip or plant-based alternative)
- 2 cups vanilla wafers, plus extra for topping
How to Make Banana Pudding Ice Cream
The process is simple, but there are a few key steps to ensure your ice cream comes out creamy and well-mixed. Start by blending the bananas until smooth in a food processor. This creates a creamy base that mixes easily with the other ingredients. Next, add the sweetened condensed milk, a pinch of salt, and the vanilla bean paste. Blend until everything is fully incorporated. If you want a more vibrant yellow color, add a drop of yellow food coloring.
Once your mixture is smooth, pour it into a large bowl. Scoop in about half of the whipped topping and gently fold it in. Folding, rather than stirring aggressively, keeps the whipped topping airy and light, creating a delicate texture in your finished ice cream. Add the remaining whipped topping and fold in the vanilla wafers. Crush the wafers lightly with your hands before adding to create ribbons of crunch throughout the dessert.
Pour the finished mixture into a 9-inch pie dish or any similar freezer-safe container. Top with additional vanilla wafers for presentation and extra crunch. Cover with plastic wrap and refrigerate overnight. This allows the ice cream to set and the flavors to meld, creating a creamy and rich dessert. The next day, let the ice cream thaw for about 10 minutes before scooping to make serving easier.
How to Serve Banana Pudding Ice Cream
Serving this ice cream is simple, but presentation can make it feel extra special. Use a large ice cream scoop to portion into bowls or dessert glasses. For added flair, sprinkle a few more crushed vanilla wafers on top. You can also drizzle a small amount of caramel or chocolate sauce for a decorative touch if desired.
This ice cream pairs well with fresh banana slices on the side, a dollop of whipped cream, or even a few chocolate shavings. If serving to a crowd, consider scooping the ice cream directly onto a dessert platter and letting guests help themselves. Its soft, creamy texture allows for easy scooping, and the ribbons of whipped topping and chunks of wafers make every serving visually appealing. Whether enjoyed on a warm summer day or as a comforting treat after dinner, this Banana Pudding Ice Cream is sure to satisfy sweet cravings.
Expert Tips for Banana Pudding Ice Cream
- Choose the right bananas: Slightly underripe bananas are best because they are firm enough to blend smoothly and hold their flavor without becoming overly mushy.
- Whipped topping matters: Whether you use a traditional or plant-based option, make sure it’s fully thawed before folding. This ensures a smooth and creamy texture throughout the ice cream.
- Folding technique: Be gentle when incorporating the whipped topping and wafers. Over-mixing can deflate the whipped topping and make your ice cream less airy.
- Freeze time: Overnight freezing is recommended to allow the ice cream to set completely. If in a hurry, a minimum of 6 hours can work, but overnight yields the best texture.
- Add-ins: Feel free to fold in chocolate chips, caramel swirls, or even a few chopped nuts to customize the flavor. Just be careful not to overpower the banana and vanilla base.
- Serving tips: Allow the ice cream to sit at room temperature for a few minutes before scooping for easier serving and a softer texture.
How to Store Banana Pudding Ice Cream
Proper storage is key to maintaining the texture and flavor of your ice cream. Keep it in an airtight container in the freezer to prevent ice crystals from forming. If stored correctly, it can last up to two weeks. Avoid leaving it out for extended periods to prevent melting and refreezing, which can affect texture. For best results, store in a shallow container rather than a deep one to allow faster and more even freezing. If your ice cream hardens too much, let it sit for 10–15 minutes at room temperature before scooping.
Variations of Banana Pudding Ice Cream
You can easily customize this recipe to suit different tastes and dietary needs. For a dairy-free version, use coconut whipped topping and sweetened condensed coconut milk. To make it extra indulgent, swirl in chocolate or caramel sauce before freezing. For texture variety, add crushed graham crackers or a layer of sliced bananas in between scoops. You can also experiment with flavored extracts, such as almond or coconut, to add subtle depth. Another fun variation is to make individual portions in small jars or cups, layering ice cream, wafers, and whipped topping for a parfait-style dessert. The possibilities are endless, and each variation retains the creamy, flavorful essence of the original recipe.
Frequently Asked Questions about Banana Pudding Ice Cream
Can I make Banana Pudding Ice Cream ahead of time?
Yes! This ice cream is perfect for preparing a day in advance. Simply assemble the mixture, freeze overnight, and serve the next day.
Can I use regular sweetened condensed milk instead of coconut milk?
Absolutely. Regular sweetened condensed milk works perfectly if you are not avoiding dairy. It provides the same creamy texture and sweet flavor.
How do I prevent the ice cream from getting icy?
Make sure to fold in the whipped topping gently and use an airtight container for storage. Avoid repeated thawing and refreezing, which can create ice crystals.
Can I use fully ripe bananas?
You can, but slightly underripe bananas hold their shape better and create a smoother texture without becoming overly mushy.
Is this recipe gluten-free?
Yes, if you use gluten-free vanilla wafers. Otherwise, traditional wafers will contain gluten.
Can I add other flavors to the ice cream?
Definitely! Chocolate chips, caramel, or chopped nuts can all be folded in to create new flavor combinations while keeping the banana pudding base intact.

Banana Pudding Ice Cream
Equipment
- Food Processor
- 9-inch pie dish or freezer-safe container
Ingredients
- 2 yellow bananas not fully ripe
- 1 can sweetened condensed coconut milk 11 oz, or 14 oz regular minus ⅓ cup
- pinch of kosher salt
- 1 teaspoon vanilla bean paste or vanilla extract
- yellow gel food coloring (optional)
- 8-9 oz whipped topping thawed (Cool Whip or plant-based alternative)
- 2 cups vanilla wafers plus extra for topping


Instructions
- Blend bananas in a food processor until smooth. Add sweetened condensed milk, salt, and vanilla; blend until incorporated.
- Pour mixture into a bowl and fold in half of the whipped topping gently. Add remaining whipped topping and fold in crushed vanilla wafers.
- Transfer mixture to a freezer-safe container, top with additional wafers, and cover with plastic wrap. Freeze overnight.
Send me this recipe!
Just enter your email below and get it sent straight to your inbox!