Red Velvet Poke Cake is truly a showstopper. This dessert takes the classic red velvet cake we all adore and transforms it into a delightful treat that is moist, flavorful, and irresistibly creamy. The unique process of poking holes in the cake allows for an infusion of sweetness, elevating the original recipe into something extraordinary. Imagine taking your fork to a cake that is not only plush and velvety but also has a rich white chocolate and cream cheese finish. This delightful concoction is perfect for any occasion, be it a festive gathering or a casual family dinner.
Why We Love This Red Velvet Poke Cake Recipe
One of the standout features of this cake is its ability to cater to different palates. Whether you’re a devoted red velvet enthusiast or new to this delightful dessert, the combination of textures and flavors makes it hard to resist. The classic red velvet is soft and tender, while the white chocolate-drizzled goodness that seeps into the holes provides a burst of sweetness.
Another reason to fall in love with this cake is its ease of preparation. With simple ingredients readily available and straightforward steps, you can whip up this indulgent dessert in no time. Plus, the poke cake technique makes it forgiving; who doesn’t love a dessert that allows for a bit of fun and creativity? It’s a delicious way to showcase your baking skills without the stress of perfection.
Ingredients for Red Velvet Poke Cake
To bring this cake to life, gather the following ingredients:
- 1 box red velvet cake mix
- 1 cup water
- 1/2 cup vegetable oil
- 3 large eggs
- 1 cup sweetened condensed milk
- 1 cup white chocolate chips
- 8 oz cream cheese, softened
- 1/2 cup butter, softened
- 3 cups powdered sugar
- 1 tsp vanilla extract
The key ingredients like the red velvet cake mix create that iconic flavor and rich color, while the unique addition of white chocolate and sweetened condensed milk elevates the cake, making it irresistible.
How to Make Red Velvet Poke Cake Directions
Getting started with your Red Velvet Poke Cake is both fun and simple. Here’s how you create this delightful dessert, step by step.
- Preheat Your Oven: First, preheat the oven according to the instructions on the cake mix box. This ensures that your cake bakes evenly.
- Prepare the Cake Batter: In a mixing bowl, combine the red velvet cake mix, water, vegetable oil, and eggs. Stir everything together until smooth. This doesn’t take long, so feel free to mix vigorously to incorporate air, which will help your cake rise beautifully.
- Bake the Cake: Pour your batter into a greased baking dish and bake as directed on the cake mix package. The aroma wafting through your kitchen will set the mood for indulging in this delightful dessert.
- Cool and Poke: Once the cake is baked, allow it to cool for about 10 minutes. While it’s still warm, use a fork to poke holes all over the top of the cake. This step is crucial as it allows the sweetened condensed milk mixture to seep into the cake, adding sweetness and moisture.
- Make the White Chocolate Mixture: In a small saucepan, melt the white chocolate chips with sweetened condensed milk over low heat. Stir the mixture until smooth. Once melted, pour this delicious mixture over the cake, ensuring it seeps into all the holes you made.
- Cool Completely: Allow the cake to cool completely. This step is essential to let the flavors meld and make the cake even more delectable.
- Prepare the Frosting: In a separate bowl, beat together the softened cream cheese and butter until smooth and creamy. Gradually add in the powdered sugar and vanilla extract, continuing to beat until your frosting is fluffy and light.
- Frost the Cake: Once the cake is completely cool, spread the cream cheese frosting evenly over the top. Be generous! You want every bite to encapsulate that creamy goodness.
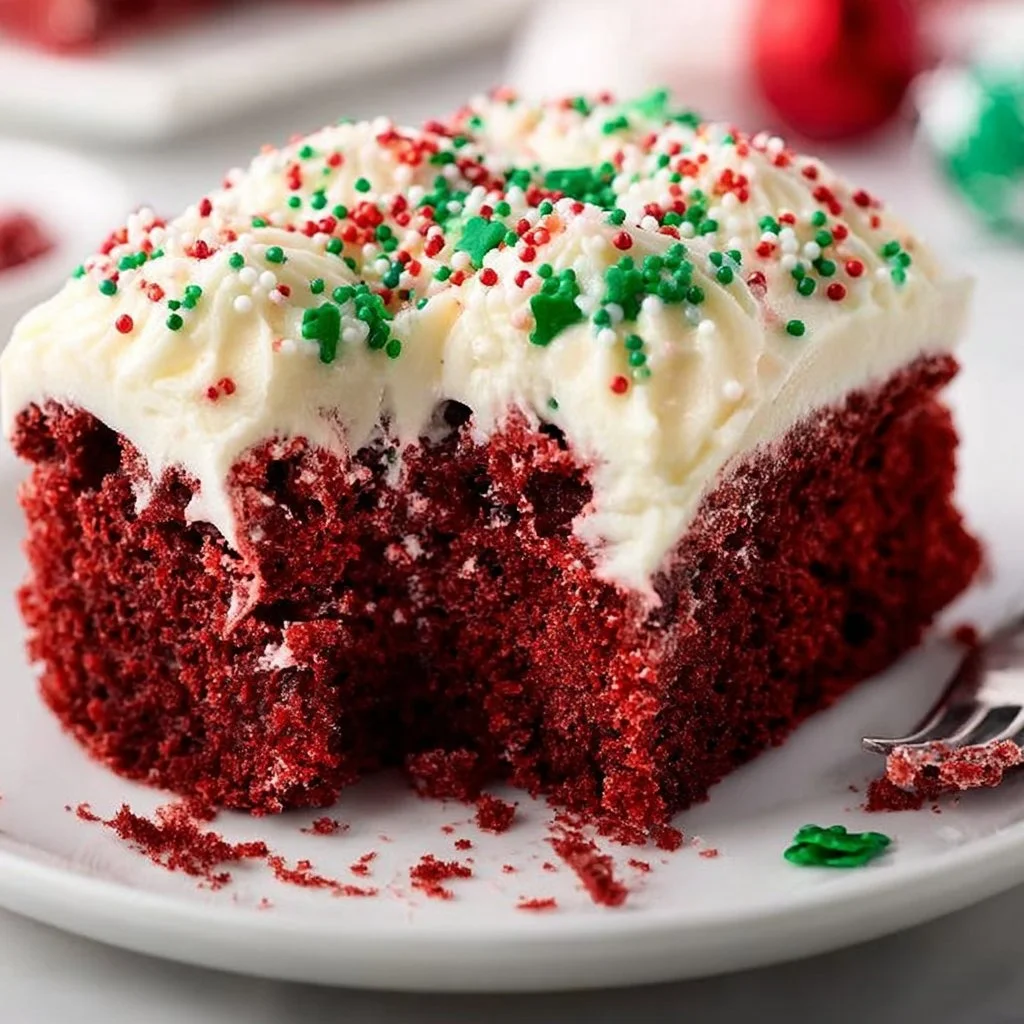
- Serve It Up: Cut your cake into squares or slices. Each piece should reveal a moist, luscious interior with the appealing red color and creamy white topping that makes this cake a stunning centerpiece.
How to Serve Red Velvet Poke Cake
Serving your Red Velvet Poke Cake can be as creative as the cake itself. Whether you’re hosting a big celebration or an intimate gathering, presenting your cake can enhance the experience for your guests.
- Plating: Serve it on a decorative cake stand or a simple white plate to make the red color pop. A garnish of fresh strawberries or raspberries can add a lovely touch, providing a fresh contrast to the rich flavors.
- Accompaniments: Consider serving your cake with a dollop of whipped cream or a scoop of vanilla ice cream for an extra indulgent treat. The creaminess of the ice cream pairs beautifully with the moist cake.
- Beverage Pairing: Complement this dessert with a steaming cup of coffee, or opt for a chilled glass of milk. Both options will enhance the flavors, making every bite an experience.
- Cutting Tips: Since this cake is incredibly moist, using a serrated knife to slice it will yield clean edges. Wipe the knife between cuts to maintain a nice presentation.
Expert Tips for Perfecting Red Velvet Poke Cake
As you embark on your Red Velvet Poke Cake journey, here are some expert tips to ensure your creation is as delicious as it can be:
- Don’t skimp on cooling: Make sure to allow the cake to cool completely before adding the frosting. This not only prevents melting but also makes sure the frosting has the right texture.
- Soak in flavor: After pouring the sweetened condensed milk mixture over the cake, let it sit for a while before frosting. This gives the mixture time to seep deeper into the holes and enhances the flavor.
- Use high-quality ingredients: For the best taste, opt for high-quality white chocolate and freshly softened cream cheese. The flavors will shine through.
- Experiment with toppings: Feel free to add some variety to the frosting—chopped nuts, chocolate shavings, or even a drizzle of caramel sauce can introduce exciting new dimensions of flavor.
- Chill before serving: Refrigerating your cake for a few hours can improve the texture and make it even more refreshing. Just make sure to cover it to prevent it from drying out.
How to Store Red Velvet Poke Cake
If you find yourself with leftover Red Velvet Poke Cake (which is a rarity!), storing it correctly will help maintain its delicious flavor and moisture.
- Refrigeration: Store your cake in an airtight container in the refrigerator. The cream cheese frosting is best kept cool to ensure its freshness.
- Cover Tightly: If you don’t have a container, cover the cake with plastic wrap or aluminum foil. This will prevent it from drying out or absorbing odors from the fridge.
- Enjoy Within a Week: For the best taste and texture, consume your leftover cake within 5-7 days. The flavors only get better as it sits and absorbs the creamy goodness.
Variations of Red Velvet Poke Cake
One of the most exciting aspects of baking is the opportunity to customize recipes according to your preferences or occasions. Here are some delicious variations to consider for your Red Velvet Poke Cake:
- Chocolate Poke Cake: Substitute the red velvet mix with chocolate cake mix for an entirely different take. Use the same methods to make it as tasty as this original.
- Berry Poke Cake: Incorporate fresh berries, such as raspberries or blueberries, into the frosting or right into the batter. This adds a fruity flavor that complements the richness of the red velvet.
- Nutty Twist: Fold in chopped pecans or walnuts into the batter before baking for a delightful crunch that pairs well with the creamy texture of the frosting.
- Layered Delight: Bake two separate cakes and layer them with frosting in between. This creates an impressive dessert that’s even more decadent.
- Festive Add-ons: Decorate with seasonal sprinkles or edible flowers to match holidays or celebrations. This makes for a visually stunning dessert for gatherings.
FAQ about Red Velvet Poke Cake
What makes a poke cake unique?
A poke cake is unique due to its method of preparation. The holes created in the top of the cake allow for delicious liquids or syrups to soak in, creating extra layers of flavor and moisture.
Can I make Red Velvet Poke Cake in advance?
Absolutely! This cake can be made a day or two before serving. In fact, letting it sit overnight allows the flavors to meld beautifully.
What is the best way to store leftovers?
Store any leftovers in the refrigerator, tightly covered in an airtight container. It will stay fresh for several days, but it’s best enjoyed within a week.
Can I use other frostings instead of cream cheese?
Certainly! Feel free to experiment with different frostings such as whipped cream or even chocolate ganache for a new twist on this delightful dessert.
Is it okay to freeze Red Velvet Poke Cake?
Yes, you can freeze this cake, though it’s advisable to freeze it un-frosted to maintain the best texture. Just wrap it tightly in plastic wrap before placing it in the freezer.

Red Velvet Poke Cake
Ingredients
For the Cake
- 1 box red velvet cake mix
- 1 cup water
- 1/2 cup vegetable oil
- 3 large eggs
- 1 cup sweetened condensed milk
- 1 cup white chocolate chips
For the Frosting
- 8 oz cream cheese, softened
- 1/2 cup butter, softened
- 3 cups powdered sugar
- 1 tsp vanilla extract


Instructions
Preparation
- Preheat the oven according to the instructions on the cake mix box.
- In a mixing bowl, combine the red velvet cake mix, water, vegetable oil, and eggs. Stir together until smooth.
- Pour the batter into a greased baking dish and bake as directed on the cake mix package.
- Once baked, allow the cake to cool for about 10 minutes. Use a fork to poke holes all over the top of the cake.
- In a small saucepan, melt the white chocolate chips with sweetened condensed milk over low heat, stirring until smooth. Pour the mixture over the cake.
- Allow the cake to cool completely.
Frosting
- In a separate bowl, beat together the softened cream cheese and butter until smooth and creamy.
- Gradually add in the powdered sugar and vanilla extract, beating until the frosting is fluffy.
- Spread the cream cheese frosting evenly over the cooled cake.
Serving
- Cut the cake into squares or slices and serve.
- Plating: Consider using a decorative cake stand and garnishing with fresh strawberries or raspberries.
Send me this recipe!
Just enter your email below and get it sent straight to your inbox!