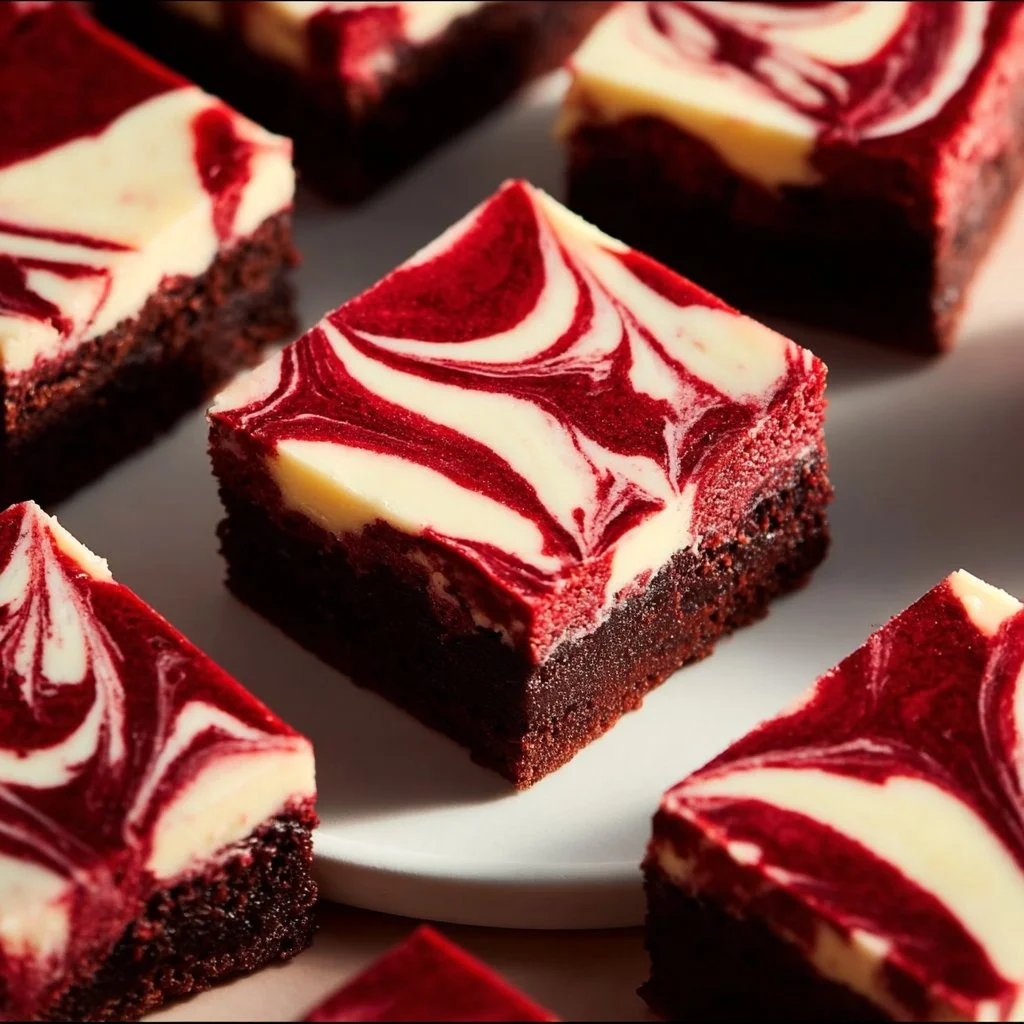
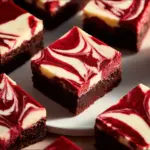
When it comes to desserts that bring joy and excitement to the table, few can match the allure of Red Velvet Cheesecake Brownies. These delightful treats combine the rich, velvety texture of red velvet cake with the creamy indulgence of cheesecake, all wrapped in the form of a brownie. Perfect for parties, celebrations, or a cozy evening at home, this recipe will have your friends and family asking for seconds.
Why We Love This Red Velvet Cheesecake Brownies Recipe
The charm of Red Velvet Cheesecake Brownies lies not only in their stunning appearance but also in their unique flavor profile. They are perfect for those who appreciate the classic red velvet cake but want a new twist. The combination of tangy cream cheese and chocolate-infused brownie batter creates a delectable contrast that is hard to resist.
Another reason to love these brownies is their ease of preparation. With simple ingredients and straightforward instructions, even novice bakers can tackle this recipe. It’s an excellent opportunity for you to bond with family or friends in the kitchen, sharing laughter and creativity while whipping up these delicious treats. The visual appeal of the deep red batter swirled with creamy goodness makes them a showstopper dessert that can brighten any occasion.
Ingredients for Red Velvet Cheesecake Brownies
To ensure that your Red Velvet Cheesecake Brownies turn out perfectly, you’ll need the following ingredients:
- 1 box red velvet cake mix
- 1/2 cup vegetable oil
- 2 large eggs
- 1/2 cup cream cheese, softened
- 1/4 cup sugar
- 1 teaspoon vanilla extract
- 1/2 cup chocolate chips
- 1/4 cup cocoa powder
These ingredients come together to create a harmonious blend of flavors and textures that will leave your taste buds dancing with joy.
How to Make Red Velvet Cheesecake Brownies
Creating these Red Velvet Cheesecake Brownies is a straightforward process that will leave you with a decadent dessert to enjoy.
- Preheat Your Oven: Start by preheating your oven to 350°F (175°C). This ensures that your brownies bake evenly.
- Prepare the Baking Pan: Grease a 9×13 inch baking pan with a little oil or cooking spray, making it easier to remove the brownies once they are baked.
- Mix the Brownie Batter: In a large mixing bowl, combine the entire box of red velvet cake mix, vegetable oil, and the eggs. Stir until it is blended well into a smooth batter.
- Layer the Batter: Pour about two-thirds of the red velvet mixture into the prepared baking pan. Use a spatula to spread it out evenly across the bottom of the pan.
- Make the Cream Cheese Mixture: In another bowl, beat together the softened cream cheese, sugar, and vanilla extract until you create a smooth mixture. This will serve as your delightful cheesecake layer.
- Create the Swirl Effect: Drop spoonfuls of the cream cheese mixture over the red velvet layer in the baking pan. Do not worry about making it perfect; instead, create a swirl design using a knife. This step will give your brownies a beautiful marbled effect once baked.
- Add Remaining Brownie Batter: Pour the remaining brownie batter over the cream cheese layer. Spread it gently so that the layers stay distinct.
- Finish with Chocolate Chips and Cocoa: Sprinkle the top with chocolate chips and a light dusting of cocoa powder. This not only adds flavor but also a satisfying texture.
- Bake: Place the baking pan in the oven and bake for 25-30 minutes. To ensure they are cooked through, insert a toothpick into the center—if it comes out clean, the brownies are ready.
- Cool and Cut: Allow the brownies to cool in the pan before cutting them into squares. This will make it easier to portion and serve them.
Making these brownies is not just about following a recipe; it’s about enjoying the process and anticipating the delightful taste that awaits you.
How to Serve Red Velvet Cheesecake Brownies
Now that you’ve made your Red Velvet Cheesecake Brownies, it’s time to think about how to serve them. Presentation can elevate the dessert experience, so consider these tips:
- Plating: Serve the brownies on a beautiful platter. You can place them in neat squares for a tidy look or allow them to appear more rustic for a homey feel.
- Garnishes: Top them with a dollop of whipped cream for added creaminess. You could also sprinkle some powdered sugar on top for a touch of elegance.
- Accompaniments: Pair these brownies with a scoop of vanilla ice cream. The contrast of warm brownies and cold ice cream is heavenly.
- Beverage Pairing: You can serve these treats alongside a cup of coffee or tea. The rich flavors of the brownies can be complemented by a bold brew.
No matter how you choose to serve them, be ready to enjoy the delighted reactions from your friends and family.
Expert Tips for Red Velvet Cheesecake Brownies
To ensure that your Red Velvet Cheesecake Brownies turn out perfectly every time, consider these expert tips:
- Quality Ingredients: Use high-quality ingredients wherever possible. Fresh eggs, good cream cheese, and premium chocolate chips can significantly enhance the flavor.
- Mixing: When preparing your cream cheese layer, ensure that the cream cheese is softened to room temperature. This will facilitate better mixing and a smoother texture.
- Don’t Overmix: When combining your ingredients, avoid overmixing the batter once the flour is added. This helps to keep the brownies tender.
- Testing for Doneness: Check for doneness several minutes before the timer goes off. Ovens can vary, and you want to avoid overbaking your brownies to keep them moist.
- Let Cool Completely: Allow your brownies to cool completely before cutting them into squares. This will help them hold their shape better.
With these tips, you are sure to impress everyone with your baking prowess.
How to Store Red Velvet Cheesecake Brownies
Storing your Red Velvet Cheesecake Brownies correctly can prolong their deliciousness. Here’s how to do it:
- Room Temperature: If you plan to consume the brownies within a couple of days, you can store them at room temperature in an airtight container.
- Refrigeration: For longer storage, place the brownies in the fridge. The cream cheese can spoil if left out too long, so it’s best to keep them cool. They can be stored in the fridge for up to one week.
- Freezing: If you want to store them for an extended period, you can freeze the brownies. Wrap them tightly in plastic wrap and then place them in a freezer-safe bag. They can last up to three months in the freezer. Just remember to thaw them in the refrigerator before serving.
By following these storage tips, you can make sure that your brownies remain fresh and tasty for as long as possible.
Variation of Red Velvet Cheesecake Brownies
One of the fantastic aspects of baking is the ability to experiment. Here are some fun variations you might consider to put your own spin on the classic Red Velvet Cheesecake Brownies:
- Nutty Delight: Add chopped walnuts or pecans for a crunchy texture. Fold them into the brownie batter before pouring it into the pan.
- Flavor Twist: Mix in a tablespoon of peppermint extract or orange zest to the cream cheese mixture for a refreshing flaky flavor.
- Chocolate Lovers: For a more intense chocolate experience, increase the chocolate chips to one cup or use dark chocolate chips for added richness.
- Swirly Goodness: Instead of using just cream cheese, you can mix in some raspberry puree to the cream cheese for a beautiful visual effect and a tangy twist.
- Gluten-Free Option: Swap out the red velvet cake mix for a gluten-free variety, ensuring that everyone can enjoy these delectable brownies.
These variations allow you to customize the dessert according to your preferences or the tastes of your guests.
Frequently Asked Questions
What are Red Velvet Cheesecake Brownies?
Red Velvet Cheesecake Brownies blend the rich texture of red velvet cake with creamy cheesecake, all in a brownie format. They’re known for their striking red color and delicious flavors.
How do I achieve the perfect texture for my brownies?
The secret to perfect brownies lies in not overmixing the batter once the flour is added. Additionally, letting them cool before cutting helps maintain their moist texture.
Can I make Red Velvet Cheesecake Brownies in advance?
Yes, you can prepare the brownies beforehand. They store well in the fridge for up to a week or can be frozen for up to three months. Just ensure they are well-wrapped to prevent drying out.
Can I add more chocolate to the brownies?
Absolutely! To amp up the chocolate flavor, feel free to add extra chocolate chips to the batter or use chocolate-flavored red velvet cake mix if you find it.
Is it necessary to refrigerate the brownies?
Yes, due to the cream cheese layer, it’s best to store these brownies in the refrigerator to keep them fresh and safe to eat.
Red Velvet Cheesecake Brownies
Ingredients
Brownie Ingredients
- 1 box red velvet cake mix
- 1/2 cup vegetable oil
- 2 large eggs Use fresh eggs for best results.
- 1/2 cup chocolate chips Use semi-sweet or dark chocolate chips.
- 1/4 cup cocoa powder
Cream Cheese Layer Ingredients
- 1/2 cup cream cheese, softened Ensure it is at room temperature for smooth mixing.
- 1/4 cup sugar
- 1 teaspoon vanilla extract


Instructions
Preparation
- Preheat your oven to 350°F (175°C).
- Grease a 9×13 inch baking pan with a little oil or cooking spray.
Brownie Batter
- In a large mixing bowl, combine the entire box of red velvet cake mix, vegetable oil, and eggs. Stir until blended into a smooth batter.
- Pour about two-thirds of the red velvet mixture into the prepared baking pan and spread it out evenly.
Cream Cheese Mixture
- In another bowl, beat together the softened cream cheese, sugar, and vanilla extract until smooth.
- Drop spoonfuls of the cream cheese mixture over the red velvet layer in the baking pan and create a swirl design using a knife.
Assembly and Baking
- Pour the remaining brownie batter over the cream cheese layer and spread it gently.
- Sprinkle the top with chocolate chips and dust with cocoa powder.
- Bake for 25-30 minutes. Check doneness with a toothpick; it should come out clean.
- Allow the brownies to cool in the pan before cutting into squares.
Send me this recipe!
Just enter your email below and get it sent straight to your inbox!