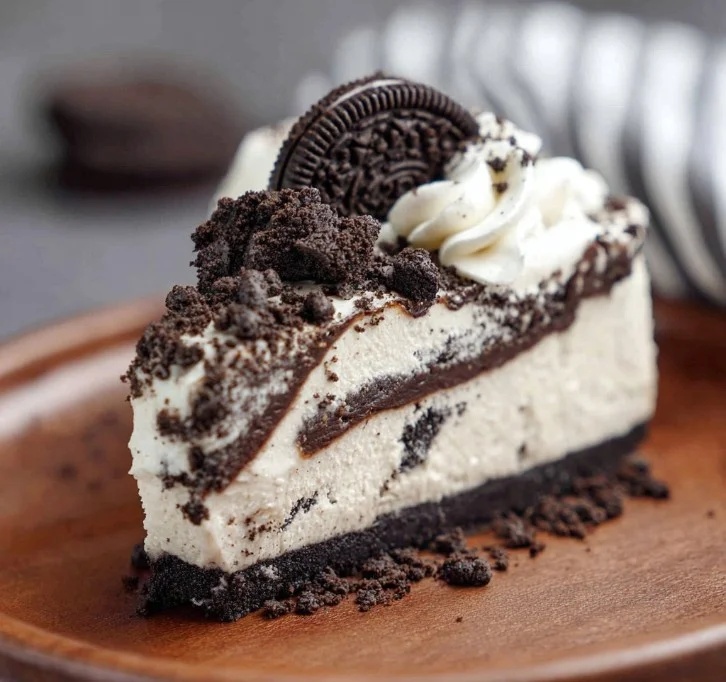
When it comes to making a dessert that’s not only delicious but also incredibly easy, the No-Bake Oreo Cheesecake stands out. This dessert has become a favorite for many, and it’s easy to see why. It’s rich, creamy, and packed with the beloved flavor of Oreos. Imagine diving into a slice of smooth cheesecake filled with crunchy cookie bits, all without the hassle of baking. Whether you’re planning a special occasion or simply looking to treat yourself, this cheesecake is sure to impress.
Why We Love This No-Bake Oreo Cheesecake Recipe
There are countless reasons why the No-Bake Oreo Cheesecake holds such a special place in the hearts of dessert lovers. For one, the textures are extraordinary. The creamy filling complements the crunchy crust and provides a delightful contrast in every bite. You also get to enjoy the rich chocolate flavor of Oreos, which pairs beautifully with the vanilla-infused cream cheese filling. If that isn’t enough, consider how quick and straightforward this recipe is. You don’t have to worry about turning on your oven or meticulously following a complicated process. Just mix, pour, and chill! Lastly, it’s a versatile dessert that works for any occasion, from family gatherings to casual dinner parties. You’ll find yourself making this delightful treat again and again.
Ingredients about No-Bake Oreo Cheesecake
To make your No-Bake Oreo Cheesecake, you will need the following ingredients:
- 1 package (14.3 oz) Oreos
- 1/2 cup (113g) unsalted butter, melted
- 4 ounces white chocolate bar
- 1 1/4 cups (354ml) heavy whipping cream
- 1/2 cup (65g) powdered sugar
- 16 ounces (452g) full-fat cream cheese, at room temperature
- 1/2 cup (95g) granulated sugar
- 2 teaspoons pure vanilla extract
- 20 Oreos, crushed
- 1 cup (236ml) heavy whipping cream (for topping)
- 1/2 cup (65g) powdered sugar (for topping)
- Additional Oreos for garnish
- Hot fudge sauce for garnish (optional)
How to Make No-Bake Oreo Cheesecake Directions
Creating your No-Bake Oreo Cheesecake is a straightforward process that even beginners can successfully tackle. Here’s how you can make it step-by-step.
- Begin by preparing your 9-inch springform pan. Lightly grease it and line the bottom with parchment paper to ensure easy removal later.
- Next, take the package of Oreos and crush them into fine crumbs. You can do this using a food processor or by placing them in a zip-top bag and crushing them with a rolling pin.
- Combine the Oreo crumbs with the melted butter in a bowl. Stir until the crumbs are thoroughly mixed with the butter.
- Press this mixture firmly into the bottom of your prepared springform pan to form the crust. Once you’ve got a solid layer, place the pan in the refrigerator to set while you prepare the filling.
- For the filling, start by melting the white chocolate in the microwave in short bursts, stirring in between to avoid burning. Once melted, set it aside to cool.
- In a separate large bowl, beat the heavy cream until soft peaks form, which means the cream should hold its shape but still be smooth. Once you see those early peaks, add in the powdered sugar and continue to beat until stiff peaks form.
- In another mixing bowl, beat the cream cheese until it’s smooth and free of lumps. Then add in the granulated sugar and vanilla extract. Mix well until everything is combined.
- Pour the melted white chocolate into the cream cheese mixture and beat again until it is fully incorporated.
- Gently fold in the whipped cream and the crushed Oreos, taking care not to deflate the whipped cream too much.
- Once everything is combined, pour the filling into the prepared crust, smoothing the top as needed.
- Cover the cheesecake with plastic wrap and place it in the refrigerator. Allow it to chill for at least 3 to 4 hours, or until set firm.
- When you are ready to serve, prepare the whipped cream topping. In a bowl, beat the heavy whipping cream and powdered sugar until soft peaks form again. You can then pipe or spread this whipped cream over the top of the chilled cheesecake.
- For that extra touch, sprinkle additional crushed Oreos on top for decoration. If you desire, drizzle hot fudge sauce over each slice when serving for a delightful finish.
How to Serve No-Bake Oreo Cheesecake
Serving your No-Bake Oreo Cheesecake is just as enjoyable as making it. First, ensure that your cheesecake is fully chilled and set. Carefully remove the sides of the springform pan to reveal your beautiful cheesecake. You can slice it into wedges for individual servings. If you want to impress your guests, consider piping extra whipped cream on each slice or garnishing with additional whole Oreos. A drizzle of hot fudge sauce can add both visual appeal and an indulgent touch. This cheesecake pairs wonderfully with fresh berries, which provide a beautiful, colorful contrast to the rich dessert.
Expert Tips: No-Bake Oreo Cheesecake
Creating the perfect No-Bake Oreo Cheesecake requires a few expert tips to ensure your dessert is a hit:
- Use Full-Fat Ingredients: Using full-fat cream cheese and heavy whipping cream will give you the creamiest and most luxurious texture. The extra fats will make your cheesecake rich and satisfying.
- Ensure Cream Cheese is Room Temperature: For a smooth filling, allow your cream cheese to sit out at room temperature for a while before mixing. Cold cream cheese can clump and create lumps in your filling.
- Fold Gently: When combining the whipped cream with your cream cheese mixture, do so gently. This helps maintain the light and airy texture.
- Chill Longer if Needed: If your cheesecake doesn’t seem firm after the recommended chilling time, let it sit in the refrigerator longer. The longer it sits, the better it often becomes.
- Make Ahead of Time: This cheesecake can be made a day in advance, making it perfect for parties or gatherings. Just keep it covered in the fridge until you’re ready to serve.
How to Store No-Bake Oreo Cheesecake
Storing your No-Bake Oreo Cheesecake is simple. If you have any leftovers (which can be rare), cover the cheesecake tightly with plastic wrap or aluminum foil. Store it in the refrigerator, where it will last for about 3 to 5 days. For extended storage, you might consider freezing individual slices. To do this, wrap each slice tightly in plastic wrap and then place them in an airtight container. The cheesecake can be frozen for up to 2 months. Make sure to thaw it in the refrigerator before serving.
Variation of No-Bake Oreo Cheesecake
The beauty of the No-Bake Oreo Cheesecake is that you can easily customize it to suit your tastes. Here are a few exciting variations to try:
- Mint Oreo Variation: Substitute regular Oreos with mint-flavored Oreos for a refreshing twist. You can also add a few drops of mint extract to the cream cheese mixture for additional minty flavor.
- Chocolate Layer: Add a layer of chocolate ganache on top of the filling before refrigerating for a decadent chocolate experience. Just melt chocolate with a little cream, pour it over the cheesecake, and chill it all together.
- Peanut Butter Twist: Incorporate peanut butter into the cream cheese mixture for a nutty flavor. You can also use a peanut butter Oreo crust for an additional punch.
- Fruit-Infused: Fold in some fresh fruit, like strawberries or raspberries, into the cheesecake mix for a fresh and vibrant taste. You can also add fruit toppings when serving.
FAQ about No-Bake Oreo Cheesecake
What makes this No-Bake Oreo Cheesecake different from regular cheesecake?
The No-Bake Oreo Cheesecake is different because it doesn’t require an oven. Instead of baking, you simply chill it in the refrigerator to set, making it an easier option for many.
Can I use low-fat cream cheese or whipped cream?
While you can use low-fat versions, keep in mind that the texture and richness will change. Full-fat ingredients typically result in a creamier cheesecake.
How many servings does this recipe make?
This recipe usually serves around 10 to 12 people, depending on how large you slice the pieces.
Can I make this cheesecake ahead of time?
Absolutely! This cheesecake is a great make-ahead dessert. Prepare it a day in advance for the best results.
Can I freeze the No-Bake Oreo Cheesecake?
Yes, you can freeze the cheesecake for up to 2 months. Make sure to wrap it well and thaw it in the refrigerator before serving.
No-Bake Oreo Cheesecake
Ingredients
Crust Ingredients
- 1 package 1 package (14.3 oz) Oreos
- 1/2 cup 1/2 cup (113g) unsalted butter, melted
Cheesecake Filling Ingredients
- 4 ounces 4 ounces white chocolate bar
- 1 1/4 cups 1 1/4 cups (354ml) heavy whipping cream
- 1/2 cup 1/2 cup (65g) powdered sugar
- 16 ounces 16 ounces (452g) full-fat cream cheese, at room temperature
- 1/2 cup 1/2 cup (95g) granulated sugar
- 2 teaspoons 2 teaspoons pure vanilla extract
- 20 Oreos 20 Oreos, crushed
Topping Ingredients
- 1 cup 1 cup (236ml) heavy whipping cream (for topping)
- 1/2 cup 1/2 cup (65g) powdered sugar (for topping)
- Additional Oreos for garnish
- Hot fudge sauce for garnish (optional)


Instructions
Preparation
- Prepare your 9-inch springform pan by lightly greasing it and lining the bottom with parchment paper.
- Crush the Oreos into fine crumbs using a food processor or a zip-top bag with a rolling pin.
- Combine the Oreo crumbs with the melted butter in a bowl and stir until thoroughly mixed.
- Press the mixture into the bottom of the prepared springform pan to form the crust and set it in the refrigerator.
- Melt the white chocolate in the microwave in short bursts, stirring in between and set aside to cool.
Filling
- Beat the heavy cream in a large bowl until soft peaks form, then add powdered sugar and continue beating until stiff peaks form.
- In another bowl, beat the cream cheese until smooth, then mix in granulated sugar and vanilla until combined.
- Pour the melted white chocolate into the cream cheese mixture and beat until fully incorporated.
- Gently fold in the whipped cream and crushed Oreos, ensuring not to deflate the whipped cream too much.
- Pour the filling into the prepared crust and smooth the top.
- Cover with plastic wrap and refrigerate for at least 3 to 4 hours until set.
Topping and Serving
- Prepare the whipped cream topping by beating heavy cream and powdered sugar until soft peaks form.
- Spread or pipe the whipped cream over the top of the chilled cheesecake.
- Garnish with additional crushed Oreos and serve with a drizzle of hot fudge sauce, if desired.
Send me this recipe!
Just enter your email below and get it sent straight to your inbox!