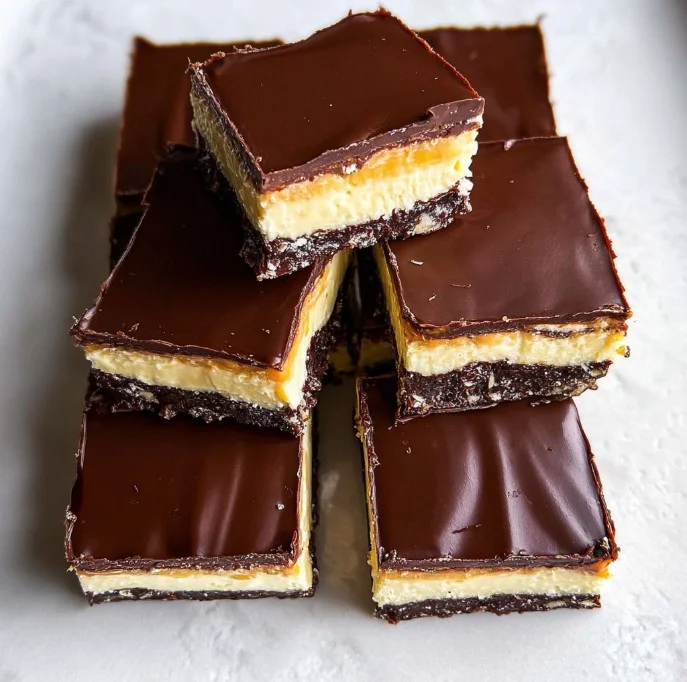
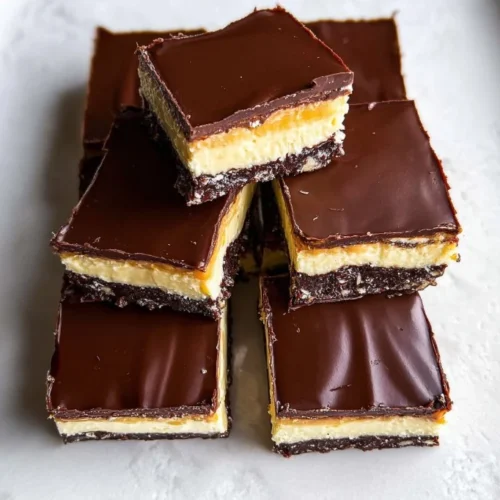
Nanaimo bars, named after the city of Nanaimo in British Columbia, Canada, are a beloved dessert that captures the essence of indulgence in every bite. These bars feature a delightful blend of creamy, chocolatey, and biscuit flavors that seamlessly come together to create a treat that is not only pleasing to the palate but also visually inviting. With their no-bake layers, Nanaimo bars are a joy to make and share, often evoking fond memories of family gatherings and special occasions.
Why We Love This Nanaimo Bars Recipe
There are countless reasons to adore this Nanaimo bars recipe. First and foremost, the combination of textures and flavors makes each bite an experience. The crisp base made from graham cracker crumbs pairs beautifully with the rich, creamy custard filling and the luscious chocolate topping. Additionally, Nanaimo bars are incredibly versatile. They can be customized with different flavors and ingredients based on your preferences.
Moreover, this recipe is straightforward, making it accessible even for those who may be new to baking. You don’t need to be a culinary expert to whip up these delicious bars. In just a few simple steps, you can create a dessert that rivals any bakery specialty without needing an oven for all the layers—although you will need to bake the base briefly. The joy of cutting into a cold, set bar and revealing its delicious layers is something that stays with you long after the last bite is gone.
Ingredients about Nanaimo Bars
To create these delightful bars, you will need the following ingredients:
Base Layer:
- 115 grams unsalted butter, melted
- 50 grams granulated sugar
- 30 grams cocoa powder
- 1 large egg
- 5 mL pure vanilla extract
- 200 grams graham cracker crumbs
- 75 grams sweetened shredded coconut
- 60 grams walnuts, chopped
Filling:
- 115 grams unsalted butter, softened
- 250 grams icing sugar
- 30 grams custard powder
- 45 mL whipping cream
- 5 mL pure vanilla extract
- 1.25 mL fine kosher salt
Topping:
- 175 grams dark chocolate, chopped
- 15 grams unsalted butter
How to Make Nanaimo Bars Directions
Making Nanaimo bars involves a series of simple steps, ensuring that you enjoy the process as much as you relish the end product.
Start by preheating your oven to 350°F (175°C). Grab a 9×9-inch square pan and line it with parchment paper for easy removal later.
In a mixing bowl, melt the unsalted butter, then stir in the granulated sugar, cocoa powder, and the large egg. Mix well until everything is combined beautifully and creamy. Add in the pure vanilla extract and incorporate it into your mixture.
In another bowl, combine the graham cracker crumbs, sweetened shredded coconut, and chopped walnuts. This mixture will add a lovely crunch when baked. Once combined, add the butter mixture to the dry ingredients and mix thoroughly until everything is evenly coated.
Press the combined mixture tightly into the prepared pan. This will form a solid base layer for your bars. Bake this mixture in the preheated oven for about 15 minutes. Once done, allow it to cool completely before moving on to the next layer.
For the creamy filling, start by creaming the softened unsalted butter in a mixing bowl. Gradually add the icing sugar and custard powder, beating well until you have a light and fluffy texture. Pour in the whipping cream, along with the pure vanilla extract and kosher salt. Continue to mix until everything is well blended.
Spread the creamy filling evenly over the cooled base layer, smoothing the top as best as you can. Afterward, refrigerate it for at least 1 hour to let it firm up and set.
While the filling sets, prepare the chocolate topping. In a heatproof bowl, melt the chopped dark chocolate with 15 grams of unsalted butter. Stir until smooth and fully combined. Once the filling is set and firm, pour the melted chocolate on top, spreading it evenly.
Return the pan to the refrigerator for another hour or until the chocolate is fully set.
Once set, carefully remove the bars from the pan using the edges of the parchment paper. Cut them into squares of your preferred size, serve, and enjoy!
How to Serve Nanaimo Bars
Nanaimo bars are perfect for any occasion. You can serve them at dessert parties, picnics, or simply treat yourself to a delicious snack at home. When serving, consider placing them on a decorative plate or platter to showcase their beautiful layers.
To elevate your serving experience, pair these bars with a hot cup of coffee or a glass of cold milk. The combination of rich chocolate with creamy fillings makes for a delightful treat that can be enjoyed at any time of day.
For a more festive touch, consider dusting the top of the bars with powdered sugar, or even adding a splash of colorful sprinkles just before serving. The visual appeal will certainly entice your guests, making them even more eager to take a bite.
Expert Tips: Nanaimo Bars
Creating the perfect Nanaimo bars can be easy with these expert tips:
Ingredient Quality: Use high-quality chocolate, butter, and other ingredients. The flavors will resonate more when quality ingredients are used.
Cooling Time: Be sure to allow each layer ample time to cool before adding the next layer. Rushing this process could result in a messy texture.
Customization: Don’t hesitate to improvise! You can substitute nuts with your favorite options or even add a hint of mint or orange zest for a unique twist.
Chill Properly: Allow the bars to chill until fully set. Keeping them refrigerated not only enhances their flavor but also ensures a firm texture when cut.
Clean Cuts: For perfectly cut squares, warm your knife with hot water before slicing; wipe it dry to prevent sticking.
How to Store Nanaimo Bars
To keep your Nanaimo bars fresh and delicious, store them in an airtight container. You can place them in the refrigerator for up to one week, but they are best enjoyed within the first few days after making.
If you plan to make a larger batch and want to save some for later, consider freezing them. To freeze, wrap each bar individually in plastic wrap, then place them in a freezer-safe container. They can last in the freezer for up to three months. When you’re ready to enjoy a bar, simply thaw it in the refrigerator or at room temperature.
Variations of Nanaimo Bars
Nanaimo bars are incredibly versatile, allowing for a variety of enjoyable variations. You can experiment with different flavor profiles for each layer.
Matcha Nanaimo Bars: Swap out the cocoa powder in the base layer for matcha, giving it an earthy flavor and a vibrant green color.
Peanut Butter Bliss: Add creamy peanut butter to the filling for a nutty flavor that pairs nicely with chocolate.
Fruit Infusion: Fold in dried fruits like cranberries or cherries into the base or filling for added texture and sweetness.
Chocolate-Coconut Combo: Use dark chocolate for the base layer and add extra coconut in both the filling and the topping for a tropical twist.
Spiced Variations: Add spices like cinnamon or nutmeg to the filling for a warm, aromatic flavor.
FAQs about Nanaimo Bars
What are Nanaimo bars?
Nanaimo bars are a no-bake dessert from Canada, consisting of three layers: a crumb base made of biscuit crumbs and cocoa, a custard-flavored filling, and a chocolate topping.
How long do Nanaimo bars last?
When stored in an airtight container in the refrigerator, Nanaimo bars can last up to a week. For longer storage, freeze them individually wrapped for up to three months.
Can I make Nanaimo bars gluten-free?
Yes! You can replace the graham cracker crumbs with gluten-free alternatives, such as crushed gluten-free cookies or almond flour, ensuring that everyone can enjoy them.
Is there a vegan version of Nanaimo bars?
Absolutely! You can substitute butter with coconut oil or dairy-free margarine, and use aquafaba as a substitute for eggs in the base layer to make it vegan-friendly.
Are there any tips for achieving the perfect layers?
Allow each layer to cool and set properly before adding the subsequent layer. Maintaining a clean knife when cutting will also help achieve neat, defined layers.
Nanaimo Bars
Equipment
- 9×9-inch square pan
- Mixing Bowl
- Electric Mixer
- Food Processor
Ingredients
- 115 g unsalted butter melted
- 50 g granulated sugar
- 30 g cocoa powder
- 1 large egg
- 5 mL pure vanilla extract
- 200 g graham cracker crumbs
- 75 g sweetened shredded coconut
- 60 g walnuts chopped
- 115 g unsalted butter softened for filling
- 250 g icing sugar
- 30 g custard powder
- 45 mL whipping cream
- 5 mL pure vanilla extract
- 1.25 mL fine kosher salt
- 175 g dark chocolate chopped for topping
- 15 g unsalted butter for topping


Instructions
- Preheat oven to 350°F (175°C) and line a 9×9-inch square pan with parchment paper.
- Melt unsalted butter and mix with granulated sugar, cocoa powder, and egg. Stir in vanilla extract.
- In another bowl, combine graham cracker crumbs, shredded coconut, and chopped walnuts. Mix with the butter mixture until well combined.
- Press the mixture into the bottom of the prepared pan and bake for 10 minutes. Set aside to cool.
- In a mixing bowl, beat softened butter until creamy, then gradually add icing sugar and custard powder, mixing until light and fluffy.
- Add whipping cream, vanilla extract, and kosher salt. Mix until combined.
- Spread the filling evenly over the cooled crust.
- In a heatproof bowl, melt dark chocolate and butter together, then pour over the filling, spreading evenly.
- Refrigerate for at least 2 hours until set. Cut into squares before serving.
Send me this recipe!
Just enter your email below and get it sent straight to your inbox!