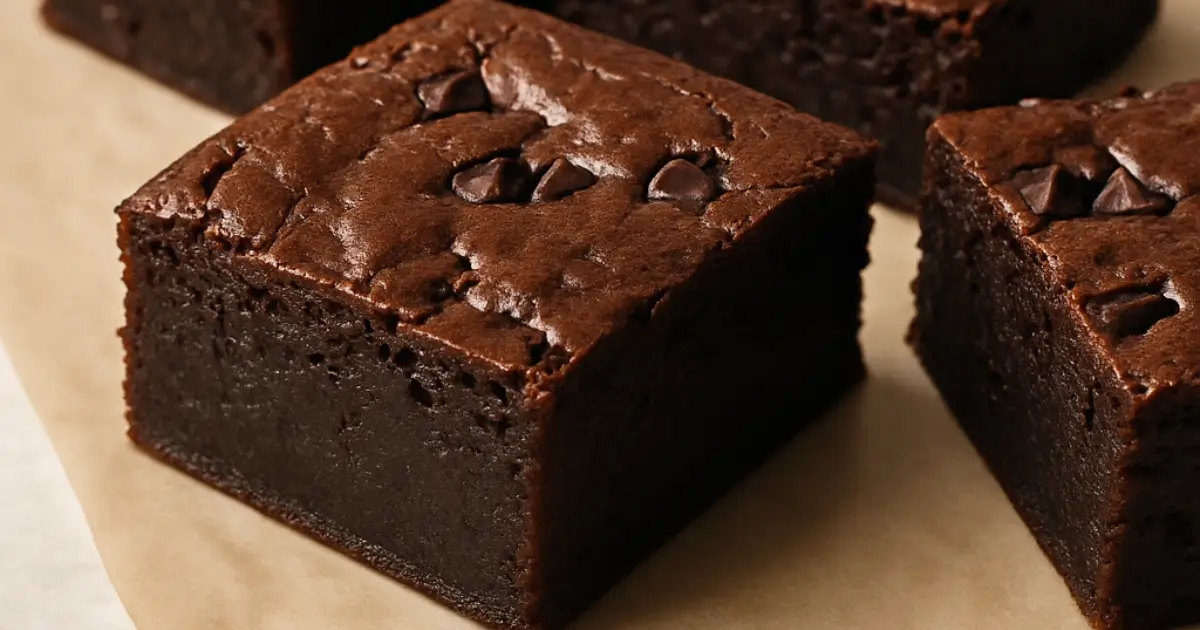
If you like mochi and brownies but can’t choose between them, this dessert is for you. Mochi brownies mix the chewy feel of mochi with the rich chocolate taste of brownies. Every bite is soft, chewy, and full of chocolate. It’s a fun change from regular brownies. You can make these for a party, a family get-together, or just to enjoy at home. They’re easy to make, gluten-free because of the sweet rice flour, and have the perfect mix of chewy and fudgy textures.
Why We Love This Mochi Brownies Recipe
You’ll love this mochi brownies recipe for so many reasons. First, it’s not your average brownie. These brownies offer a surprising twist with their chewy center and slightly crispy edges. They taste rich and satisfying without feeling too heavy. That chewiness comes from the sweet rice flour, also known as mochiko, which is what makes mochi so famous.
This dessert is also incredibly flexible. You can make it with dairy milk or a plant-based substitute, and it still comes out great. It’s the kind of dessert you can serve to guests who are gluten-sensitive without anyone noticing the difference. The touch of dark chocolate sprinkled on top adds extra depth and texture to each slice. These brownies are also simple enough that even if you’re new to baking, you can still make them successfully the first time.
Because they’re so unique, mochi brownies also make a great conversation starter. Bring them to a potluck or offer them as a homemade gift, and you’ll have people asking for the recipe. They’re easy to store, stay fresh for days, and even taste better the next day.
Ingredients about Mochi Brownies
Cocoa powder – Unsweetened cocoa powder provides the deep chocolate flavor in these brownies. For best results, use natural cocoa powder, not Dutch-processed, as it interacts better with the baking powder used in this recipe.
Granulated white sugar – Sweetens the batter and balances the bitterness of the cocoa. Do not reduce the amount, as sugar also contributes to the texture and moisture of mochi brownies.
Baking powder – Acts as the leavening agent, helping the brownies rise slightly while maintaining their dense, chewy interior. Do not substitute with baking soda, as it will alter the structure and taste.
Unsalted butter (melted) – Adds richness, moisture, and depth of flavor. If you use salted butter, reduce the added salt by half to keep the balance right.
Large eggs – Provide structure and help emulsify the wet and dry ingredients. Use room temperature eggs for best results.
Milk – Whole milk works best for a soft, custard-like interior. You may substitute with almond milk or oat milk for a dairy-free version, though texture may vary slightly.
Vanilla extract – Enhances the overall flavor profile and adds a warm, sweet aroma.
Dark chocolate (chopped, optional topping) – Melts into the top layer and gives an extra boost of chocolate with a hint of texture. You can use chocolate chips if preferred.
How to Make Mochi Brownies Directions
You’re going to love how straightforward this recipe is. Even if you’re not confident in the kitchen, these brownies are hard to mess up. Just follow these steps, and you’ll have the perfect pan of chewy, chocolatey brownies ready in no time.
Start by preheating your oven to 350°F (175°C). Line an 8 by 8-inch square baking pan with parchment paper. This makes it easier to lift the brownies out after they’ve baked and cooled.
In a medium bowl, combine the dry ingredients: mochiko flour, unsweetened cocoa powder, sugar, and baking powder. Use a whisk to mix everything thoroughly. You want the ingredients to be evenly combined without any lumps of flour or cocoa.
In a separate large bowl, add the melted butter. Then crack in the eggs and pour in the milk and vanilla extract. Whisk until the mixture looks smooth and there are no streaks of egg left.
Now, slowly pour your dry mixture into the wet one. Stir gently until everything comes together. The batter will look a bit different from typical brownie batter—it’s slightly thinner, but that’s normal when working with mochiko flour.
Pour the batter into the lined baking pan. Use a spatula to spread it evenly. Then sprinkle the chopped dark chocolate over the top. This adds an extra punch of chocolate and gives each bite some added texture.
Place the pan in the oven and bake for 60 to 70 minutes. Around the 60-minute mark, start checking the center with a toothpick. It should come out mostly clean, with just a few moist crumbs. That means your mochi brownies are set but still fudgy.
Once they’re done, remove the pan from the oven and let it cool completely. Don’t try to cut them while they’re hot—the mochi texture makes them sticky when warm. Once cooled, they’ll be much easier to slice.
Cut into 12 pieces, and enjoy the chewy, chocolatey goodness.
How to Serve Mochi Brownies
Mochi brownies are best served once they’ve completely cooled and set. Their chewy texture and rich flavor stand out when they’re at room temperature. You can slice them into even squares or rectangles for a clean presentation.
Serve them on a dessert platter for parties, or pack them in lunch boxes for a sweet treat during the day. These brownies go perfectly with a glass of milk or a hot cup of coffee or tea. You can even serve them slightly warmed up with a scoop of ice cream for an indulgent dessert.
Because they’re both chewy and chocolatey, they work well in both casual and special settings. If you’re hosting guests, add a sprinkle of powdered sugar on top or drizzle with melted chocolate before serving. You can also stack them with parchment paper between the layers for a pretty, giftable box of treats.
Whether you serve them simple or dressed up, mochi brownies are always a hit.
Expert Tips: Mochi Brownies
Here are a few helpful tips to make sure your mochi brownies turn out perfect every time:
- Don’t skip the parchment paper. Mochi tends to stick to pans, so lining your pan is key for easy removal.
- Let them cool completely before cutting. They need time to firm up; otherwise, they’ll be too sticky.
- Use a plastic knife or lightly greased knife for cleaner cuts. This prevents sticking and gives you smoother edges.
- Don’t overmix the batter. Stir just until the ingredients come together to avoid a tough texture.
- Use high-quality cocoa powder. It makes a big difference in flavor. Dutch process gives a deeper chocolate taste.
- Keep an eye on baking time. Every oven is different, so start checking around 60 minutes. The center should be set but soft.
- Test variations carefully. While you can swap milk, changing too many ingredients can affect the chewy texture.
Avoid rushing through any step—mochi brownies need a little patience but are worth every minute.
How to Store Mochi Brownies
Storing mochi brownies is simple, and they stay fresh for several days. Once they’ve cooled completely, place them in an airtight container. You can keep them at room temperature for 2 to 3 days.
If you want to store them longer, you can refrigerate them. Just know that chilling will make them a bit firmer. To bring back some of the chewiness, microwave each piece for 5 to 10 seconds before eating.
For longer storage, you can freeze mochi brownies. Wrap individual slices in plastic wrap, then place them in a freezer-safe container. When you’re ready to enjoy them, thaw them at room temperature and warm slightly if desired.
Variation of Mochi Brownies
There are lots of ways to change up this mochi brownie recipe to make it your own. Here are some fun ideas to try:
- Matcha Mochi Brownies: Replace 1 tablespoon of cocoa powder with matcha powder for a green tea twist.
- Peanut Butter Swirl: Add a few spoonfuls of peanut butter to the top of the batter before baking and swirl it in for a nutty flavor.
- Chocolate Chips Inside: Mix in extra chocolate chips or chunks for added richness.
- Coconut Milk Version: Substitute coconut milk for a tropical flavor and a slightly denser texture.
- Salted Caramel Drizzle: After baking, drizzle with homemade or store-bought caramel and sprinkle sea salt for a sweet-salty balance.
- Mini Mochi Brownie Bites: Bake the batter in muffin tins for individual servings—just adjust the baking time to about 20-25 minutes.
With these easy twists, you can keep this recipe feeling fresh and fun every time you make it.
FAQ about Mochi Brownies
What makes mochi brownies different from regular brownies?
Mochi brownies have a chewy, sticky texture because they use mochiko flour instead of regular wheat flour. It gives them a unique consistency that’s soft and satisfying.
Can I make mochi brownies without eggs?
Yes, you can try using egg substitutes like applesauce or a flaxseed mixture, but it may slightly change the texture.
Do I need to refrigerate mochi brownies?
Not unless you plan to store them for more than 3 days. They’re fine at room temperature if kept in a sealed container.
Can I use other flours instead of mochiko?
Mochiko is essential for the chewy texture. Regular rice flour or wheat flour won’t give the same result.
Are mochi brownies gluten-free?
Yes, because mochiko is made from sweet rice, these brownies are naturally gluten-free.
Why are my mochi brownies too sticky?
They may not be fully cooled. Always wait until they’re completely set before cutting and serving.
Mochi Brownies
Equipment
- 8×8 inch square baking pan
- Parchment Paper
- Whisk
- Mixing Bowls:
- Spatula
Ingredients
Dry Ingredients
- 1 cup mochiko flour (sweet rice flour)
- 1/2 cup unsweetened cocoa powder
- 1 cup granulated white sugar
- 1 1/2 teaspoons baking powder
Wet Ingredients
- 5 tablespoons unsalted butter melted
- 2 large eggs
- 12 ounces whole milk or milk substitute
- 1 teaspoon vanilla extract
Topping
- 3 tablespoons dark chocolate chopped


Instructions
- Preheat the oven to 350°F (175°C). Line an 8×8-inch square baking pan with parchment paper.
- In a medium bowl, whisk together mochiko flour, cocoa powder, sugar, and baking powder until well combined.
- In a separate large bowl, mix melted butter, eggs, milk, and vanilla extract until smooth.
- Gradually add the dry ingredients to the wet ingredients. Stir gently until fully combined. Batter will be slightly thinner than typical brownie batter.
- Pour the batter into the prepared pan and spread evenly. Sprinkle chopped dark chocolate on top.
- Bake for 60–70 minutes. Begin checking at 60 minutes. A toothpick inserted in the center should come out mostly clean.
- Let the brownies cool completely in the pan before cutting into 12 pieces.
Send me this recipe!
Just enter your email below and get it sent straight to your inbox!