Making frozen yogurt pops is an easy and enjoyable way to create a refreshing treat that everyone can love. These delightful pops combine creamy texture with fruit flavors, making them a perfect snack or dessert for hot days or just when you crave something sweet. With simple ingredients and straightforward steps, you’ll have a delicious homemade treat that satisfies both kids and adults alike.
Why We Love This Frozen Yogurt Pops
Frozen yogurt pops are not just a tasty way to cool down; they also offer a healthier alternative to store-bought frozen desserts. You control the ingredients, ensuring you pack in the nutrients while minimizing added sugars and artificial flavors. The versatility of flavors means you can customize each batch to suit your taste or seasonal produce availability. Moreover, making these pops can be a fun family activity, encouraging creativity and teamwork in the kitchen. You can mix and match ingredients, allowing everyone to create their favorite combinations. Once you master the basic technique, the possibilities are endless, making these frozen yogurt pops a delightful treat you’ll come back to again and again.
Ingredients for Frozen Yogurt Pops
- 2 cups plain yogurt (Greek or regular)
- 1 cup fresh fruit (such as berries, peaches, or bananas)
- 1/4 cup honey or maple syrup (adjust for sweetness)
- 1 teaspoon vanilla extract (optional)
- A pinch of salt (optional)
- Additional fruit pieces or granola for layering (optional)
Directions
Start by washing and preparing your fruit. Chop larger pieces into smaller chunks if necessary. For berries, you may leave them whole or mash them slightly to release some juices.
In a mixing bowl, combine the yogurt, honey or maple syrup, vanilla extract, and a pinch of salt. Mix well until all ingredients are blended smoothly.
Fold in the fresh fruit, or if you want to maintain some texture, add it without mashing. If you prefer a more uniform pop, blend the fruit mixture with the yogurt until well combined.
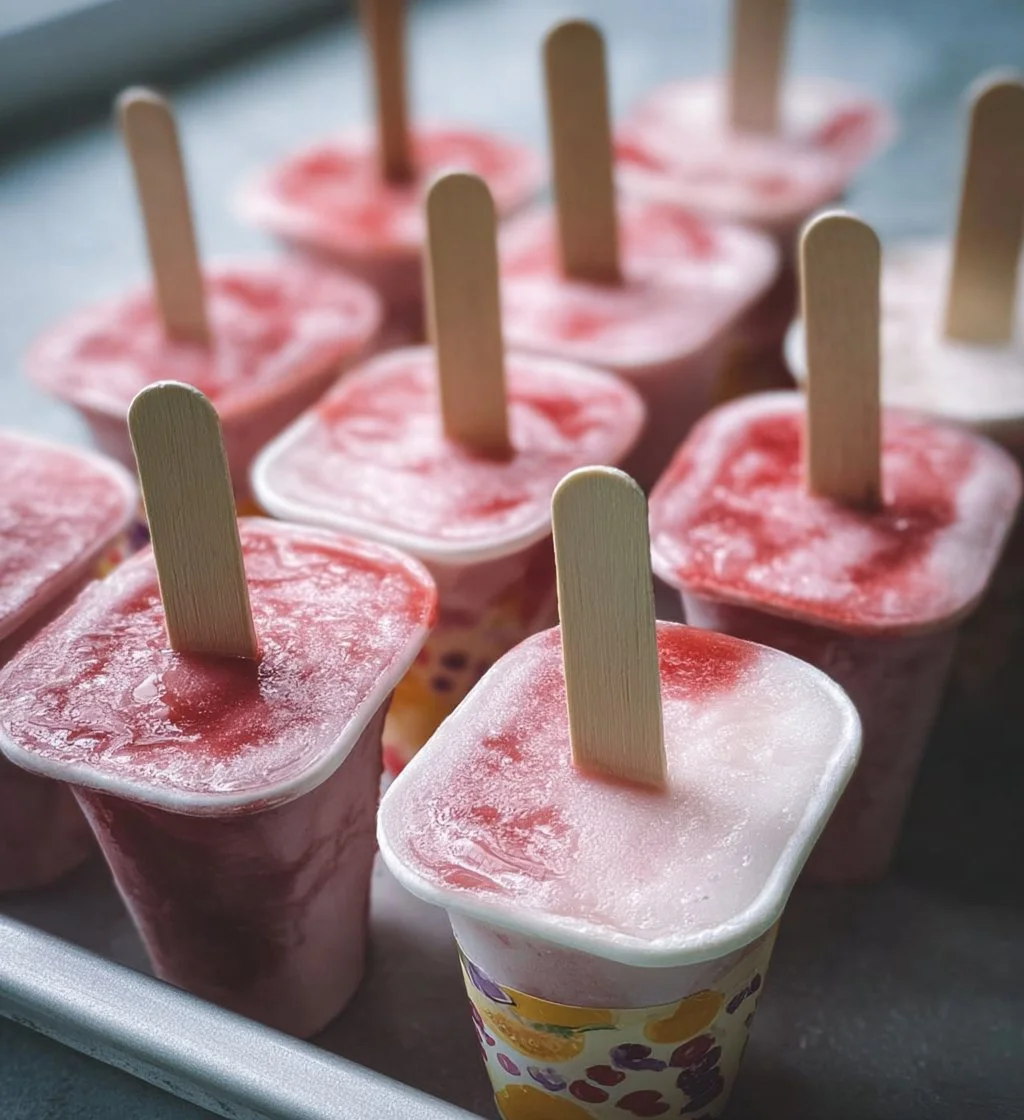
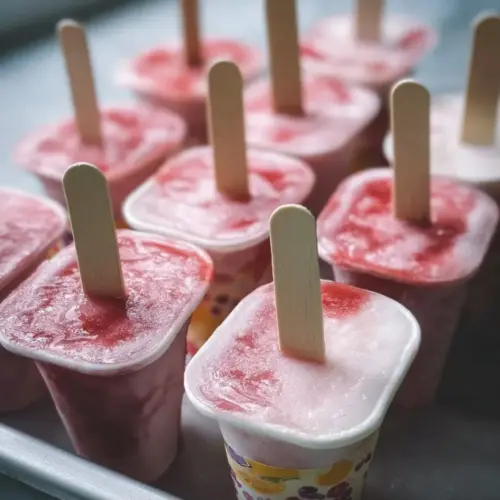
Pour the mixture into your chosen molds, filling them about 3/4 full. Gently tap the molds on the counter to remove any air bubbles and ensure an even fill.
If desired, add additional chunks of fruit or a sprinkle of granola on top for extra texture and flavor. Stick in a popsicle stick in the center of each mold.
Place the molds in the freezer and let them freeze for at least 4–6 hours, or until completely solid.
Once frozen, remove the pops from the molds by running them under warm water for a few seconds, making it easier to release them.
How to Serve Frozen Yogurt Pops
Serving frozen yogurt pops is simple and incredibly fun. Start by taking the pops out of the freezer just a few minutes before you plan to serve them. This slight thawing makes them easier to eat and enhances their creamy texture. You can serve them straight from the molds or arrange them on a platter for a delightful visual presentation. Consider adding some extra toppings on the side, such as chopped nuts, mini chocolate chips, or more fresh fruit for guests to create custom-loaded pops. The beauty of these yogurt pops is their versatility, allowing you to serve them as they are or alongside a fruit puree for dipping. You can even create a fun “pop bar” for parties, where everyone can choose their mix-ins and toppings. This approach is perfect for adding a personal touch to each pop, making for an interactive and engaging dessert experience.
Expert Tips for Frozen Yogurt Pops
Creating the perfect frozen yogurt pops comes down to a few expert tips you can keep in mind. First, choose high-quality plain yogurt for a creamy texture and flavor. Greek yogurt often works best due to its rich consistency, but you can use regular yogurt if you prefer something lighter. When selecting fruit, opt for ripe, sweet options that are in season for the best taste. If you want to control sweetness, taste your mixture before pouring it into molds and adjust honey or maple syrup accordingly.
Additionally, consider experimenting with citrus juices, like lemon or lime, to add a zesty note to your pops. You can also layer different flavors in the molds for a fun visual effect; just pour each flavor gently to avoid mixing too much. To enhance the health factor further, consider using alternatives to sugar, such as mashed bananas or dates, for sweetness. Lastly, if you’re making pops for kids, you can blend some spinach or kale into the yogurt mixture for added nutrition without affecting the flavor significantly. These tips will ensure you create tasty, colorful frozen yogurt pops that everyone will love.
How to Store Frozen Yogurt Pops
Proper storage of frozen yogurt pops will keep them delicious and ready for your next craving. Once your pops are completely frozen, remove them from the molds and wrap each individual pop in plastic wrap or aluminum foil. This wrapping prevents freezer burn and helps maintain the pops’ texture and flavor. Place the wrapped pops in an airtight container or a resealable plastic bag before returning them to the freezer. Ensure you label the container or bag with the date so you can keep track of freshness.
When stored correctly, these homemade yogurt pops can last for up to 2 months in the freezer. However, for the best flavor and texture, enjoying them within the first month is a good idea. When you’re ready to serve them, simply take them out and let them thaw for a couple of minutes at room temperature for easy removal from the wrap.
Variations of Frozen Yogurt Pops
Experimenting with different flavor variations can take your frozen yogurt pops from simple to spectacular. Start with the base recipe and think outside the box. For a tropical twist, mix in crushed pineapple or diced mango with coconut yogurt, and consider adding shredded coconut for texture. If you love chocolate, blend cocoa powder into the yogurt mixture or layer it with a chocolate sauce before freezing.
For a berry medley, combine strawberries, blueberries, and raspberries in one batch for a colorful pop. Don’t forget about herbal flavors! Fresh mint or basil can add an intriguing twist, especially when paired with citrus flavors. You can also create creamier pops by adding a bit of coconut milk or almond milk to the yogurt mixture.
For a fun crunch, consider mixing in granola or crushed nuts after pouring the base into the molds. If you want to make a lower-calorie version, substitute some yogurt with fresh fruit puree and adjust sweetness accordingly. The beauty of frozen yogurt pops is their adaptability, so let your taste buds guide you as you explore new flavor combinations.
FAQ about Frozen Yogurt Pops
What are frozen yogurt pops?
Frozen yogurt pops are a frozen treat made from yogurt and blended fruit, offering a creamy texture and the ability to customize flavors.
How long do frozen yogurt pops last?
When stored properly in the freezer, frozen yogurt pops can last up to 2 months, though they are best enjoyed within the first month for optimal flavor.
Can I use non-dairy yogurt for frozen yogurt pops?
Yes, you can use non-dairy yogurt alternatives, such as almond, coconut, or soy yogurt, to make frozen yogurt pops that align with dietary preferences.
Are frozen yogurt pops healthier than ice cream?
Yes, frozen yogurt pops generally contain less sugar and fat than traditional ice cream, making them a healthier alternative for a sweet treat.
Can I add sweeteners to my frozen yogurt pops?
Absolutely! You can sweeten your frozen yogurt pops with honey, maple syrup, or even alternative sweeteners to achieve your desired level of sweetness.
Is it possible to make frozen yogurt pops without molds?
Yes, if you don’t have molds, you can use small cups or ice cube trays. Insert a wooden stick into each section once the mixture is slightly frozen.
Frozen Yogurt Pops
Ingredients
Main Ingredients
- 2 cups plain yogurt (Greek or regular) Choose high-quality for best results
- 1 cup fresh fruit (such as berries, peaches, or bananas) Use ripe and sweet options for better flavor
- 1/4 cup honey or maple syrup Adjust for sweetness as needed
- 1 teaspoon vanilla extract Optional for added flavor
- 1 pinch salt Optional to enhance flavor
- to taste additional fruit pieces or granola for layering Optional for extra texture and flavor


Instructions
Preparation
- Wash and prepare your fruit. Chop larger pieces into smaller chunks if necessary, or mash berries slightly to release juices.
- In a mixing bowl, combine the yogurt, honey or maple syrup, vanilla extract, and salt. Mix well until blended smoothly.
- Fold in the fresh fruit, or add it whole if you want to maintain some texture.
- Pour the mixture into molds, filling them about 3/4 full. Tap the molds gently on the counter to remove air bubbles.
- If desired, add extra fruit chunks or granola on top. Insert a popsicle stick into each mold.
Freezing
- Place molds in the freezer and let them freeze for at least 4-6 hours, or until completely solid.
- To release the pops, run the molds under warm water for a few seconds.
Serving
- Remove pops from the freezer a few minutes before serving for easier eating.
- Serve straight from the molds or arrange on a platter. Offer toppings like nuts or chocolate chips for custom loading.
Send me this recipe!
Just enter your email below and get it sent straight to your inbox!