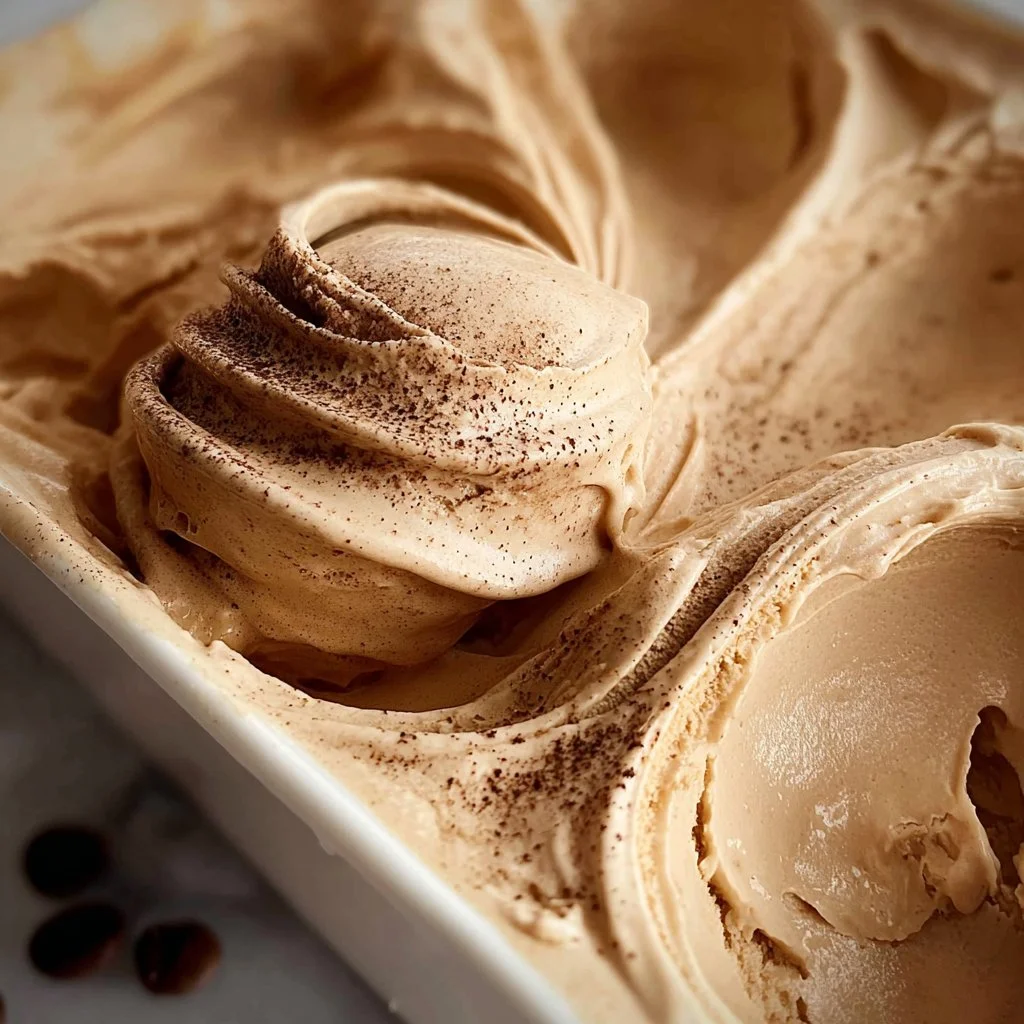
When the sun blazes down, there’s nothing quite as refreshing as a scoop of ice cream. But when that ice cream is flavored with rich, aromatic coffee, it elevates your dessert experience to a whole new level. Coffee ice cream combines the creamy, velvety texture you’re used to with the invigorating essence of coffee, making it not only a delicious treat but also a little pick-me-up.
Why We Love This Coffee Ice Cream Recipe
One of the greatest joys of making coffee ice cream at home is the freedom to customize the flavor to suit your taste. This recipe uses simple ingredients you likely already have in your kitchen. The combination of heavy cream, whole milk, and sugar creates a rich and creamy foundation. The addition of instant coffee crystals or espresso strengthens the coffee flavor, while vanilla extract adds a hint of warmth, rounding out the taste profile beautifully.
What really sets this recipe apart is its ease. You don’t need to be an expert in the kitchen to whip up this delightful treat. It’s an excellent project during a lazy weekend afternoon, giving you a sense of accomplishment when you enjoy your homemade ice cream later. Plus, it’s an excellent way to cool down on a summer day or to cap off a cozy dinner with friends.
Ingredients for Coffee Ice Cream
Before you jump into the process of making your own coffee ice cream, gather the following ingredients. These are staples found in most kitchens, ensuring the dessert is just an arm’s reach away. Here’s what you’ll need:
- 2 cups heavy cream
- 1 cup whole milk
- 3/4 cup sugar
- 1 1/2 tablespoons instant coffee crystals or instant espresso
- 1 tablespoon vanilla extract
- 1/8 teaspoon salt
How to Make Coffee Ice Cream Directions
Now that you have your ingredients prepared, it’s time to dive into the process of creating this delightful treat. Follow these simple steps to make your own coffee ice cream from scratch.
Freezing the Ice Cream Maker: Ensure that the insert of your ice cream maker has been frozen overnight. This is vital for achieving the perfect consistency in your ice cream.
Mixing the Base: In a medium-sized bowl, combine the heavy cream, whole milk, and sugar. Whisk them together until the sugar is completely dissolved. This builds the creamy base for your ice cream.
Adding Coffee Flavor: Now, it’s time to infuse your mixture with that stunning coffee flavor. Add the instant coffee crystals and salt to the mixture, whisking briskly for about two minutes. This helps fully dissolve the coffee, ensuring a consistent flavor throughout.
Chilling the Mixture: Place the bowl in the freezer for about 20 minutes. This step is crucial as it helps cool the mixture before it hits the ice cream maker. After 20 minutes, take it out and whisk it again, then return it to the freezer for another 10 minutes.
Final Whisking: Once you’ve taken it out of the freezer again, whisk the mixture one last time to maintain a smooth texture before you start the churning process.
Churning the Ice Cream: Assemble your ice cream maker and start it up. Slowly pour the chilled mixture into the ice cream maker as it runs. Follow the manufacturer’s instructions for how long to churn. It should typically take between 15 to 30 minutes for it to reach a soft-serve consistency.
Storing the Ice Cream: Once churned, transfer the ice cream to your desired container. Enjoy it soft right away, or for a firmer texture, let it freeze for about 4 to 6 hours until it is solid and scoopable.
Making your own coffee ice cream is a delightful experience that brings satisfaction with every scoop. The creamy texture paired with the unmistakable coffee flavor is bound to impress your friends and family.
How to Serve Coffee Ice Cream
Serving your homemade coffee ice cream can be as simple or as intricate as you choose. Here are some delightful ways to present and enjoy your delicious creation:
Classic Scoop: Serve the ice cream in a bowl or cone. For an elegant touch, drizzle a little chocolate syrup over the top or add a sprinkle of cocoa powder for extra flavor.
With Coffee: For the ultimate indulgence, pair a scoop of coffee ice cream with a shot of hot espresso for an affogato-style dessert. The hot coffee melts the ice cream, creating a delightful mix of flavors and textures.
Coffee Float: Create a unique coffee float by combining your coffee ice cream with cold brew coffee or iced coffee. Top with whipped cream and a dusting of cocoa or cinnamon for an impressive dessert.
Pairing with Baked Goods: Coffee ice cream goes wonderfully with baked treats. Place a scoop on top of brownies or chocolate chip cookies, decadent enough to satisfy anyone’s sweet cravings.
No matter how you choose to serve your coffee ice cream, it’s a dessert that promises comfort and satisfaction, making it the perfect finish to any meal.
Expert Tips for Making Coffee Ice Cream
Use Quality Ingredients: The flavor of your coffee ice cream hinges on the quality of your ingredients. For the best results, opt for high-quality coffee crystals or espresso. The flavor will be more pronounced and satisfyingly rich.
Chill Everything: Before mixing, ensure both your mixing bowl and ice cream maker are properly chilled. This will aid in achieving a smoother texture while preventing ice crystals from forming.
Stay Within Time Limits: When churning, be mindful of not overdoing it. Churning past the suggested time can lead to a buttery consistency rather than the creamy texture you want.
Experiment with Flavors: Don’t hesitate to branch out. Consider adding a splash of flavored liqueur like coffee or almond or swirls of caramel or chocolate for added indulgence.
Watch the Freezing Process: If your ice cream solidifies too hard in the freezer, let it sit out for a few minutes before scooping. This softens it just enough for a beautiful, easy scoop.
Incorporating these expert tips will enhance your ice cream-making experience, resulting in a batch that’s truly extraordinary.
How to Store Coffee Ice Cream
Proper storage of your homemade coffee ice cream is key to maintaining its delightful texture and flavor. Here’s how to ensure that your ice cream stays fresh:
Air-tight Containers: Transfer your ice cream to an air-tight container as soon as it’s churned. This prevents ice crystals from forming and keeps your ice cream smooth.
Layer It Right: If adding any mix-ins like chocolate chips or nuts, fold them in gently at the end of the churning process. This ensures they’re evenly distributed and doesn’t interfere with the freezing process.
Temperature Control: Store your ice cream in the coldest part of the freezer—usually the back. Avoid leaving it out on the counter too long between servings to prevent thawing and refreezing.
Keep It Covered: If you’re making multiple flavors, label and cover your containers well. This prevents flavors from mixing and keeps the texture intact.
If stored correctly, your coffee ice cream can last up to two weeks in the freezer, although it may not last that long once your friends and family get a taste!
Variations of Coffee Ice Cream
Why stop at just one flavor when making coffee ice cream? Here are some delightful variations to try out:
Mocha Madness: Add a homemade chocolate fudge swirl or chocolate chunks to your coffee ice cream for a mocha version. The combination of coffee and chocolate is an irresistible duo.
Nutty Delight: Fold in crushed almonds or hazelnuts for a nutty flavor. Toasting the nuts beforehand enhances their flavor and adds a pleasant crunch.
Mint Coffee Ice Cream: For a refreshing twist, add a few drops of peppermint extract to your mixture. The contrast between coffee and mint offers a unique flavor profile that’s surprisingly delicious.
Spiced Coffee Ice Cream: Introduce a pinch of cinnamon or nutmeg into your base for a cozy, spiced coffee flavor. This is particularly enjoyable during the fall and winter months.
Exploring these variations can turn your coffee ice cream into a new masterpiece with every batch you make.
Frequently Asked Questions About Coffee Ice Cream
How do I know if my coffee ice cream is ready to serve?
Your coffee ice cream should be thick and creamy once churned, resembling a soft-serve consistency. After freezing for a few hours, it should be firm yet still scoopable.
Can I use regular brewed coffee instead of instant coffee?
Using brewed coffee is possible, but you’ll need to reduce the amount of liquid in the recipe. Instant coffee gives a stronger flavor without altering the creaminess.
How can I make my ice cream softer?
If your ice cream ends up too hard, let it sit at room temperature for a few minutes before serving. You can also try adding a bit more cream or milk during mixing to create a softer texture.
Coffee Ice Cream
Equipment
- Ice Cream Maker
- Mixing Bowl
Ingredients
- 2 cups heavy cream
- 1 cup whole milk
- 3/4 cup sugar
- 1 1/2 Tbsp. instant coffee crystals or instant espresso
- 1 Tbsp. vanilla extract
- 1/8 tsp. salt


Instructions
- Ensure the insert of your ice cream maker has been frozen overnight.
- In a medium bowl, combine heavy cream, whole milk, and sugar. Whisk until the sugar is completely dissolved.
- Add instant coffee crystals and salt, whisking briskly for about two minutes until fully dissolved.
- Chill the mixture in the freezer for about 20 minutes, then whisk again and return to the freezer for another 10 minutes.
- Assemble your ice cream maker and pour the chilled mixture in as it runs. Churn according to manufacturer’s instructions, usually 15 to 30 minutes.
- Transfer the churned ice cream to an airtight container. Enjoy soft immediately or freeze for 4 to 6 hours for a firmer texture.
Send me this recipe!
Just enter your email below and get it sent straight to your inbox!