Carmelite Bars are a delightful dessert that many people adore, combining a rich layering of chocolate, caramel, and a crumbly crust. They are perfect for sharing at gatherings or simply enjoying at home. The layers create a texture that satisfies every sweet craving while offering a wonderful balance between sweet and salty flavors. In this article, you will learn why these treats are so beloved, how to make them, and plenty of tips to ensure your Carmelite Bars turn out perfectly.
Why We Love This Carmelite Bars
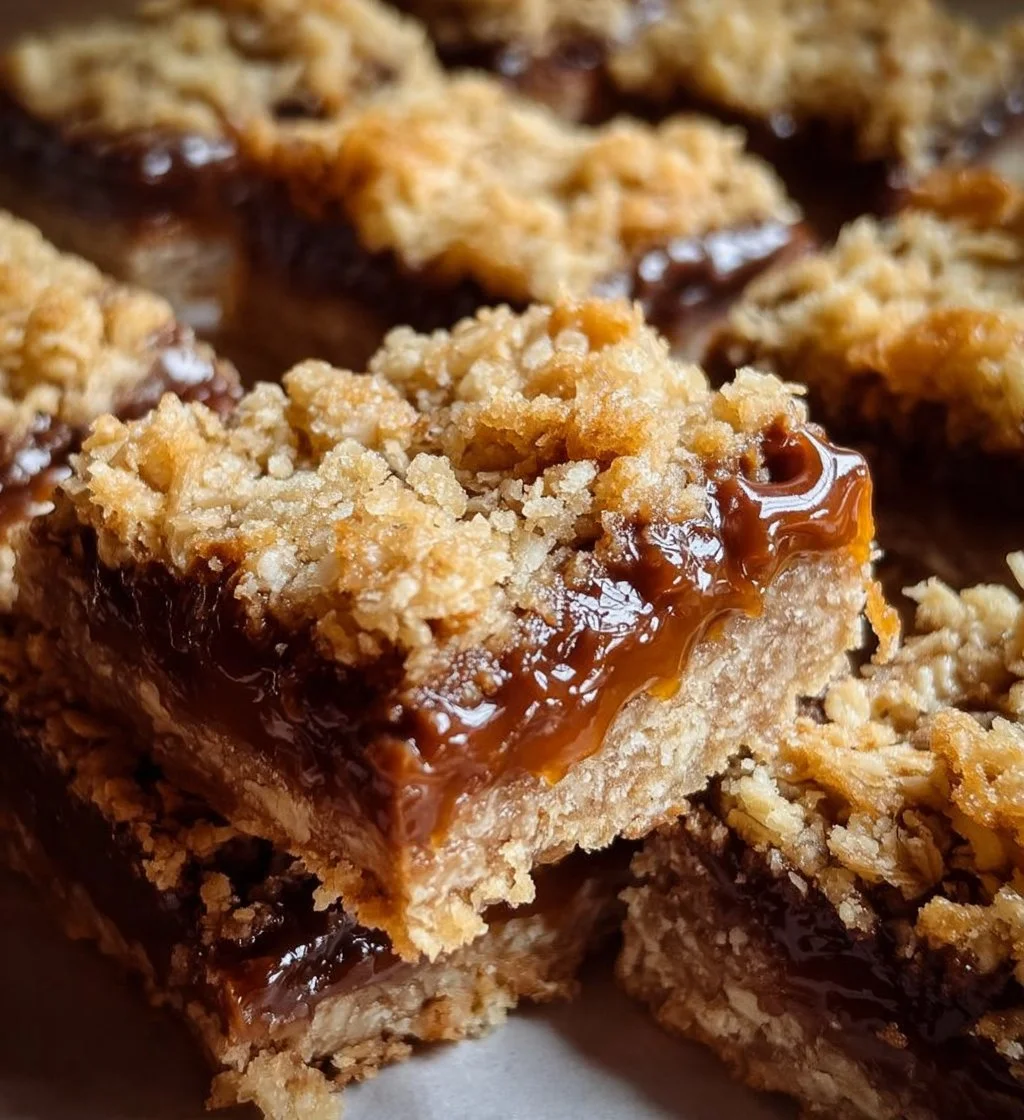
Carmelite Bars capture the hearts of dessert lovers for several reasons. First, the combination of rich chocolate, smooth caramel, and a buttery crust delivers a flavor explosion. Each bite brings together the crunch of the crust with a gooey layer of caramel and a rich chocolate topping. The contrasting textures make them irresistible.
Second, they are incredibly versatile. You can serve them in various settings, from casual family dinners to festive parties, making them a fantastic choice for any occasion. These bars are also easy to transport, so they work well for potlucks and picnics.
Lastly, the straightforward preparation process allows even novice bakers to whip up a batch without stress. You don’t need specialized skills or fancy equipment. With simple ingredients and a few easy steps, you can create a delicious dessert that everyone will love.
Ingredients for Carmelite Bars
- 1 cup all-purpose flour
- 1 cup rolled oats
- 1/2 cup brown sugar, packed
- 1/2 teaspoon baking soda
- 1/2 teaspoon salt
- 1/2 cup unsalted butter, melted
- 1 cup chocolate chips
- 1 cup caramel candies, unwrapped
- 1/2 cup sweetened condensed milk
- 1/2 teaspoon vanilla extract
Directions
- Preheat your oven to 350°F (175°C) and prepare a baking dish by greasing it lightly or lining it with parchment paper.
- In a large bowl, mix the flour, oats, brown sugar, baking soda, and salt until well combined. Pour in the melted butter and stir until you form a crumbly dough.
- Press half of the mixture into the bottom of the prepared baking dish to create a crust. Bake for about 10 minutes until lightly golden.
- While the crust bakes, prepare the caramel layer. In a saucepan over low heat, melt the caramel candies with sweetened condensed milk, stirring frequently until smooth. Add the vanilla extract and mix well.
- Pour the caramel mixture over the baked crust and spread it evenly. Sprinkle the chocolate chips on top.
- Take the remaining crumb mixture and crumble it evenly over the chocolate chips.
- Return the dish to the oven and bake for an additional 15-20 minutes, or until the top is golden brown and the chocolate chips are melted.
- Allow the bars to cool completely in the baking dish before cutting them into squares and serving.
How to Serve Carmelite Bars
Serving Carmelite Bars is just as enjoyable as making them. Once you cut the bars, consider presenting them on a decorative platter to highlight their appeal. Garnish them with a sprinkle of sea salt on top for a sophisticated touch that enhances the flavors even further.
If you’re hosting a gathering, serve them alongside a selection of beverages such as cold milk, coffee, or tea. Their sweetness pairs beautifully with these drinks, offering a balanced experience for your guests. For a more festive atmosphere, you can add whipped cream or a scoop of vanilla ice cream on the side.
Moreover, consider drizzling extra caramel sauce over the bars for those who crave additional sweetness. Topping them with nuts, like chopped pecans or walnuts, can add a delightful crunch and additional flavor. When served in a cozy setting, the rich layers of chocolate and caramel make these bars an irresistible treat that invites you to come back for seconds.
Expert Tips for Carmelite Bars
To ensure your Carmelite Bars are a hit, keep a few expert tips in mind. First, make sure all your ingredients are at room temperature before you begin. This will help them blend more easily and create a better texture in your final product.
If you’re making caramel from wrappers, use a high-quality brand for the best flavor. While store-bought options are convenient, homemade caramel can elevate your bars to another level. If you decide to go this route, keep an eye on the temperature to avoid burning.
Be careful not to overbake the bars. The key is to remove them when they are just lightly golden on top. They will continue to firm up as they cool. Also, letting them cool completely in the pan will make cutting easier and prevent them from falling apart.
Lastly, try to be generous with the chocolate chips. The more you add, the more chocolatey richness you will enjoy in each bite. You can even mix in other types of chips, such as white chocolate or milk chocolate, for added variety.
How to Store Carmelite Bars
Storing your Carmelite Bars properly can help them stay fresh and delicious for longer. Once they cool completely, slice them into squares and place them in an airtight container. You can layer the bars with parchment paper to prevent them from sticking together.
Keep the container in a cool, dry place if you plan to consume them within a week. For longer storage, consider refrigerating your bars. This helps preserve their freshness and texture, allowing you to enjoy them over several weeks. Just remember to let them sit at room temperature for a few minutes before serving them, as the cold can alter their texture.
If you need to store them for an even more extended period, consider freezing them. Wrap each bar individually in plastic wrap and place them in a freezer-safe container. They can last up to three months in the freezer. When you’re ready to indulge again, simply thaw them in the refrigerator or at room temperature.
Variations of Carmelite Bars
Carmelite Bars are highly adaptable, allowing you to experiment with various flavors and mixes. One popular variation includes adding nuts to the crust or the topping for extra crunch. Chopped almonds or pecans can offer a delightful contrast to the softness of the caramel and chocolate.
You could also experiment with different types of chocolate. Using dark chocolate can deepen the flavor profile, while white chocolate provides a sweeter alternative. For those who love a little spice, consider adding a pinch of cinnamon or even a dash of espresso powder to the crust for a unique twist.
If you’re in the mood for seasonal flavors, try incorporating pumpkin puree or apple pie spices in autumn to create a delightful fall-inspired version. In the summer, you could fold in fresh berries into the caramel for a fruity take.
You can even create a cookie-caramel hybrid by using cookie dough instead of crust for a cookie base. This adaptation brings in a chewy texture that many might find appealing. The possibilities are limited only by your imagination, so feel free to get creative!
FAQ about Carmelite Bars
What are Carmelite Bars?
Carmelite Bars are a layered dessert featuring a crumbly crust, creamy caramel, and rich chocolate, making them a favorite for sweet tooth lovers.
Can I make Carmelite Bars ahead of time?
Yes, you can make Carmelite Bars ahead of time and store them in an airtight container for up to a week, or freeze them for several months.
How should I cut the Carmelite Bars for serving?
It’s best to let the bars cool completely before cutting them into squares. For clean cuts, use a sharp knife and wipe it with a damp cloth between cuts.
What kind of chocolate can I use in Carmelite Bars?
You can use semi-sweet chocolate chips, dark chocolate, or milk chocolate, depending on your preference.
Can I customize the toppings on my Carmelite Bars?
Absolutely! You can add nuts, flaky sea salt, or additional caramel drizzles for a customized touch on your Carmelite Bars.