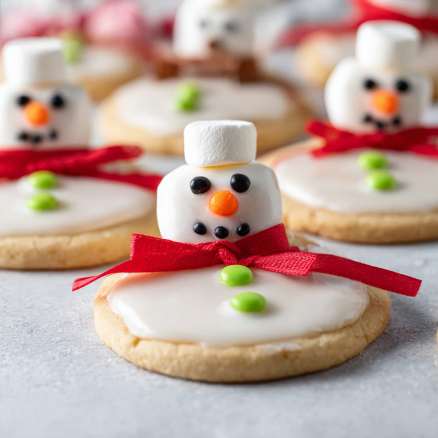
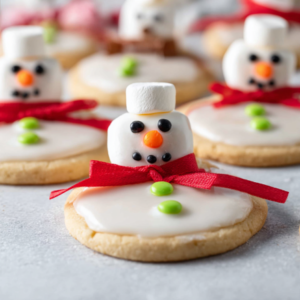
When it comes to the festive season, creating delightful treats that capture the holiday spirit is essential. Melted Snowman Cookies are not just a delicious dessert; they are a playful and engaging activity that brings joy to both kids and adults. The whimsical appearance of these cookies, resembling a snowman that’s melting away, adds a fun twist to your holiday baking. Imagine the joy on your family’s faces as they enjoy these adorable delights at your next gathering or holiday party.
Why We Love This Melted Snowman Cookies Recipe
There’s so much to love about Melted Snowman Cookies! First and foremost, they embody the spirit of winter and holiday cheer. The fun and creativity involved in decorating these cookies make them a favorite among both kids and adults. You’ll appreciate how simple the recipe is, allowing even novice bakers to join in on the fun without feeling overwhelmed.
The cookies are not just about looks; they taste fantastic, combining the sweetness of sugar cookies with creamy frosting and delightful toppings. The customization possibilities are endless! You can get creative with decorations, making each cookie uniquely yours. Plus, they are perfect for sharing. Whether you’re gifting them to neighbors, bringing them to a holiday potluck, or serving them at your own festive get-together, these cookies are sure to impress your guests.
Melted Snowman Cookies also make a fun and memorable activity to do with children or friends. You can divide the decorating tasks among everyone, making it a collaborative and bonding experience. Ultimately, these cookies are not just a treat; they’re a celebration of creativity, togetherness, and holiday spirit.
Ingredients about Melted Snowman Cookies
To create these delightful Melted Snowman Cookies, you’ll need a few simple ingredients that come together beautifully. Below is the list of what you will require:
- 16 oz Sugar Cookie Dough: The base of your cookies, offering a sweet and soft texture.
- 1 1/2 cups White Frosting: This acts as a delicious “puddle” for your snowmen.
- 12 Large Marshmallows: These will be the snowman heads, adding a fluffy touch.
- 4 Pull ‘n Peel Twizzlers: These make perfect scarves for your snowmen.
- 12 Orange Sprinkles: To represent the carrot noses of your snowy friends.
- 1/4 cup Mini Chocolate Chips: Use these for the eyes and mouths.
- 36 Pearl Sprinkles: Any color will work as buttons on your snowman.
- Brown or Black Decorating Piping Gel: This will be used for the arms and additional details.
How to Make Melted Snowman Cookies Directions
Making these Melted Snowman Cookies is an enjoyable process that begins with some simple preparation. Start by preheating your oven according to the sugar cookie package instructions; this ensures that your cookies bake evenly.
Next, take your sugar cookie dough and divide it into sections. Grab two dough pieces from your 16 oz package and roll them together between your palms to create a smooth cookie dough ball. You want them to be about the size of a golf ball. Place these cookie dough balls onto an ungreased cookie sheet, making sure to leave enough space between them for spreading during baking. Continue this process until you have formed 12 cookie dough balls.
Bake your cookies as per the package instructions until they are golden and firm. Once baked, carefully remove them from the oven. Allow the cookies to cool completely on a wire rack. This step is crucial because warm cookies and frosting do not mix well!
Now it’s time to decorate. Spoon the white frosting into a microwave-safe bowl and heat it in the microwave for about 10 to 15 seconds, just enough to thin it out without completely melting it. You want to create a smooth, pourable frosting that will mimic the look of a puddle on the cookie. Scoop 1 to 2 tablespoons of the thinned frosting onto each cooled cookie and gently spread it around in a circular motion. Aim to create a puddle effect with the frosting.
Once your cookies are frosted, position a large marshmallow on top of each cookie, making sure it sits snugly toward one edge. Next, take your Pull ‘n Peel Twizzlers and carefully remove two connected strands. Wrap these strands around the base of the marshmallow, mimicking the appearance of a cozy scarf. Feel free to separate the strands slightly at the ends for a fun touch.
Now, it’s time to add the noses! Stick one end of an orange sprinkle into the center of each marshmallow to serve as the snowman’s nose. The sprinkles should resemble a cute little carrot peeking out.
For the eyes and mouth, melt the mini chocolate chips in a microwave-safe bowl. Heat them for 30 seconds, then stir. Continue this process until you have a smooth melted chocolate. Use a toothpick or the end of a chopstick to carefully dip into the chocolate, placing two dots above the carrot nose for the eyes and a larger dot below for a mouth that expresses surprise.
Finish off your cookies by placing three pearl sprinkles on the frosting for buttons on the snowman’s belly. Using the brown or black piping gel, pipe small arms at each side of the buttons to give your snowman some character.
And just like that, your Melted Snowman Cookies are ready! Each creation will bring smiles and add a festive spirit to your holiday gatherings.
How to Serve Melted Snowman Cookies
Serving your delightful Melted Snowman Cookies can be just as fun as making them! Once you have decorated them, choose a festive platter or tray to display them beautifully. You can use a holiday-themed plate, which will add to the cheerful atmosphere.
Consider pairing the cookies with a warm beverage like hot chocolate, apple cider, or a cozy cup of tea. The combination of the sweet, soft cookies with a warm drink enhances the overall experience and is perfect for colder days.
You might also want to create a small dessert table or buffet, showcasing your cookies alongside other holiday treats. This way, guests can choose their favorites and enjoy a delightful spread. If you’re inviting kids to the celebration, they’ll love the interactive aspect of picking their favorite snowman cookies.
Don’t forget to take pictures of your adorable creations before they disappear! These cookies make for a great photo opportunity and are a lovely way to capture the essence of your holiday baking adventures. Enjoy the cookies fresh, and don’t hesitate to encourage your friends and family to indulge in the whimsical joy of these festive treats.
Expert Tips: Melted Snowman Cookies
Creating the perfect Melted Snowman Cookies can be a breeze with a few handy tips:
- Cookie Consistency: Ensure your sugar cookie dough is well-blended and smooth. If it’s too crumbly, add a touch of milk or an egg to help bind it better.
- Cooling Time: Patience is key! Allow the cookies to cool wholly before frosting. Warm cookies can cause the frosting to melt, ruining the intended look.
- Piping Gel: If you don’t have piping gel, you can achieve a similar effect using melted chocolate or icing. Just make sure whatever you use is easy to work with.
- Experiment with Toppings: Feel free to try different frosting colors or additional toppings. Use colored sprinkles, edible glitter, or even fondant for added fun!
- Get Creative: Engage everyone during decorating. Set up a decorating station with different candies and toppings, and let your guests design their snowmen however they like.
- Making Ahead: You can prepare the cookies in advance, just wait until decoration day to add the marshmallows and frosting. This saves time on busy days leading to the holidays.
By following these tips, your Melted Snowman Cookies will not only look great but taste fantastic too!
How to Store Melted Snowman Cookies
To maintain the freshness of your Melted Snowman Cookies, you’ll want to store them properly. Here’s the best way to do it:
- Airtight Container: Once the cookies are fully decorated, place them in an airtight container. This will help keep them moist and fresh for a longer time.
- Layering: If you are stacking the cookies in a container, place parchment paper in between layers to prevent them from sticking to each other.
- Room Temperature: Store the cookies at room temperature. If you choose to refrigerate them, be aware that cold conditions may affect the texture of the frosting and marshmallows.
- Consumption Timing: For optimal taste and presentation, try to enjoy the cookies within a week of baking. However, if you want to extend their shelf life, omit the marshmallows and frosting until you are ready to serve.
If you want to prepare these cookies for a later date, it may be best to freeze the baked cookies themselves. Just remember to let them cool completely before wrapping them tightly and freezing. You can frost them once they’re thawed for a fresh experience!
Variation of Melted Snowman Cookies
While the classic Melted Snowman Cookies are absolutely delicious, don’t hesitate to bring your unique spin to the recipe. Here are a few variations you might enjoy:
- Chocolate Bake: Swap the sugar cookie dough for chocolate cookie dough. This delightful twist will create a unique flavor that pairs wonderfully with the sweetness of frosting and marshmallows.
- Colorful Frosting: Instead of plain white frosting, try using colored frostings like blue, pink, or even green to give your snowman cookies a fun, vibrant twist. You can match the frosting to a festive theme or let creativity run wild.
- Add Flavor: Incorporate extracts into your sugar cookie dough, such as vanilla, almond, or peppermint, to add a burst of flavor that fits the season.
- Mini Snowmen: Make smaller versions of the cookies to create a snowman army! Mini cookies can be easier to decorate and perfect for party favors.
- Scented Sugar Cookies: Play with different sugars like cinnamon sugar or perhaps a nutty touch with hazelnut-infused sugar to create layered flavors that enhance your snowmen.
These variations make it easy to make these cookies your own and share them with others!
FAQ Section
Are Melted Snowman Cookies difficult to make?
Not at all! This recipe is beginner-friendly and easy to follow. With straightforward ingredients and simple steps, you’ll find it enjoyable to make these adorable cookies.
Can I use store-bought sugar cookie dough?
Yes, using store-bought sugar cookie dough is an ideal option for faster preparation, making the entire process much easier and more convenient for everyone involved.
How can I make my cookies look perfect?
Practice makes perfect! Take your time while decorating and have fun with the process. Remember, each snowman can have its unique character, adding to the fun!
Can I freeze the Melted Snowman Cookies?
You can freeze the baked cookies without frosting or marshmallows. Bake them, cool them completely, and store them in an airtight container. Frost them when you’re ready to enjoy!
What can I substitute for marshmallows?
If you want to avoid marshmallows, consider using large meringue cookies or chocolate-dipped cookies as the snowman heads instead. This offers a delightful twist to your creation.
Melted Snowman Cookies
Equipment
- Baking Sheet
- Mixing Bowl
- Piping Bag
Ingredients
- 16 oz Sugar Cookie Dough
- 1 1/2 cups White Frosting
- 12 large Marshmallows For snowman heads
- 4 Pull ‘n Peel Twizzlers For scarves
- 12 Orange Sprinkles For noses
- 1/4 cup Mini Chocolate Chips For eyes and mouths
- 36 Pearl Sprinkles For buttons
- Brown or Black Decorating Piping Gel For arms and details


Instructions
- Preheat your oven according to the sugar cookie package instructions.
- Divide the sugar cookie dough into sections and roll them into golf ball-sized balls. Place them on an ungreased cookie sheet.
- Bake the cookies according to package instructions until golden and firm.
- Allow cookies to cool completely on a wire rack.
- Melt the white frosting in the microwave for 10-15 seconds until pourable.
- Spread 1-2 tablespoons of melted frosting onto each cooled cookie to create a puddle effect.
- Place a large marshmallow on top of each cookie and wrap with Twizzler strands to create scarves.
- Add an orange sprinkle for the nose and use melted chocolate chips for eyes and mouth.
- Finish by adding pearl sprinkles for buttons and piping gel for arms.
Send me this recipe!
Just enter your email below and get it sent straight to your inbox!