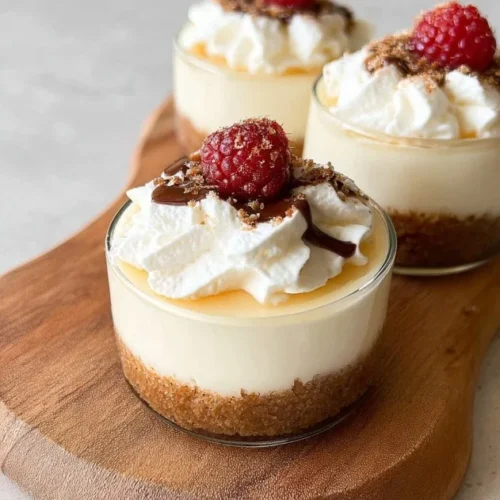
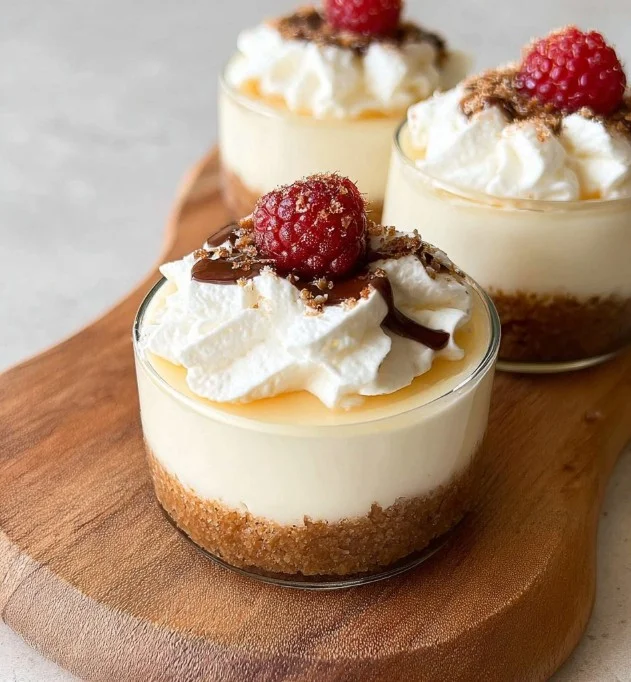
When you think of decadent desserts, cheesecake often comes to mind – rich, creamy, and always a crowd-pleaser. But let’s step up the game and talk about cheesecake cups. This delightful twist on the classic recipe brings all the amazing flavors of traditional cheesecake but in a convenient and perfectly portioned format. Ideal for special occasions, casual get-togethers, or even a simple sweet treat at home, cheesecake cups are both visually appealing and delicious. You might just find that they bring a little joy to your day!
Why We Love This Cheesecake Cups Recipe
Cheesecake cups are more than just a practical dessert; they are an experience to savor. Each element combines to create a delightful harmony of flavors and textures. The crunch of the graham cracker crust contrasts beautifully with the velvety cream cheese filling, while the fresh fruit on top adds a hint of freshness that elevates the entire dessert. Here are a few reasons why you will adore these cheesecake cups:
Easy to Make: This recipe involves simple ingredients and straightforward steps, making it accessible for anyone, regardless of experience in the kitchen.
Portion Control: With individual servings, you can prevent overindulgence while still enjoying a treat. You can easily control how much you want to enjoy.
Customizable: While we’ll stick to the classic recipe, you can improvise by adding your favorite flavors or toppings, letting your creativity shine.
Perfect for Any Occasion: From birthday parties to holiday gatherings or even a cozy night in, cheesecake cups are versatile enough to fit any situation.
Impressive Presentation: Serve them in clear cups to showcase the delightful layers. They look gorgeous and taste incredible, making them a sure hit with guests.
Now you’re ready to dive into making these delicious cheesecake cups. Let’s get started!
Ingredients about Cheesecake Cups
To create these scrumptious cheesecake cups, you will need the following ingredients. Each element plays a vital role in crafting the perfect balance of flavors and textures.
- Graham cracker crumbs: 3/4 cup
- Butter, melted: 2 tablespoons
- Powdered sugar: 1 tablespoon for the crust and 1 cup for the filling
- Cream cheese, softened: 8 ounces
- Heavy whipping cream: 1/2 cup
- Vanilla extract: 1 teaspoon
- Fresh fruit or berries: For serving
These simple ingredients come together to create a delightful treat that you and your loved ones will enjoy!
How to Make Cheesecake Cups Directions
Now that you have all the ingredients ready, let’s walk through the steps to make these cheesecake cups.
Prepare the Crust: Start by combining the graham cracker crumbs, melted butter, and 1 tablespoon of powdered sugar in a small bowl. Mix these ingredients thoroughly until it resembles wet sand. Once mixed, divide the crust evenly across four serving cups. Press it down gently to form a solid base.
Cream the Cheese: In another bowl, take your softened cream cheese and beat it with an electric mixer on high for about 30 seconds. You want it to be soft and creamy. Once you have that perfect texture, set it aside.
Whip the Cream: In a separate bowl, whip your heavy cream until soft peaks form. This should take a couple of minutes. Once you reach that texture, gradually add in the remaining cup of powdered sugar and the vanilla extract while continuing to beat the mixture.
Combine: Carefully fold half of the whipped cream into the cream cheese mixture. Use medium speed on your mixer until it’s well combined. Repeat with the remaining whipped cream, ensuring that the mixture remains fluffy.
Assemble: Now, it’s time to divide the cheesecake mixture evenly among the four cups with the crust. Use a spatula to smooth out the tops. Once all the mixture is in the cups, cover them with plastic wrap or a lid.
Chill: Place your assembled cheesecake cups in the refrigerator for at least four hours. This chilling time allows the flavors to meld beautifully and ensures a lovely texture.
Serve: When you’re ready to enjoy your cheesecake cups, remove them from the fridge and top them with your choice of fresh fruit or berries. The fruit not only adds flavor but also enhances the visual appeal.
With these easy-to-follow directions, you will have delightful cheesecake cups ready to impress your guests or satisfy your cravings!
How to Serve Cheesecake Cups
Serving cheesecake cups is a breeze, and there are many wonderful ways to enhance this already delightful dessert. First and foremost, because they are already portioned, you can serve them directly in their cups—no need for plates or utensils, which is great for casual gatherings.
When presenting your cheesecake cups, consider these serving suggestions:
Toppings: Aside from fresh fruit or berries, you can add different toppings like crushed nuts, chocolate shavings, or drizzles of chocolate or caramel sauce for a touch of decadence.
Garnishing: A sprinkle of mint leaves or a dusting of cocoa powder can elevate their look and add an extra burst of flavor.
Variety: Create a mini dessert table with different cheesecake cup flavors. For example, you could have one batch with strawberries and another with blueberries; the options are endless!
Experience: Encourage your guests to experienced different combinations and flavors. Mixing and matching toppings can create a fun tasting experience.
Now, sit back and watch as your cheesecake cups become the star of the dessert buffet!
Expert Tips: Cheesecake Cups
To ensure your cheesecake cups turn out perfectly every time, here are some expert tips you can follow:
Room Temperature Ingredients: Make sure your cream cheese is at room temperature before mixing. This will help achieve a smoother and creamier texture.
Whip the Cream Properly: Be cautious not to over-whip the heavy cream; stopping as soon as you see soft peaks form will give you the best results.
Chill Time: Patience is key! Allowing the cups to chill for at least four hours (or even overnight) will yield the best flavor and texture.
Flavor Variations: Experiment with flavored extracts, like almond or lemon, depending on your preference for a unique twist on the classic cheesecake.
Keep It Layered: For an appealing presentation, make sure to keep the layers distinct when you assemble them. It adds to the aesthetic appeal when served.
Keep these tips in mind as you whip up your delightful cheesecake cups!
How to Store Cheesecake Cups
If you find yourself with extra cheesecake cups or want to make them ahead of time, proper storage is key. Here are some simple guidelines:
Refrigeration: Keep your cheesecake cups covered in the refrigerator. They can last for up to five days, making them ideal for preparing in advance.
Covering: Use plastic wrap, lids, or even aluminum foil to keep them airtight. This will help maintain their freshness and prevent them from absorbing other odors in the fridge.
Freeze if Necessary: If you want to store them for an even longer period, cheesecake cups can be frozen. Just make sure to freeze them in an airtight container. They can last up to three months in the freezer. When you’re ready to enjoy, simply transfer them to the fridge to thaw overnight.
Variations of Cheesecake Cups
One of the best parts about cheesecake cups is the possibility for variations. Here are some fascinating twists you can try:
Chocolate Cheesecake Cups: Add unsweetened cocoa powder to your cream cheese mixture for a chocolatey delight. Top with chocolate shavings or ganache.
Fruit Flavored Cheesecake: Blend in pureed strawberries or raspberries into the cream cheese for a fruity explosion. Use the corresponding fruit on top for a colorful presentation.
Nut-Based Crust: Swap graham cracker crumbs for crushed cookies or nuts to create a different texture and flavor profile. A pecan crust is especially delicious!
Caramel Swirl: Add a swirl of caramel sauce into the cheesecake mixture before chilling for a sweet surprise.
Each of these variations can create a new experience with the same fundamental recipe, keeping things exciting in your dessert lineup!
FAQs about Cheesecake Cups
Are cheesecake cups better than a whole cheesecake?
Cheesecake cups offer portion control, ease of serving, and a visually appealing presentation without the need for slicing a whole cheesecake. They can often be more convenient for gatherings or meal prep.
How long do cheesecake cups need to chill?
It’s best to chill your cheesecake cups for at least four hours, but overnight is ideal for maximum flavor development.
Can I use low-fat cream cheese?
Yes, you can substitute low-fat cream cheese for a lighter option. However, it may slightly affect the creaminess of the texture.
How can I make cheesecake cups gluten-free?
Switch out graham crackers for gluten-free cookie crumbs or crushed nuts, ensuring all other ingredients are gluten-free as well.
What fruits pair well with cheesecake cups?
Fruits such as strawberries, blueberries, raspberries, and sliced peaches make excellent toppings for cheesecake cups due to their natural sweetness and vibrant colors.

Cheesecake Cups
Equipment
- Mixing Bowl
- Electric Mixer
- Clear cups or jars
Ingredients
- 3/4 cup graham cracker crumbs
- 2 Tbsp butter melted
- 1 Tbsp powdered sugar for the crust
- 1 cup powdered sugar for the filling
- 8 oz cream cheese softened
- 1/2 cup heavy whipping cream
- 1 tsp vanilla extract
- 1 cup fresh fruit or berries for serving
Instructions
- In a small bowl, combine the graham cracker crumbs, melted butter, and 1 tablespoon of powdered sugar until it resembles wet sand. Divide this mixture evenly across four serving cups and press down gently to form a crust.
- In another bowl, beat the softened cream cheese with an electric mixer until smooth and creamy. Set aside.
- In a separate bowl, whip the heavy cream until soft peaks form. Gradually add in the remaining cup of powdered sugar and vanilla extract while continuing to beat.
- Fold half of the whipped cream into the cream cheese mixture, then fold in the remaining whipped cream until combined.
- Divide the cheesecake mixture evenly among the four cups. Smooth the tops with a spatula, cover, and refrigerate for at least four hours.
- When ready to serve, remove from the fridge and top with fresh fruit or berries.
Send me this recipe!
Just enter your email below and get it sent straight to your inbox!


