
There are few desserts that evoke as much excitement and anticipation as a red velvet cheesecake. With its striking crimson color and luxurious layers of creamy sweetness, this decadent dessert has become a beloved choice for celebrations, special occasions, or simply a weekend treat. When you whip up this delightful cake, you merge the classic flavors of red velvet with a rich, velvety cheesecake, creating a dessert that is sure to impress your family and friends.
Why We Love This Red Velvet Cheesecake Recipe
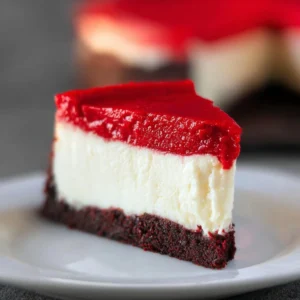
What sets this red velvet cheesecake apart from other desserts is its unique combination of flavors and textures. The chocolatey undertones from the cocoa powder, paired with the tangy notes of cream cheese and sour cream, create a harmonious balance that is utterly irresistible. The creamy filling contrasts beautifully with the crunchy Oreo crust, making each bite a delicious experience. Additionally, the vibrant red hue of the cheesecake makes it visually stunning, perfect for any gathering. Whether you are celebrating a birthday, hosting a dinner party, or simply treating yourself, this cheesecake is guaranteed to be a crowd-pleaser.
Ingredients About Red Velvet Cheesecake
To make this indulgent red velvet cheesecake, you will need the following ingredients:
- 24 Oreos (2 cups | 268g Oreo crumbs)
- 4 tbsp (56g) butter, melted
- 24 oz cream cheese, room temperature (three 8 oz packages)
- 1 cup (207g) sugar
- 3 tbsp (21g) cocoa powder
- 1 cup (230g) sour cream
- 1/4 cup (60ml) buttermilk
- 4 large eggs
- 2 tsp white vinegar
- 2 tsp vanilla extract
- 2 oz red food coloring
- 4 oz cream cheese, room temperature (for topping)
- 1 cup (240ml) heavy whipping cream, cold
- 1/2 cup (58g) powdered sugar
- 1/2 tsp vanilla extract
How to Make Red Velvet Cheesecake Directions
Creating your own red velvet cheesecake may seem intimidating, but with these straightforward steps, you’ll find the process not only easy but also very rewarding.
Prepare the Crust: Start by preheating your oven to 325°F (163°C). Take a 9-inch springform pan and line the bottom with parchment paper, ensuring the sides are greased well. In a mixing bowl, combine the Oreo crumbs with the melted butter until evenly coated. Press this mixture firmly into the bottom of the pan and a little up the sides to create the crust. Once done, bake this crust for just 10 minutes and then set it aside to cool.
Make the Cheesecake Batter: After cooling the crust, reduce your oven temperature to 300°F (148°C). In a large bowl, using an electric mixer, beat the room-temperature cream cheese until smooth. Gradually add the sugar and cocoa powder, mixing on a low speed to combine. Add in the sour cream and buttermilk, beating gently until the mixture is harmonious. Now, it’s time to add the eggs, one at a time. Make sure to blend slowly to keep the mixture creamy. Finally, stir in the vinegar, vanilla extract, and the red food coloring until everything is well blended.
Bake the Cheesecake: Carefully pour the cheesecake batter over your pre-baked Oreo crust. To ensure a smooth and even baking process, place the springform pan inside a larger baking dish filled with about an inch of water (this is your water bath). Bake in the oven for approximately 1 hour and 45 minutes. You want the center to be set but still jiggly. Upon reaching this point, turn off the oven and leave the cheesecake to cool with the door closed for 30 minutes. After that, crack the oven door open slightly and let it cool for another 20-30 minutes before gently removing it from the oven and the water bath.
Refrigerate: Allow the cheesecake to cool completely on the countertop before transferring it to the refrigerator. You will need to chill the cheesecake for a minimum of 5-6 hours, though overnight is ideal for the best texture and flavor.
Prepare the Topping: When you’re ready to serve the cheesecake, start by beating the additional cream cheese in a bowl until it’s smooth. In a separate bowl, whip the cold heavy cream and powdered sugar together until stiff peaks form. Gently fold the whipped cream into the softened cream cheese. Once combined, spread the topping generously over the chilled cheesecake.
Final Chill: After adding the topping, refrigerate the cheesecake once more until you are ready to serve.
How to Serve Red Velvet Cheesecake
Serving your red velvet cheesecake is as delightful as making it. For the best presentation, slice the cheesecake into individual portions. You can garnish each slice with additional whipped cream, chocolate shavings, or even a sprinkle of cocoa powder for a touch of elegance. This cheesecake is perfect on its own, but if you want to elevate it even further, consider serving it with a drizzle of chocolate syrup or warm fruit compote alongside it. A scoop of vanilla ice cream makes a fantastic pairing, too, providing a delightful contrast in temperature and texture.
When hosting a gathering, make sure to place your slices on a vibrant serving platter to showcase the rich red color of the cake. Your guests won’t be able to resist reaching for more!
Expert Tips: Red Velvet Cheesecake
To achieve the perfect red velvet cheesecake, consider these expert tips:
Room Temperature Ingredients: Make sure all dairy ingredients, especially the cream cheese, eggs, and sour cream, are at room temperature. This ensures that everything blends smoothly, preventing lumps and achieving that creamy texture you desire.
Avoid Overmixing: When incorporating the eggs into your cheesecake batter, mix gently and do not overbeat. Overmixing can incorporate excess air, which may lead to cracking during baking.
Water Bath Benefits: Using a water bath not only helps the cheesecake to bake evenly but also prevents the top from cracking. If you do see small cracks, don’t worry—topping it with whipped cream will cover any imperfections beautifully.
Chill for Success: For the best flavor and texture, always allow the cheesecake ample chilling time. The overnight chill enhances all the flavors and allows them to meld together beautifully.
Use Quality Ingredients: The better the ingredients, the better the cheesecake will taste. Aim to use high-quality cream cheese and pure vanilla extract for the best results.
How to Store Red Velvet Cheesecake
To keep your red velvet cheesecake fresh, store it in the refrigerator covered with plastic wrap or in an airtight container. Properly stored, it should last about 5 to 7 days, maintaining its delicious flavor and texture. Always be sure to slice the cheesecake using a sharp, warm knife—it ensures a clean cut without squishing the creamy layers.
For longer storage, you can freeze the cheesecake. Wrap individual slices tightly in plastic wrap, followed by aluminum foil, and place them in a freezer-safe container. It can last for up to 2 months in the freezer. When you’re ready to enjoy, simply thaw in the refrigerator overnight before serving.
Variation of Red Velvet Cheesecake
While the classic recipe is absolutely divine, you might enjoy experimenting with variations to keep things interesting. Here are some great ideas:
Chocolate Ganache Topping: Melt some dark chocolate and cream together to create a luscious ganache. Pour this over the cheesecake for an added layer of richness.
Layered Cheesecake: For a fun twist, you can create a layered version by alternating red velvet cheesecake and classic cheesecake layers. This creates a stunning visual and a delightful contrast of flavors.
Seasonal Flavors: Incorporate seasonal ingredients to change up the flavors. In fall, for instance, you might add a hint of pumpkin spice to the batter, or in spring, try folding in fresh berries.
Mini Cheesecakes: If you’re looking for portion control or a fun dessert option, consider making mini red velvet cheesecakes in muffin tins. Adjust the baking time accordingly for these smaller treats.
Swirls and Toppings: Experiment with swirling in different flavored cream cheese mixtures, such as orange or almond extract, before baking. Toppings can also vary based on your preferences, from additional Oreo crumbles to crushed nuts.
FAQ About Red Velvet Cheesecake
What Makes Red Velvet Cheesecake Different from Traditional Cheese Cake?
Red velvet cheesecake stands out because it combines the classic flavors of red velvet cake with the creamy richness of cheesecake. The addition of cocoa powder gives it a subtle chocolate flavor, while the iconic red color makes it visually striking.
Can I Use a Different Type of Crust?
Absolutely! While the Oreo crust gives a delicious chocolatey base, you can experiment with other crusts such as a graham cracker crust or a nut-based crust for a gluten-free option.
What Can I Do If My Cheesecake Cracks While Baking?
If your cheesecake does crack, don’t panic! It’s a common occurrence. You can cover it beautifully with a layer of whipped cream, ganache, or fruit topping to hide any imperfections.
Is Red Velvet Cheesecake Hard to Make?
Not at all! While it may seem complicated, the steps are straightforward, and with a little practice, you’ll find it easy to prepare. Just follow the instructions carefully, and you’ll have a stunning cheesecake to impress friends and family.
How Long Should I Refrigerate the Cheesecake Before Serving?
For the best flavor and texture, chilling your cheesecake for at least 5 to 6 hours is ideal. However, overnight is recommended for optimal results.
Red Velvet Cheesecake
Equipment
- 9-inch Springform Pan
- Mixing Bowl
- Electric Mixer
Ingredients
- 24 pieces Oreos (2 cups | 268g Oreo crumbs)
- 4 Tbsp butter melted (56g)
- 24 oz cream cheese room temperature (three 8 oz packages)
- 1 cup sugar (207g)
- 3 Tbsp cocoa powder (21g)
- 1 cup sour cream (230g)
- 1/4 cup buttermilk (60ml)
- 4 large eggs
- 2 tsp white vinegar
- 2 tsp vanilla extract
- 2 oz red food coloring
- 4 oz cream cheese room temperature (for topping)
- 1 cup heavy whipping cream cold (240ml)
- 1/2 cup powdered sugar (58g)
- 1/2 tsp vanilla extract


Instructions
- Preheat oven to 325°F (163°C) and prepare a 9-inch springform pan with parchment paper.
- Combine Oreo crumbs with melted butter and press into the bottom of the pan. Bake for 10 minutes and set aside to cool.
- Reduce oven temperature to 300°F (148°C). Beat cream cheese until smooth, then add sugar and cocoa powder, mixing well.
- Add sour cream and buttermilk, then mix in eggs one at a time, followed by vinegar, vanilla, and red food coloring.
- Pour batter over the crust in the springform pan. Bake in a water bath for 1 hour and 45 minutes until the center is set but jiggles slightly.
- Cool in the oven with the door closed for 30 minutes, then cool completely on the counter before refrigerating for at least 5-6 hours.
- Beat cream cheese for topping until smooth. Whip heavy cream with powdered sugar and vanilla until stiff peaks form, then fold into cream cheese.
- Spread topping over the chilled cheesecake and refrigerate until ready to serve.
Send me this recipe!
Just enter your email below and get it sent straight to your inbox!