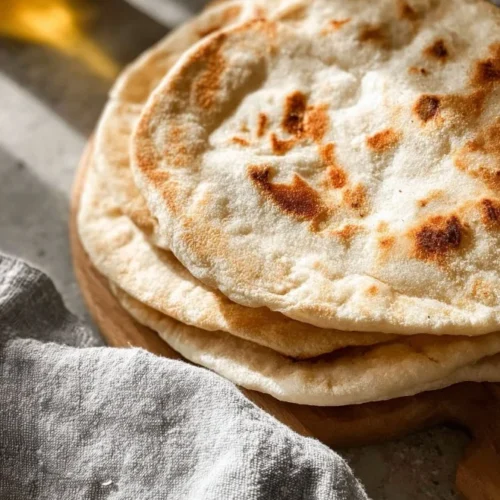
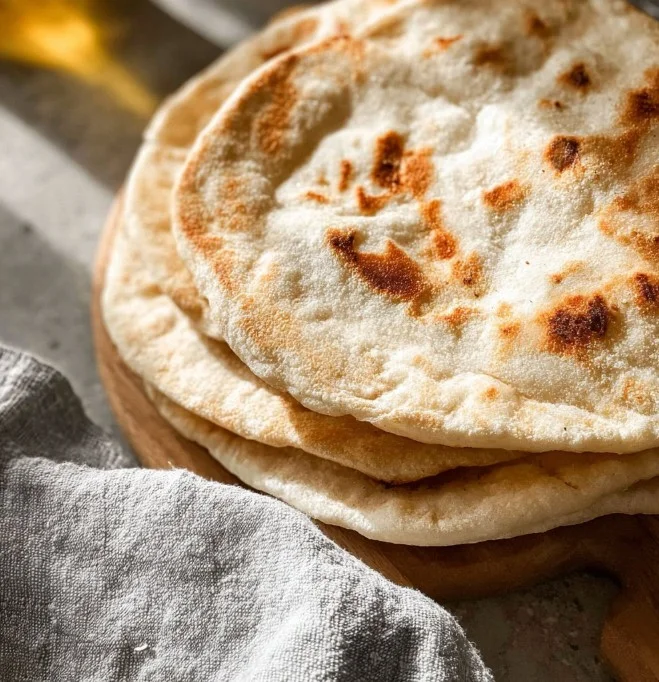
Pita bread is soft, fluffy, and perfect for holding your favorite fillings or dips. Making it at home is easy and gives you fresh, warm bread that tastes amazing. With just a few basic ingredients, you can enjoy this classic bread straight from your own kitchen.
Why We Love This Homemade Pita Bread Recipe
There are several reasons we adore this homemade pita bread recipe. First and foremost, it’s incredibly simple to whip up, using easily accessible ingredients you probably already have in your pantry. The satisfaction of creating bread from scratch is unmatched, especially when you watch them puff up beautifully on the skillet.
Moreover, homemade pita bread is so much fresher and more flavorful than store-bought options. You can experiment with how thick or thin you like your pita, adjusting it to your personal preferences. The soft texture and warmness are sure to impress your family and guests, making any meal feel special. Add a simple dipping sauce, and you have a perfect appetizer or snack!
Ingredients about Homemade Pita Bread
To get started, you will need a few straightforward ingredients to make your homemade pita bread. Here’s a list of everything you will require, along with their measurements:
- 1 cup warm water (237g)
- 2 1/4 teaspoons instant yeast (1 packet)
- 1 teaspoon granulated sugar
- 1 teaspoon fine sea salt
- 1 Tablespoon olive oil
- 2 1/4 cups all-purpose flour (281g)
With these ingredients in hand, you are well on your way to enjoying homemade pita bread!
How to Make Homemade Pita Bread Directions
Creating delicious homemade pita bread involves a few simple steps, and you will quickly find the process enjoyable. Follow along with these directions to create your perfect pitas:
Start with Combining Ingredients: In a mixing bowl, combine the warm water, instant yeast, granulated sugar, fine sea salt, and olive oil. Then, add one cup of the all-purpose flour into the mixture. Stir gently until the mixture is combined and slightly frothy.
Create the Dough: As you mix, gradually add more flour, a little at a time. Continue this until a soft dough begins to form. The dough should be wet and a bit sticky but still manageable. Take your floured hands and knead the dough right in the bowl for about a minute, until it becomes smooth and elastic.
Let It Rest: Once you have a smooth dough, transfer it to a well-greased bowl. Cover the bowl with a clean kitchen towel and set it aside in a warm area for about 40 minutes. This resting period allows the yeast to work its magic, causing the dough to rise beautifully.
Divide and Shape: After the resting period, your dough should have roughly doubled in size. Carefully punch the dough down to remove excess air, and then divide it into eight equal pieces. Take each piece and roll it out into thin circles, aiming for around 1/4 inch thick. You can use a rolling pin for this step or even flatten it with your hands.
Cook Your Pitas: With your dough circles ready, heat a griddle or a large skillet over medium-high heat. Lightly grease the surface with a little olive oil. Place the rolled-out pita bread onto the hot griddle, and let it cook for about 2 minutes or until the bottom becomes lightly golden. Flip it over and cook for another minute. The pita should puff up as it cooks, creating the perfect pocket for filling.
Keep Them Warm: Once cooked, remove the pita bread from the skillet and wrap them in a kitchen towel to keep warm while you cook the remaining pieces. This helps maintain their softness.
With these clear and straightforward directions, you will master the art of homemade pita bread in no time!
How to Serve Homemade Pita Bread
Serving homemade pita bread opens up a world of delicious possibilities. Imagine creating a delightful spread for yourself or guests featuring fresh and colorful ingredients.
As a Standalone Snack: Freshly baked pita bread is a treat on its own. You can serve it warm, alongside a few dips like hummus, tzatziki, or baba ganoush. These classic Mediterranean dips pair perfectly with the soft and tender texture of your pita.
For Sandwiches: You can use pita bread as a pocket to fill with your favorite ingredients. Stuff them with grilled chicken, fresh salad greens, sliced cucumbers, tomatoes, and your favorite sauce or dressing. The pocket shape holds everything together wonderfully.
Accompaniments: Pita can serve as a scoop for spreads, dips, and even soups. You can cut them into triangles and toast them for a delightful chip to accompany your meals.
On a Platter: For gatherings or family meals, serve your homemade pita bread on a large platter with an array of fillings and sides. Add meats, vegetables, and various sauces so everyone can create their own custom pita.
Homemade pita bread is incredibly versatile; you can enjoy it in countless ways, enhancing your meals and snacking options.
Expert Tips: Homemade Pita Bread
To ensure your homemade pita bread turns out perfectly every time, consider the following expert tips:
Water Temperature Matters: Using warm water is crucial because it helps activate the yeast. However, be careful not to use boiling water, as this can kill the yeast. Aim for water that feels warm to your wrist.
Don’t Skip Kneading: Kneading the dough is vital to developing gluten, which gives pita its lovely texture. Even a minute of gentle kneading can make a significant difference.
Rest Your Dough: Allowing your dough to rest not only helps it rise but also makes it easier to shape your pitas later. Be patient during this stage to achieve the best results.
Cooking Temperature: Make sure your griddle or skillet is hot enough before placing the pita on it. This high heat is crucial for achieving the puffing action that makes pita unique.
Experiment with Thickness: Depending on your preference, feel free to adjust the thickness of your pitas. Thinner pitas will puff more and create a more prominent pocket, while thicker ones will have a chewier texture.
How to Store Homemade Pita Bread
Storing your homemade pita bread properly can prolong its freshness and texture. Here are a few tips for ensuring your pita stays delicious:
Room Temperature: If you plan to eat the pitas within the next couple of days, simply place them in a plastic bag or airtight container at room temperature. This will keep them soft.
Refrigeration: For longer storage, place the pitas in the refrigerator. Make sure they are well-wrapped or in an airtight container to prevent drying out. However, refrigeration can make them a bit tougher, so it’s best to reheat them before serving.
Freezing: If you wish to store your pitas for an extended period, freezing is an excellent option. Wrap each pita in plastic wrap and place them in a freezer-safe bag. They will keep well for up to three months.
When you wish to enjoy your frozen pitas, reheat them in the oven or on a skillet after allowing them to thaw at room temperature.
Variation of Homemade Pita Bread
While this homemade pita bread recipe is undoubtedly delightful on its own, you might want to switch things up. Here are some variations you can try:
Whole Wheat Pita: Substitute half or all of the all-purpose flour with whole wheat flour for a healthier option. This will give your pitas a nuttier flavor and denser texture.
Herb-Infused Pita: Add dried herbs such as oregano, thyme, or rosemary into your dough for a flavorful twist that can enhance your meals further.
Stuffed Pita: Before rolling out, you can fill your pita with cheese, spinach, or even seasoned ground meat for a stuffed version that’s hearty and satisfying.
Sweet Pita: Incorporate a dash of cinnamon or sugar to the dough and serve with honey for an exciting dessert option or a unique treat.
By exploring these variations, you can create a range of pitas that suit any meal, making your kitchen a hub of creativity.
FAQ
What is homemade pita bread best used for?
Homemade pita bread is incredibly versatile. You can use it for dips, sandwiches, wraps, or even as an accompaniment to meals. It’s perfect for stuffing with your favorite ingredients or simply enjoying with spreads.
How long does homemade pita bread last?
When stored properly, homemade pita bread can last about 2-3 days at room temperature. If you refrigerate or freeze them, you can prolong their shelf life significantly, allowing you to enjoy fresh pitas whenever you desire.
Can you freeze homemade pita bread?
Absolutely! Freezing homemade pita bread is a fantastic way to ensure you always have some on hand. Just wrap them tightly and store them in a freezer-safe container.
Why did my pita bread not puff?
If your pita bread doesn’t puff while cooking, it may be due to the dough being too thick, not having enough heat, or insufficient resting time for the dough. Ensure your skillet is hot enough, and try rolling the dough thinner for better results.
Is homemade pita bread healthier than store-bought?
Generally, yes! Homemade pita bread allows you to control the ingredients and avoid preservatives and additives often found in store-bought options. Plus, you can use whole grains and healthier oils if you choose.

Pita Bread
Equipment
- Mixing Bowl
- Rolling Pin
- Griddle or Skillet
- Kitchen towel
Ingredients
- 1 cup warm water (237g)
- 2 1/4 teaspoons instant yeast (1 packet)
- 1 teaspoon granulated sugar
- 1 teaspoon fine sea salt
- 1 tablespoon olive oil
- 2 1/4 cups all-purpose flour (281g)
Instructions
- In a mixing bowl, combine warm water, instant yeast, granulated sugar, sea salt, and olive oil. Add 1 cup of all-purpose flour and stir until slightly frothy.
- Gradually add more flour, mixing until a soft dough forms. Knead in the bowl for about a minute until smooth and elastic.
- Transfer the dough to a greased bowl, cover with a kitchen towel, and let it rise in a warm area for about 40 minutes.
- After rising, punch down the dough, divide it into 8 equal pieces, and roll each into a thin circle (about 1/4 inch thick).
- Heat a griddle or skillet over medium-high heat and lightly grease it. Cook each pita for about 2 minutes on one side, then flip and cook for another minute until puffed.
- Remove the cooked pitas from the skillet and wrap them in a kitchen towel to keep warm while cooking the remaining pitas.
Send me this recipe!
Just enter your email below and get it sent straight to your inbox!


