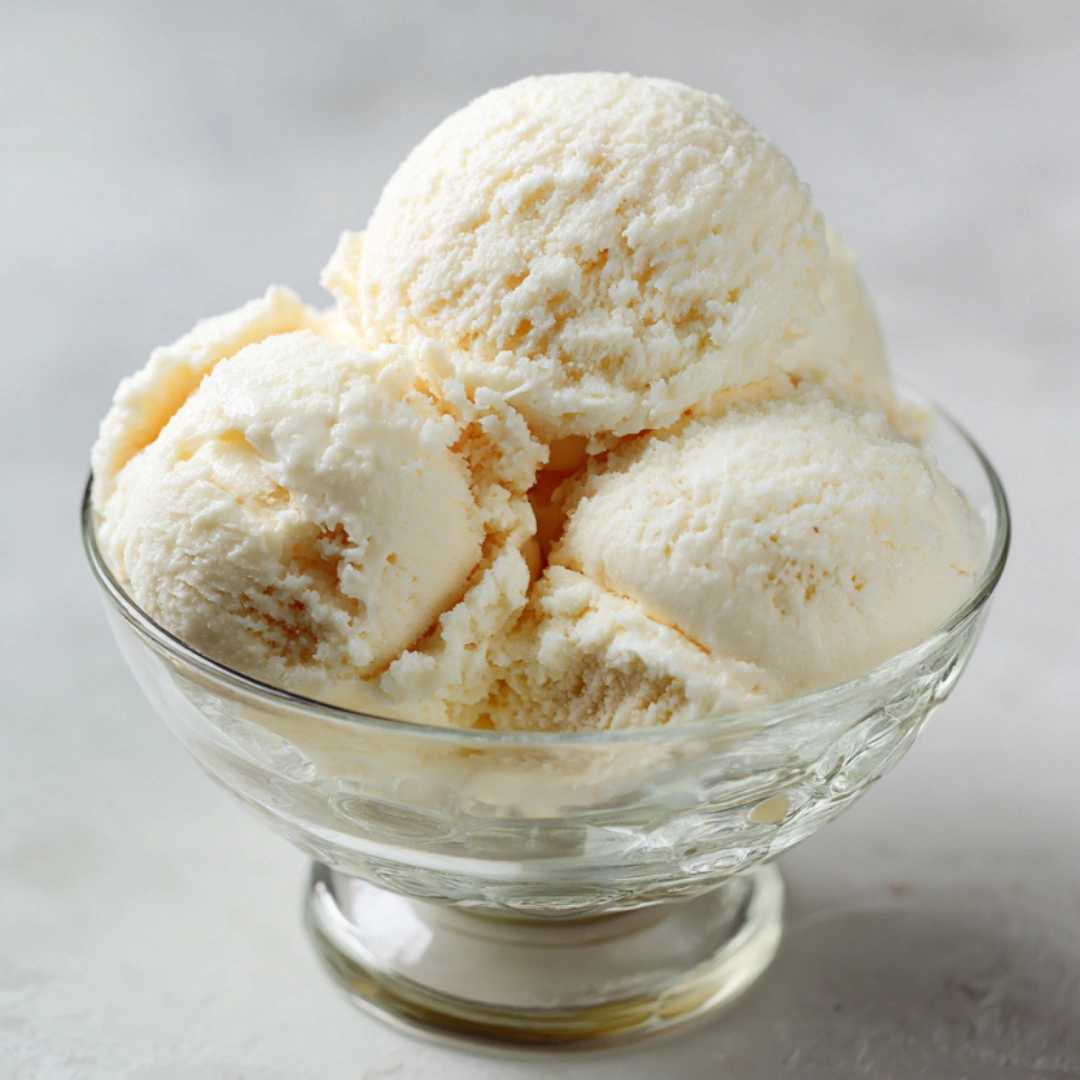
If you’re looking to make a creamy, delicious ice cream that’s both vegan and gluten-free, this Coconut Milk Ice Cream recipe is just what you need. Made with only five simple ingredients, it’s an easy way to enjoy a rich dessert that’s dairy-free but still luxuriously smooth. You’ll love how the natural flavor of coconut shines through, creating a refreshing treat perfect for any occasion.
Why We Love This Coconut Milk Ice Cream Recipe
This coconut milk ice cream is a wonderful alternative to traditional dairy-based ice creams. It’s rich and creamy thanks to the full-fat coconut milk, but it’s also lighter and easier to digest for many people. Plus, it’s made with basic pantry ingredients, so you don’t need to hunt for anything special. Whether you’re vegan, gluten-free, or just wanting something different, this recipe makes a delightful frozen treat that’s smooth, flavorful, and satisfying. It’s also easy to customize with toppings or mix-ins to make it your own.
Ingredients about Coconut Milk Ice Cream
For this simple and tasty coconut milk ice cream, you’ll need:
- 2 cans (15 oz each) full-fat coconut milk, divided
- ½ cup granulated sugar
- 1 ½ tablespoons cornstarch
- ¼ teaspoon salt
- 2 teaspoons vanilla extract
How to Make Coconut Milk Ice Cream Directions
Start by preparing your ice cream maker bowl. The night before, place the bowl in the freezer so it can freeze completely. This is essential for proper churning and achieving the ideal texture.
Next, measure out half a cup of coconut milk and set it aside for later use. Pour the remaining coconut milk into a small saucepan. Add the granulated sugar and salt, then place the pan over medium heat. Stir continuously with a whisk until the sugar dissolves completely. Once smooth, add the vanilla extract and mix well.
In a separate bowl, combine the reserved half cup of coconut milk with the cornstarch. Stir until the cornstarch is fully dissolved and the mixture is smooth without lumps.
Pour this cornstarch and coconut milk mixture back into the saucepan with the heated coconut milk mixture. Keep stirring constantly and bring the mixture to a boil. Continue to boil for about five minutes, stirring frequently. This will cook the cornstarch and thicken the base into a creamy custard-like consistency.
When thickened, transfer the mixture to a shallow container. Cover it and place it in the refrigerator for at least four hours to chill completely. This step is key for proper texture and flavor.
Once chilled, pour the cold ice cream base into your frozen ice cream maker bowl. Follow your manufacturer’s instructions to churn the mixture until it thickens and looks like soft serve ice cream.
At this point, you can enjoy it immediately for a softer texture, or transfer it to an airtight container and freeze for a firmer consistency. When you’re ready to serve, let it sit out for 5 to 10 minutes to soften slightly.
How to Serve Coconut Milk Ice Cream
Serving your coconut milk ice cream can be as simple or as creative as you like. Scoop it into bowls for a classic dessert experience. If you want to get fancy, serve it in waffle cones or add toppings like toasted coconut flakes, fresh fruit, or chopped nuts to add texture and extra flavor.
You can also use this ice cream as part of a sundae, pairing it with chocolate sauce or caramel drizzle. For a tropical touch, serve alongside pineapple or mango slices. It’s great on its own or as a complement to warm desserts like fruit crisps or cakes.
The creamy texture and mild coconut flavor make it versatile and easy to enjoy in many ways, so feel free to get creative when serving.
Expert Tips: Coconut Milk Ice Cream
For the best results, always use full-fat coconut milk. The fat content is what gives this ice cream its creamy, rich texture that feels indulgent without any dairy.
Make sure your ice cream maker bowl is completely frozen before churning. If it’s not cold enough, the ice cream won’t set properly and could turn out icy or runny.
When cooking the mixture on the stove, keep stirring continuously to prevent lumps and avoid burning the base. Patience here pays off with a smooth final product.
If you don’t have an ice cream maker, don’t worry! You can still make this ice cream by freezing the base in a baking dish and blending it every 30 minutes until creamy, but it will take a bit more time and effort.
Adjust sweetness to your taste. If you prefer less sugar, you can reduce it slightly, but remember sugar also helps with the texture and freezing point.
How to Store Coconut Milk Ice Cream
Store your coconut milk ice cream in an airtight container to prevent freezer burn and maintain its fresh flavor. Keep it in the freezer and consume within one month for best taste and texture.
When removing from the freezer, allow it to sit at room temperature for about 10 to 15 minutes before scooping. This helps soften it just enough for easy serving without melting too quickly.
Avoid frequent thawing and refreezing, as this can change the texture and make the ice cream icy.
Variations of Coconut Milk Ice Cream
You can easily customize this coconut milk ice cream recipe to suit your preferences.
Add mix-ins like chopped dark chocolate, shredded coconut, or chopped nuts during the last few minutes of churning for extra texture.
For a fruit twist, blend in pureed mango, pineapple, or berries before chilling the base. This will give your ice cream a fresh, fruity flavor.
Try swapping the vanilla extract for almond or coconut extract for a different flavor profile.
If you want a lower sugar version, consider using natural sweeteners like maple syrup or agave, but adjust the amount as these liquids may affect texture.
For a no-machine method, freeze the base in a shallow container and stir or blend every 30 minutes until smooth and creamy.
Frequently Asked Questions About Coconut Milk Ice Cream
Can I make this ice cream without an ice cream maker?
Yes! After preparing the base, freeze it in a shallow dish. Every 30 minutes, stir or blend it until smooth and creamy. This takes longer but works well without special equipment.
Is this coconut milk ice cream dairy-free?
Absolutely. This recipe uses coconut milk instead of dairy, making it perfect for those avoiding animal products or lactose.
Can I use light coconut milk instead of full-fat?
Full-fat coconut milk is recommended because it provides the richness needed for creamy texture. Light coconut milk may result in a thinner, icier ice cream.
How long can I store this ice cream?
Store it in an airtight container in the freezer for up to one month. For the best texture, avoid thawing and refreezing multiple times.
Can I add other flavors?
Yes, you can add fruit purees, nuts, chocolate chips, or extracts to customize the taste. Just mix them in during or after churning.

Coconut Milk Ice Cream
Equipment
- Ice Cream Maker
- Shallow Container
- Saucepan
Ingredients
- 2 cans full-fat coconut milk (15 oz each, divided)
- 1/2 cup granulated sugar
- 1 1/2 Tbsp. cornstarch
- 1/4 tsp. salt
- 2 tsp. vanilla extract
Instructions
- Freeze the ice cream maker bowl overnight for proper churning.
- Measure out 1/2 cup of coconut milk and set aside. Pour the remaining coconut milk into a saucepan, add sugar and salt, and heat over medium until sugar dissolves. Stir in vanilla extract.
- In a separate bowl, combine reserved coconut milk with cornstarch, stirring until smooth. Pour this into the saucepan and bring to a boil, stirring constantly for about 5 minutes until thickened.
- Transfer the mixture to a shallow container, cover, and refrigerate for at least 4 hours to chill completely.
- Once chilled, pour the mixture into the frozen ice cream maker bowl and churn according to the manufacturer’s instructions until it reaches a soft serve consistency.
- Enjoy immediately for a softer texture or transfer to an airtight container and freeze for a firmer consistency.
Send me this recipe!
Just enter your email below and get it sent straight to your inbox!


