
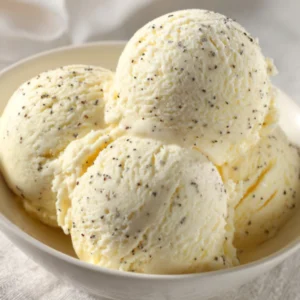
When you crave something classic, smooth, and endlessly satisfying, vanilla ice cream never lets you down. It’s the kind of dessert that feels familiar, comforting, and always delicious—whether served in a cone, alongside pie, or just in a bowl on its own. This homemade version gives you the real deal: a rich, creamy texture and deep vanilla flavor that store-bought varieties simply can’t compete with.
Why We Love This Vanilla Ice Cream Recipe
You’re going to fall in love with this recipe because it combines simple ingredients with a technique that brings out the best in each one. There’s no artificial flavoring here—just pure, aromatic vanilla drawn straight from the bean. The combination of heavy cream, whole milk, and egg yolks creates that dense, silky consistency you only get from high-quality ice cream shops.
It’s also incredibly flexible. Want to fold in chocolate chips or swirl in caramel? You can. Prefer it straight-up and unadorned? Perfect. Once you master this basic recipe, you’ll have a delicious foundation for all your frozen dessert creations.
Even if you’re new to ice cream making, this process is straightforward. With just a few tools—a pot, a whisk, a strainer, and either an ice cream maker or a freezer—you’re fully equipped. The satisfaction of that first spoonful, fresh from your own kitchen, is more than worth the wait.
Ingredients about Vanilla Ice Cream
Making vanilla ice cream at home is surprisingly simple. You only need a handful of real ingredients to create that creamy, melt-in-your-mouth magic. Each one plays a key role in the flavor and texture of the final scoop.
- 2 vanilla bean pods
- 3 cups heavy cream
- 1 cup whole milk
- 1 cup sugar
- 4 egg yolks
How to Make Vanilla Ice Cream Directions
Start by preparing your vanilla bean pods. Split them in half lengthwise with a small knife. This allows the seeds inside to be released into the cream mixture later, which is where the flavor lives.
In a medium-sized pot, add the split vanilla pods along with the heavy cream, whole milk, and sugar. Set the heat to low or medium—don’t rush this step. Slowly warm the mixture while stirring gently with a rubber spatula. You want the milk to scald, not boil. You’ll know it’s ready when you see steam rising and the sugar has fully dissolved.
Remove the pot from heat and carefully take out the vanilla pods. Using the back of a spoon or a knife, scrape the seeds from the inside of the pods and add them back into the mixture. These tiny black flecks are what give the ice cream its signature speckled appearance and intense vanilla flavor.
Now it’s time to temper the eggs. This step sounds technical, but it’s just a way to bring the yolks up to temperature without cooking them too quickly. In a large mixing bowl, whisk the egg yolks until smooth. Slowly add a small amount of the hot milk mixture into the yolks while whisking constantly. Once incorporated, continue to pour the rest of the milk in a steady stream, whisking all the while.
Pour the combined mixture back into the pot and place it over low to medium heat. Stir constantly with your spatula or spoon. After about 5 to 7 minutes, the custard will thicken enough to coat the back of a spoon. Be patient here—this step ensures your ice cream sets properly.
Strain the custard through a fine mesh strainer or chinois into a clean bowl. This removes any cooked bits or pod fragments. Now you need to chill it thoroughly. Either place the bowl in an ice bath or cover and refrigerate it for at least 2 hours until completely cold.
Once chilled, pour the custard into your ice cream maker. Follow the manufacturer’s instructions to churn the mixture until it reaches a thick, scoopable consistency. This usually takes about 20 to 30 minutes, depending on your machine.
If you don’t have an ice cream maker, no problem. Pour the mixture into a shallow freezer-safe container. Freeze it, stirring every 30 minutes for the first few hours. This prevents ice crystals from forming and keeps the texture creamy.
Once fully churned or frozen, your vanilla ice cream is ready to enjoy. You can serve it immediately for a soft-serve texture, or transfer it to a sealed container and freeze it until firm.
How to Serve Vanilla Ice Cream
You can serve vanilla ice cream in more ways than you might think. The most classic way is by scooping it into a bowl or cone. That alone is delicious. But you can also pair it with fresh fruit, drizzle it with chocolate sauce, or sandwich it between cookies for an easy treat.
Use it to top off warm desserts like brownies, cobblers, or fruit crisps. The contrast between the hot and cold elements is hard to beat. Vanilla ice cream also goes great with your morning waffles or pancakes if you’re feeling extra indulgent.
Want to impress your guests? Serve it in hollowed-out fruit bowls like pineapple halves or orange shells. Or create a build-your-own sundae bar with sprinkles, nuts, sauces, and whipped cream for a fun and interactive dessert.
Expert Tips: Vanilla Ice Cream
- Use Fresh Vanilla Pods: Fresh beans give you a deep, bold vanilla flavor that no extract can replicate. Look for soft, pliable pods with a strong scent.
- Don’t Skip the Chill: Cooling the custard fully before churning is a key step. It helps your ice cream set properly and churn faster.
- Churn Thoroughly: Whether using a machine or doing it manually, the churning process is essential. It prevents large ice crystals and gives the ice cream a creamy texture.
- Egg Tempering Matters: Pour the hot milk in slowly while whisking to prevent scrambling the yolks. Rushing this step can result in curdled custard.
- Strain It Well: Don’t skip straining. Even the smallest cooked egg bits can affect the smoothness of your ice cream.
- Flavor Add-Ins: Once you master the base, try adding crushed cookies, fruit swirls, or melted chocolate at the end of churning.
How to Store Vanilla Ice Cream
To store your homemade vanilla ice cream, use a freezer-safe, airtight container. A shallow, wide container works best because it allows the ice cream to freeze evenly and scoop easily.
Press a piece of plastic wrap or parchment paper directly onto the surface before sealing with the lid. This helps prevent freezer burn and keeps the texture smooth.
Your ice cream will keep in the freezer for up to 3 months, though it’s usually best enjoyed within the first few weeks for the creamiest texture and best flavor. When you’re ready to serve it, let it sit at room temperature for a few minutes to soften slightly for easier scooping.
Variation of Vanilla Ice Cream
Once you have this basic vanilla ice cream recipe down, the options for variation are endless. You can use this same custard base and swap or add different ingredients to customize the flavor.
For a chocolate twist, stir in melted dark chocolate during the last few minutes of churning. Or mix in chocolate chips for a cookies-and-cream vibe.
If you love fruity flavors, add a swirl of raspberry jam, strawberry puree, or chopped fresh mango after churning.
For a nutty spin, fold in roasted almonds, pecans, or pistachios. You can also drizzle in homemade peanut butter for added richness.
Craving something a little more indulgent? Try a caramel swirl. Add spoonfuls of thick caramel into the churned ice cream and gently mix for a ribbon effect.
You can even go bold with spices like cinnamon, cardamom, or nutmeg to give your vanilla base a cozy, warm profile.
FAQ – Vanilla Ice Cream
What makes this vanilla ice cream recipe better than store-bought?
This recipe uses fresh ingredients like real vanilla beans and egg yolks, giving it a richer texture and deeper flavor. Store-bought versions often use artificial flavorings and stabilizers, which can’t compete with the taste of homemade.
Can I make vanilla ice cream without an ice cream machine?
Yes, you can! Simply pour the chilled custard into a container and freeze it, stirring every 30 minutes for the first 2 to 3 hours to break up ice crystals and create a smoother texture.
What if I don’t have vanilla pods?
You can use 1 tablespoon of high-quality vanilla extract instead. While it won’t have the same depth as real pods, it will still give a pleasant vanilla flavor.
Why is my ice cream icy instead of creamy?
This usually happens when the custard wasn’t chilled enough before freezing or if it wasn’t churned properly. Be sure to follow all cooling and stirring steps closely.
Vanilla Ice Cream
Equipment
- Medium Pot
- Mixing Bowl
- Whisk
- Fine Mesh Strainer
- Ice Cream Maker or Freezer-Safe Container
Ingredients
- 2 pods vanilla bean
- 3 cups heavy cream
- 1 cup whole milk
- 1 cup sugar
- 4 egg yolks


Instructions
- Split the vanilla bean pods in half lengthwise and scrape the seeds into a medium pot. Add the pods, heavy cream, whole milk, and sugar.
- Warm the mixture over low to medium heat, stirring gently until the sugar dissolves and steam rises, but do not boil.
- Remove the pot from heat and take out the vanilla pods. Scrape the seeds back into the mixture.
- In a mixing bowl, whisk the egg yolks until smooth. Gradually add a small amount of the hot milk mixture while whisking.
- Pour the egg mixture back into the pot with the remaining milk mixture. Cook over low heat, stirring constantly until the custard thickens enough to coat the back of a spoon (about 5-7 minutes).
- Strain the custard through a fine mesh strainer into a clean bowl and chill thoroughly in an ice bath or in the refrigerator for at least 2 hours.
- Pour the chilled custard into an ice cream maker and churn according to the manufacturer’s instructions until thick and scoopable (about 20-30 minutes).
- If you don’t have an ice cream maker, pour the mixture into a shallow freezer-safe container and freeze, stirring every 30 minutes for the first few hours to prevent ice crystals.
- Once churned or frozen, serve immediately for soft-serve texture or transfer to a sealed container and freeze until firm.
Send me this recipe!
Just enter your email below and get it sent straight to your inbox!