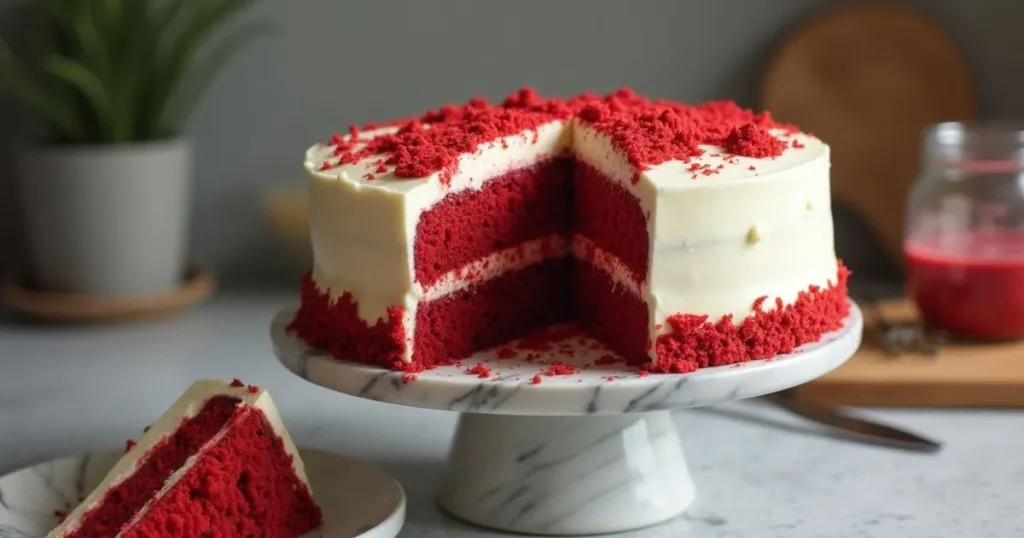
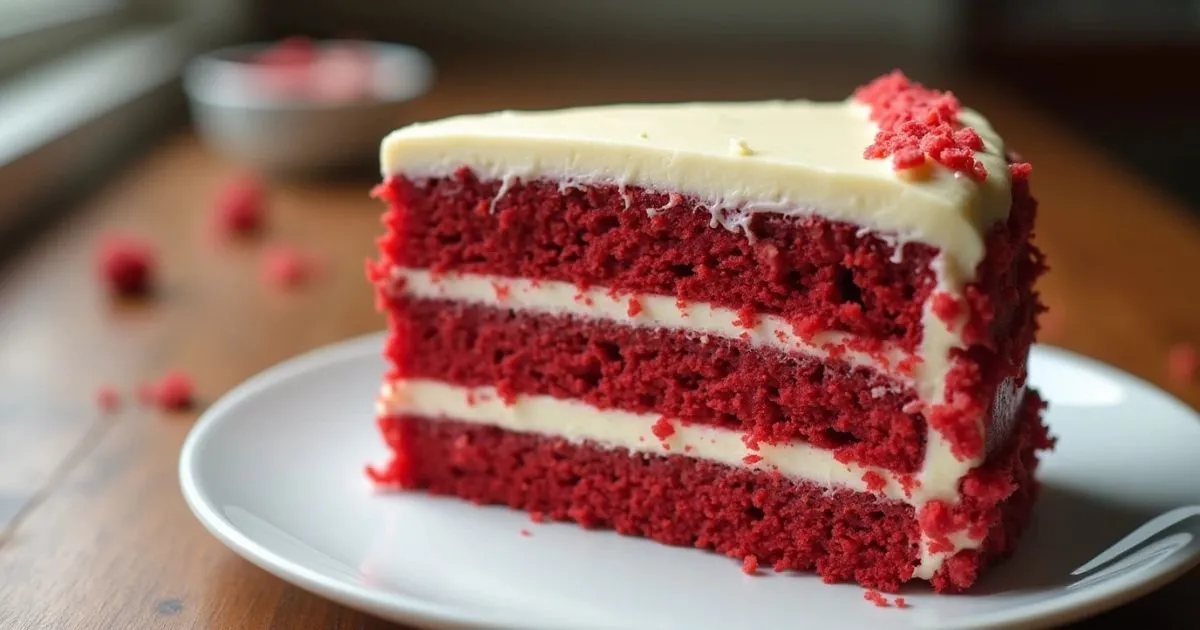
Every wedding tells a beautiful story, and nothing adds sweetness quite like a stunning red velvet wedding cake. Its rich, velvety texture and vibrant color have made it a beloved choice for many couples on their special day. If you’re looking to create a cake that not only tastes incredible but also looks breathtaking, you’ve come to the right place. In this guide, you’ll discover the origins of red velvet cake, essential ingredients, step-by-step instructions, and expert tips to ensure your wedding cake is a showstopper.
What Makes Red Velvet Wedding Cake Special?
The Origins of red velvet wedding cake
Red velvet cake has roots that trace back to the South, where it was initially a simple chocolate cake with a slightly reddish hue, enhanced by the reaction of cocoa powder with acidic ingredients like buttermilk and vinegar. Over the years, this cake has evolved into a symbol of celebration, often gracing wedding tables due to its stunning appearance and rich flavor. The color red represents love and passion, making it a fitting choice for weddings.
Key Features of red velvet wedding cake
- Color and Texture: The iconic red color not only catches the eye but also indicates the moistness of the cake. The unique texture is soft and tender, making every bite a delight.
- Flavor Profile: Red velvet cake is a delicious blend of cocoa, vanilla, and cream cheese frosting, creating a flavor experience that’s both rich and refreshing.

Ingredients for Your Red Velvet Wedding Cake
For the Cake:
- Cake Flour: Provides a tender texture and fine crumb to your cake. Substituting with all-purpose flour may result in a denser and less delicate crumb. Stick to cake flour for that luxurious, velvety finish.
- Unsweetened Cocoa Powder: Adds a subtle chocolate flavor and contributes to the classic red velvet taste. Use natural cocoa powder, not Dutch-processed, to maintain the desired acidity in the batter.
- Unsalted Butter (Melted): Adds richness and flavor. Using unsalted butter allows you to manage the amount of salt in the recipe. If substituting with salted butter, reduce the added salt by half.
- Buttermilk: Its acidity reacts with baking soda to create a tender crumb and mild tangy flavor. Use whole buttermilk for the best results; avoid substituting with plain milk unless mixed with vinegar or lemon juice.
- Vanilla Extract: Adds warmth and enhances the cake’s flavor profile. For the most flavorful results, opt for pure vanilla extract.
- Red Gel Food Coloring: Provides a vibrant red hue. Gel food coloring is more concentrated than liquid, ensuring you get the desired color without adding too much liquid to the batter.
- Distilled White Vinegar: Balances the cake’s flavors and helps intensify the red color when combined with cocoa powder. Avoid substituting with other types of vinegar, as their flavors may overpower the cake.
- Plain Hot Coffee or Boiling Water: Enhances the cocoa flavor and makes the batter easier to mix. The heat helps bloom the cocoa powder for a richer taste. If you prefer not to use coffee, hot water works as a substitute.
For the Cream Cheese Frosting:
- Cream Cheese (Room Temperature): The star ingredient for the frosting, giving it a tangy, creamy richness. Use full-fat cream cheese for the best texture and flavor. Reduced-fat versions can result in a runnier consistency.
- Unsalted Butter (Room Temperature): Adds structure and smoothness to the frosting. Using unsalted butter allows for better flavor control. If substituting with salted butter, omit the additional salt.
- Vanilla Extract: Enhances the tanginess of the cream cheese and balances the sweetness. Choose high-quality pure vanilla extract to achieve the best flavor.
- Powdered Sugar (Sifted): Sweetens the frosting and provides a smooth, creamy texture. Sifting is essential to avoid lumps. Do not substitute with granulated sugar, as it will create a gritty texture.
How to Make This Red Velvet Wedding Cake Step-by-Step
Creating your red velvet wedding cake is a joyous endeavor. Here’s how you can do it:
Preparation Instructions
Preheat the Oven: Preheat your oven to 325°F (163°C). Line three 8-inch cake pans with parchment paper and coat the sides with nonstick cooking spray.
Make the Cocoa Mixture: In a bowl, whisk together hot coffee and cocoa powder. Let it sit to cool slightly.
Mix the Dry Ingredients: In another bowl, combine the flour, baking powder, baking soda, salt, and optional cinnamon. Set this aside.
Blend the Wet Ingredients: In a large bowl, mix together sugar, vegetable oil, melted butter, eggs, egg yolk, buttermilk, vanilla extract, and red gel food coloring. Blend until fully combined. Add the cooled cocoa mixture and vinegar, then mix until smooth.
Combine the Mixtures: Gradually sift the dry ingredients into the wet ingredients, stirring gently to combine.
Bake: Distribute the batter evenly across the prepared pans. Bake for 25-30 minutes, or until a toothpick inserted into the center comes out clean.
Cool the Cakes: Distribute the batter evenly across the prepared pans. Gently run a knife around the edges, then flip the cakes onto wire racks to cool completely.
Expert Tips for the Perfect Red Velvet Wedding Cake
- Choose Quality Ingredients: Opt for high-quality cocoa powder and gel food coloring. The better the ingredients, the more vibrant and flavorful your cake will be.
- Room Temperature Matters: Ensure that your eggs, butter, and buttermilk are at room temperature for easier blending and a better texture.
- Layering for Impact: When assembling your cake, alternate layers of cake and frosting for a beautiful, multi-tiered look. Use a spatula to create smooth edges and an elegant finish.
How to Store Your Red Velvet Wedding Cake?
- At Room Temperature: If you plan to eat the cake within a few days, store it in an airtight container at room temperature. It will remain fresh for up to 4 days.
- In the Refrigerator: For longer storage, place the cake in the fridge, where it can last up to a week. Make sure it’s wrapped tightly to prevent it from drying out.
Freezing Instructions
- Before Frosting: Wrap each layer in plastic wrap and aluminum foil, then place them in the freezer.
- After Frosting: Once your cake is assembled, freeze it for about an hour to set the frosting. After that, wrap it tightly and store it in the freezer.
Frequently Asked Questions
What makes a red velvet wedding cake different from other cakes?
Red velvet cake stands out due to its vibrant color and distinctive flavor, which combines elements of chocolate with a subtle tanginess from buttermilk and vinegar. This unique taste and appearance make it a favorite choice for weddings.
Can I make this cake ahead of time?
Absolutely! You can bake and freeze the cake layers in advance, allowing you to save time on your big day. Just be sure to follow the freezing instructions to maintain freshness.
What are some popular variations of red velvet wedding cake?
Feel free to get creative! Some popular variations include adding a layer of raspberry jam between the cake layers or incorporating different frosting flavors, such as chocolate or almond, for a unique twist.
More Cake recipes you will love!
old-fashioned molasses cake recipe.
Easy peach cobbler recipe using cake mix

Red velvet wedding cake recipe
Ingredients
For the Cake:
- 1/2 cup plain hot coffee or boiling water
- 2 1/4 cups all-purpose flour
- 1/4 cup unsweetened cocoa powder
- 1 teaspoon baking soda
- 1/2 teaspoon baking powder
- 1 teaspoon fine sea salt
- 1/2 cup vegetable oil
- 1/4 teaspoon ground cinnamon optional
- 2 cups granulated sugar
- 2 large eggs at room temperature
- 1 stick unsalted butter melted
- 1 cup buttermilk at room temperature
- 1 large egg yolk at room temperature
- 3 teaspoons red gel food coloring
- 1 teaspoon distilled white vinegar
- 2 teaspoons vanilla extract
For the Cream Cheese Frosting:
- 16 ounces cream cheese at room temperature
- 2 teaspoons vanilla extract
- 4 cups powdered sugar sifted
- 2 sticks of unsalted butter at room temperature
Instructions
- Preheat the Oven: Start by setting your oven to 325°F (163°C). Prepare three 8-inch cake pans by lining them with parchment paper and spraying the sides with nonstick cooking spray.
- Make the Cocoa Mixture: In a mixing bowl, whisk together the hot coffee and cocoa powder. Let this mixture sit to cool slightly.
- Mix the Dry Ingredients: In another bowl, combine the flour, baking powder, baking soda, salt, and optional cinnamon. Set aside.
- Blend the Wet Ingredients: In a large bowl, mix together the sugar, vegetable oil, melted butter, eggs, egg yolk, buttermilk, vanilla extract, and red gel food coloring. Blend well until everything is fully combined. Add the cooled cocoa mixture and vinegar, mixing until smooth.
- Combine Mixtures: Gradually sift the dry ingredients into the wet mixture, whisking gently to incorporate.
- Bake: Pour the batter evenly into the prepared pans. Bake for 25-30 minutes, or until a toothpick inserted in the center comes out clean.
- Cool the Cakes: Once baked, let the cakes cool in their pans for about 10 minutes. Carefully run a thin knife around the edges, then invert the cakes onto wire racks to cool completely.
Send me this recipe!
Just enter your email below and get it sent straight to your inbox!


