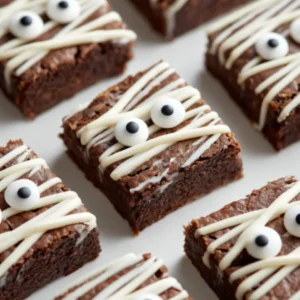
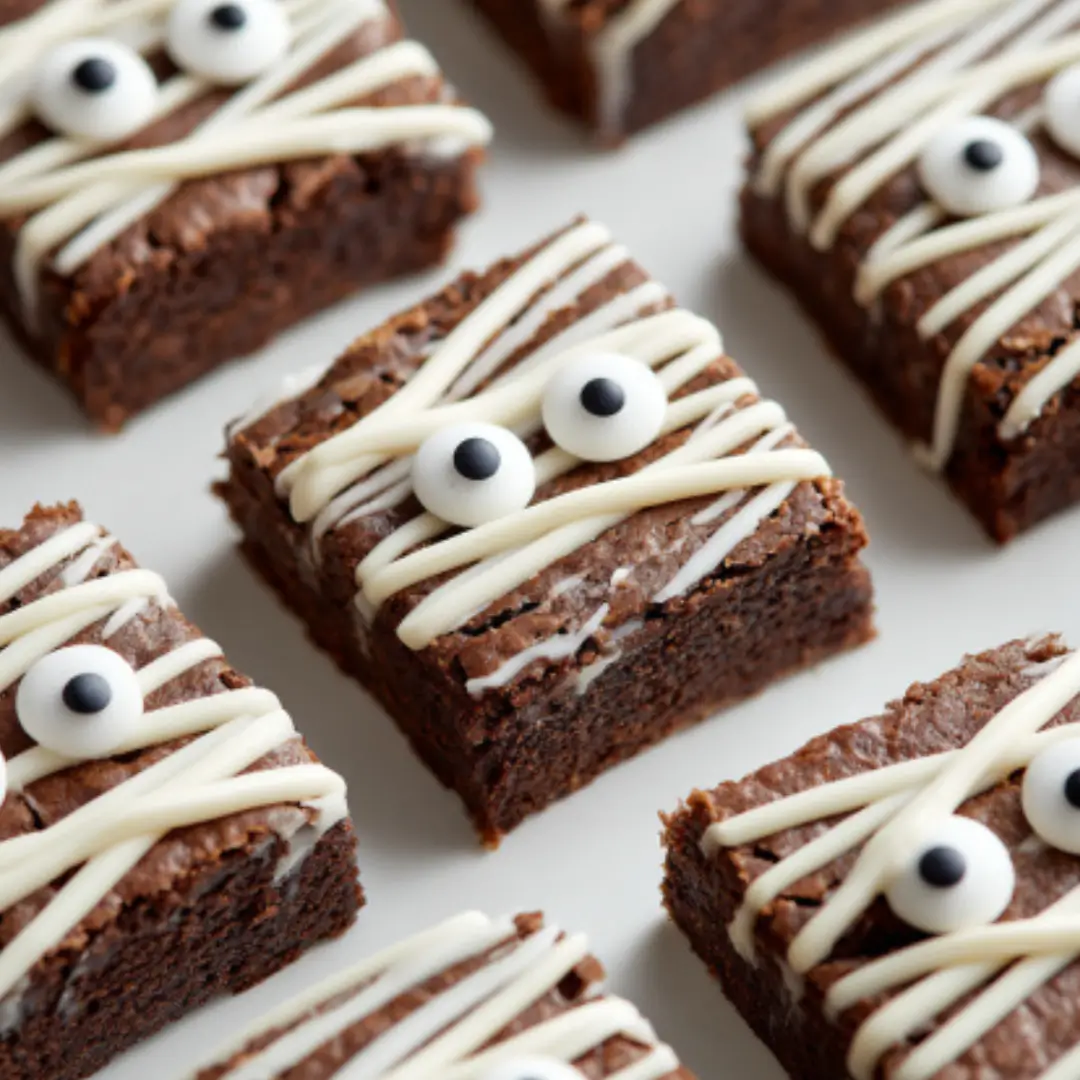
If you’re looking for a fun Halloween dessert, Mummy Brownies are a great choice. They’re rich, chocolatey brownies decorated with white chocolate drizzle and candy eyes to look like little mummies. These spooky treats are simple to make and perfect for parties, school events, or just a festive day at home.
Why We Love This Mummy Brownies Recipe
You’ll love how easy and fun these Mummy Brownies are to make. They strike the perfect balance between creativity and convenience. Using a basic hand-mixed brownie base, you’ll skip the fuss of electric mixers while still getting that moist, chocolatey texture you crave.
What makes this recipe stand out is how it turns everyday ingredients into something extraordinary. The melted white chocolate becomes the “bandages,” and the candy eyes bring these treats to life—literally. Plus, they’re a hit with both kids and adults. You’ll find yourself making them every October.
If you enjoy baking around the holidays but want something simple and fun, these brownies are your go-to. They offer visual appeal, delicious taste, and a great opportunity for little hands to help out in the kitchen.
Ingredients for Mummy Brownies
You won’t need anything fancy to bring these spooky treats to life. The base is a rich brownie made from everyday baking ingredients, and the mummy design is easy to achieve with just two extra toppings.
Brownie Base:
- ½ cup butter
- ¼ cup semisweet chocolate chips
- 2 teaspoons vanilla extract
- 2 large eggs
- ¾ cup all-purpose flour (94g)
- ½ cup white sugar (100g)
- ½ cup brown sugar (100g)
- ⅓ cup Dutch-process cocoa powder (33g)
- ¼ teaspoon salt
Toppings:
- 1 cup white chocolate chips or candy melts
- 32 candy eyes
You can also use milk chocolate chips instead of semisweet or substitute regular baking cocoa powder for Dutch-process cocoa, depending on what you have on hand.
How to Make Mummy Brownies Directions
Get ready to have some fun in the kitchen. These Mummy Brownies come together quickly, and the decorating part adds a playful twist to your typical dessert routine. Follow these steps for perfect results every time.
Start by preheating your oven to 350°F (175°C). Line a 9×9-inch baking pan with parchment paper or lightly coat it with cooking spray.
In a large microwave-safe bowl, combine the butter and chocolate chips. Microwave for 30 seconds, stir, then microwave for another 30 seconds. Stir until the butter is fully melted and the chocolate is smooth.
In a separate bowl, mix together the flour, brown sugar, white sugar, cocoa powder, and salt. Blend until the dry ingredients are evenly distributed.
Add the eggs and vanilla extract to the butter-chocolate mixture. Stir by hand until completely mixed. You want a smooth, glossy batter at this point.
Gradually stir the dry ingredients into the wet mixture. Keep folding until no streaks of flour remain, but don’t overmix—it’s okay if it looks a bit thick.
Pour the batter into the prepared pan. Use a spatula to spread it evenly to the corners.
Place the pan in the oven and bake for 30–35 minutes. Check with a toothpick—it should come out with only a few moist crumbs when the brownies are done.
Let the brownies rest in the pan for 5 minutes before lifting them out using the parchment paper. Allow them to cool on a rack for at least 30 minutes. This step is key to clean, crisp slices.
Once cooled, cut the brownie into 16 equal squares—4 rows by 4 rows. Place the squares on a wire rack or clean tray, ready for decorating.
Now for the fun part: the mummy look. Melt the white chocolate chips in a microwave-safe bowl in 30-second intervals, stirring after each one. Don’t rush this step; overheating will burn the chocolate.
Pour the melted chocolate into a small zip-top bag. Snip a tiny piece from one corner to create a piping bag. Drizzle the chocolate back and forth across each brownie to form mummy bandages. Make sure to drag the drizzle across where the eyes will go.
Gently press two candy eyes into each brownie while the chocolate is still warm so they stick well.
Let the decorated brownies rest for about 15 minutes until the chocolate drizzle hardens.
Now you’ve got an entire tray of sweet, spooky Mummy Brownies!
How to Serve Mummy Brownies
You’ve put in the effort, now let’s talk about the best ways to serve these little mummies. They’re ideal for a Halloween dessert table, wrapped individually for school events, or displayed on a festive tray for a spooky movie night.
Use a black or orange serving platter to really make the white chocolate bandages pop. Add a few mini pumpkins or Halloween decorations to the table for extra flair.
You can also stick decorative toothpicks into each brownie for easy grabbing—perfect for kids’ parties. If you’re packing them up for a gift or bake sale, place each one in a clear cellophane bag and tie it with Halloween ribbon.
Whether you’re going casual or creating a themed display, these brownies fit right in. Their playful design adds charm to any setup and guarantees a smile from every guest.
Expert Tips: Mummy Brownies
- Let them cool completely before slicing and decorating. If the brownies are even slightly warm, the drizzle won’t hold its shape, and the candy eyes might slide off.
- Use parchment paper when baking. It makes removing the brownies from the pan effortless and keeps cleanup easy.
- Stick with Dutch-process cocoa if you want a deep, rich chocolate flavor. But regular unsweetened cocoa works if that’s all you have.
- Add an extra egg if you prefer cake-like brownies instead of fudgy ones. This small change makes a noticeable difference in texture.
- Test the white chocolate before drizzling. It should be smooth and pourable but not too runny. If it seems too thick, stir in a teaspoon of neutral oil to loosen it.
- Work quickly once the drizzle starts. You want the eyes to adhere before the chocolate sets.
- Get the kids involved. This is a great recipe to let them help with drizzling and placing the candy eyes.
How to Store Mummy Brownies
You’ve made a big batch—now here’s how to keep them fresh. Once the chocolate drizzle has fully hardened, store the brownies in an airtight container.
They’ll stay soft and tasty at room temperature for up to 4 days. If your kitchen is especially warm, refrigerate them to prevent the white chocolate from melting.
To keep the design intact, place parchment paper between layers if you need to stack them. If you want to prep these ahead of time, you can freeze the undecorated brownies. Wrap tightly in plastic and store in a freezer bag for up to 2 months. Just thaw at room temperature and decorate when you’re ready.
Variation of Mummy Brownies
You don’t have to stick to the same version every time. Here are a few fun ways to switch things up:
- Gluten-Free Option: Use a 1-to-1 gluten-free flour blend. The results are just as fudgy and delicious.
- Peanut Butter Mummies: Swirl in a few tablespoons of peanut butter into the batter before baking. You can even use peanut butter chips in the drizzle for a nutty twist.
- Double Chocolate: Add extra chocolate chips into the batter for even more gooey richness.
- Colorful Bandages: Tint the white chocolate with gel food coloring to give your mummies some flair. Purple, orange, or green “bandages” can add a spooky-cute effect.
- Eye Options: Try oversized candy eyes or glowing sugar eyes for different looks. Some even glow under black light!
- Mini Mummies: Use a mini muffin tin for bite-sized mummy brownie bites. Perfect for little hands and party platters.
These little changes keep the recipe exciting every year and let you customize it for different tastes or dietary needs.
Frequently Asked Questions: Mummy Brownies
Can I make Mummy Brownies ahead of time?
Yes, you can bake the brownies a day or two in advance. Store them undecorated and add the white chocolate drizzle and eyes on the day you serve them.
What type of chocolate chips should I use?
Semisweet chips give a balanced chocolate flavor, but you can also use milk or dark chocolate chips, depending on your preference.
Can I melt chocolate on the stove instead of the microwave?
Absolutely. Just use a double boiler to gently melt the chocolate without burning it.
How do I keep the white chocolate from seizing?
Make sure your bowl and spoon are completely dry. Any water can cause the chocolate to seize and clump.
Are Mummy Brownies safe for school events?
Yes, as long as you avoid nut ingredients. Always check the labels on your chocolate chips and candy eyes for allergen information.
What if I can’t find candy eyes?
You can make your own using small dots of white chocolate and edible black gel, or skip them entirely and just go with the mummy bandages.

Mummy Brownies
Equipment
- 9×9-inch Baking Pan
- Microwave-safe bowl
- Parchment Paper
Ingredients
- 1/2 cup butter
- 1/4 cup semisweet chocolate chips
- 2 teaspoons vanilla extract
- 2 large eggs
- 3/4 cup all-purpose flour (94g)
- 1/2 cup white sugar (100g)
- 1/2 cup brown sugar (100g)
- 1/3 cup Dutch-process cocoa powder (33g)
- 1/4 teaspoon salt
- 1 cup white chocolate chips or candy melts
- 32 pieces candy eyes
Instructions
- Preheat your oven to 350°F (175°C) and line a 9×9-inch baking pan with parchment paper.
- In a microwave-safe bowl, combine butter and chocolate chips, microwaving in 30-second intervals until melted and smooth.
- In a separate bowl, mix flour, brown sugar, white sugar, cocoa powder, and salt until evenly distributed.
- Add eggs and vanilla to the butter-chocolate mixture, stirring until smooth.
- Gradually stir in the dry ingredients until just combined.
- Pour the batter into the prepared pan and spread evenly.
- Bake for 30–35 minutes, until a toothpick comes out with a few moist crumbs.
- Let the brownies cool in the pan for 5 minutes, then lift them out using the parchment paper and cool completely on a rack.
- Once cooled, cut into 16 squares and drizzle melted white chocolate over each brownie to create mummy bandages.
- Press two candy eyes into each brownie while the chocolate is still warm.
- Allow the brownies to set for about 15 minutes before serving.
Send me this recipe!
Just enter your email below and get it sent straight to your inbox!


