
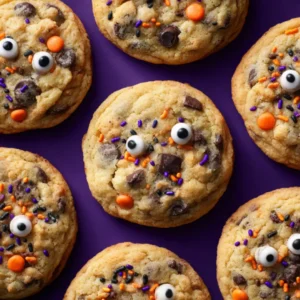
Halloween Chocolate Chip Cookies are easy to make and taste great. They have lots of melty chocolate chips and colorful Halloween sprinkles. Adding candy eyes after baking makes them fun and perfect for kids and adults. Whether for a party or a snack, these cookies are soft, tasty, and festive. You’ll enjoy baking and eating them all season long.
Why We Love This Halloween Chocolate Chip Cookies Recipe
You’ll find yourself reaching for this recipe again and again because it perfectly combines ease and festive flair. The cookie dough is chilled before baking, which helps develop flavor and keeps your cookies from spreading too much in the oven, giving them a lovely soft and chewy texture. Adding sprinkles and candy eyes not only boosts the fun factor but also makes them perfect for Halloween parties, school events, or just a cozy night in. Plus, the ingredients are simple and common, so you likely have most of what you need on hand. These cookies offer a nostalgic taste that feels homemade and special, without complicated steps or long prep times. They’re a fantastic way to get creative with seasonal decorations while enjoying a classic chocolate chip cookie.
Ingredients for Halloween Chocolate Chip Cookies
To get started on your Halloween cookie adventure, here’s the list of ingredients you’ll need:
- 1/2 cup unsalted butter, melted
- 1/3 cup granulated sugar (about 67 grams)
- 1/2 cup packed light brown sugar (about 100 grams)
- 1 large egg
- 1 teaspoon vanilla extract
- 1/2 teaspoon salt
- 1/2 teaspoon baking soda
- 1 1/2 cups all-purpose flour, spooned and leveled (about 186 grams)
- 1 1/2 cups chocolate chips
- 1/2 to 3/4 cup Halloween-themed sprinkles
- Candy eyes (optional, for decorating)
How to Make Halloween Chocolate Chip Cookies
Making these Halloween Chocolate Chip Cookies is straightforward and rewarding. You start by blending the melted butter with both brown and granulated sugars. This combination helps give your cookies a rich flavor and a slightly caramelized note once baked. Then, you add in the vanilla extract and egg, mixing until everything is smooth and uniform.
Next, you’ll combine the dry ingredients—flour, salt, and baking soda—and gradually mix them into the wet ingredients on a low speed. This step ensures your dough doesn’t get overworked, which could lead to tougher cookies. After the flour mixture is just incorporated, increase the mixing speed slightly for about 15 to 30 seconds to create a smooth dough. Be sure to scrape down the sides of your bowl so every bit is evenly mixed.
The fun part comes next: gently folding in your chocolate chips and colorful Halloween sprinkles with a spatula or spoon. This keeps the dough light and full of little bursts of sweetness in every bite. Using a tablespoon or an ice cream scoop, portion out the dough into 2-tablespoon balls onto a baking sheet lined with parchment paper.
Here’s an important tip: instead of baking right away, cover your dough balls with plastic wrap and chill them in the refrigerator for 1.5 to 2 hours—or even up to 24 hours if you want to prepare ahead. Chilling firms up the dough, which helps the cookies bake evenly and develop more depth in flavor.
When you’re ready to bake, preheat your oven to 350°F (about 175°C). Place your chilled dough balls on a baking sheet, spacing them around 2 inches apart. Bake for 11 to 13 minutes until the edges turn golden brown but the centers remain soft.
If you’re adding candy eyes, gently press them onto each warm cookie right after they come out of the oven, so they stick nicely without melting. Let the cookies cool on the baking sheet for a few minutes before transferring them to a wire rack to cool completely. This step helps them firm up just enough while keeping a chewy texture inside.
How to Serve Halloween Chocolate Chip Cookies
These cookies are perfect for sharing at Halloween parties, school events, or as a special treat for your family. You can arrange them on a themed platter with other festive snacks to create a fun dessert table that catches the eye. Pair your cookies with a cold glass of milk or a warm cup of your favorite caffeine-free tea for a comforting combination.
For an extra spooky touch, try stacking them like mini cookie towers and add more candy eyes or tiny edible decorations on top. They also make great gifts—wrap a few in clear cellophane tied with orange or black ribbon for an easy, thoughtful Halloween present.
If you want to serve them at a gathering, consider placing a small bowl of extra sprinkles nearby so guests can decorate their cookies before eating. This interactive element adds to the fun and lets everyone customize their treat.
Expert Tips for Halloween Chocolate Chip Cookies
To get the best results with this recipe, here are some helpful tips:
- Use unsalted butter to control the salt level precisely. Salted butter can alter the flavor balance.
- When measuring flour, use the spoon-and-level method to avoid packing too much in the cup, which can make cookies dense. Fluff the flour with a spoon, spoon it into your measuring cup, and level off the excess with a knife.
- Don’t skip chilling the dough. It’s essential for texture and flavor development. The longer you chill (up to 24 hours), the better the taste.
- Avoid overmixing once the flour is added. Overworking dough can make your cookies tough instead of soft.
- If you want uniform cookies, use a small ice cream scoop or a tablespoon measure to portion the dough evenly.
- Baking times can vary slightly depending on your oven, so keep an eye on the first batch to adjust time if needed.
- Adding candy eyes while the cookies are warm ensures they stick without melting or losing shape.
- Store cookies in an airtight container at room temperature to maintain softness for several days.
Following these tips will help you create Halloween cookies that look as great as they taste and bring smiles to everyone who tries them.
How to Store Halloween Chocolate Chip Cookies
Once baked and cooled, store your Halloween Chocolate Chip Cookies in an airtight container at room temperature. They will stay fresh and soft for 3 to 5 days this way, making them perfect for making ahead of time for parties or treats. If you want to keep them longer, you can freeze the baked cookies. Place them in a freezer-safe container or bag, separating layers with parchment paper to prevent sticking. Frozen cookies will keep well for 2 to 3 months.
Alternatively, you can freeze the cookie dough balls before baking. Just portion the dough onto a tray, freeze until firm, then transfer to a freezer bag. When you want fresh cookies, bake them straight from frozen—just add a couple of extra minutes to the baking time. This method is great for having Halloween cookies ready anytime you need them without the hassle of mixing dough from scratch.
Variation of Halloween Chocolate Chip Cookies
If you want to switch things up or personalize your Halloween cookies, there are several ways to do it. Try replacing the chocolate chips with white chocolate or peanut butter chips for a different flavor profile. Adding chopped nuts like walnuts or pecans can add a crunchy texture that contrasts nicely with the soft cookie.
For a fun twist, use different colors and shapes of sprinkles to match other seasonal themes or celebrations beyond Halloween. You can also swap candy eyes with small gummy candies or edible markers to draw faces on the cookies after baking for extra creativity.
If you prefer a healthier option, try using whole wheat flour instead of all-purpose flour, though it will change the texture slightly. You can also reduce the sugar by half and add mashed banana or unsweetened applesauce to maintain moisture without losing sweetness.
For a richer flavor, add a pinch of cinnamon or pumpkin spice to the dry ingredients, turning these cookies into an autumn delight. These variations let you adapt the recipe to your taste and occasion, keeping the fun of Halloween alive in every bite.
Frequently Asked Questions About Halloween Chocolate Chip Cookies
What makes these Halloween Chocolate Chip Cookies different from regular chocolate chip cookies?
These cookies are chilled before baking and decorated with Halloween-themed sprinkles and optional candy eyes, making them festive and fun for the season while keeping the classic cookie taste and texture.
Can I make the dough ahead of time?
Yes, you can prepare the dough and chill it for up to 24 hours before baking. This helps develop flavor and makes baking day easier.
How should I store leftover cookies?
Store them in an airtight container at room temperature for up to five days, or freeze baked cookies for longer storage.
Can I skip the candy eyes or sprinkles?
Absolutely! The sprinkles and candy eyes add festive charm but are optional. The cookies taste delicious even without them.
What if I don’t have Halloween sprinkles?
You can use any colorful sprinkles you have on hand or omit them altogether for a classic chocolate chip cookie.
How can I make these cookies softer?
Make sure not to overbake and avoid overmixing the dough. Chilling the dough before baking also helps keep them tender.
Are these cookies suitable for kids?
Yes, they’re perfect for children and a great way to get them involved in holiday baking with easy decorating options.
Can I double this recipe?
Yes, the recipe doubles well. Just be sure to chill the dough in batches if needed and adjust baking times accordingly.
Halloween Chocolate Chip Cookies
Equipment
- Mixing Bowl
- Baking Sheet
- Parchment Paper
- Refrigerator
Ingredients
- ½ cup unsalted butter (melted)
- ⅓ cup granulated sugar (about 67 grams)
- ½ cup packed light brown sugar (about 100 grams)
- 1 large egg
- 1 teaspoon vanilla extract
- ½ teaspoon salt
- ½ teaspoon baking soda
- 1½ cups all-purpose flour (about 186 grams)
- 1½ cups chocolate chips
- ½ to ¾ cup Halloween-themed sprinkles
- Candy eyes (optional, for decorating)


Instructions
- In a mixing bowl, blend melted butter with granulated and brown sugars until well combined.
- Add in the egg and vanilla extract, mixing until smooth.
- Combine flour, salt, and baking soda in a separate bowl, then gradually mix into the wet ingredients until just incorporated.
- Fold in chocolate chips and Halloween sprinkles gently.
- Cover the dough with plastic wrap and chill in the refrigerator for 1.5 to 2 hours (or up to 24 hours).
- Preheat the oven to 350°F (about 175°C). Line a baking sheet with parchment paper.
- Portion the chilled dough into 2-tablespoon balls and place them on the prepared baking sheet, spacing them 2 inches apart.
- Bake for 11 to 13 minutes, until the edges are golden but the centers remain soft.
- Press candy eyes onto warm cookies immediately after baking. Let cool on the baking sheet for a few minutes before transferring to a wire rack.
Send me this recipe!
Just enter your email below and get it sent straight to your inbox!