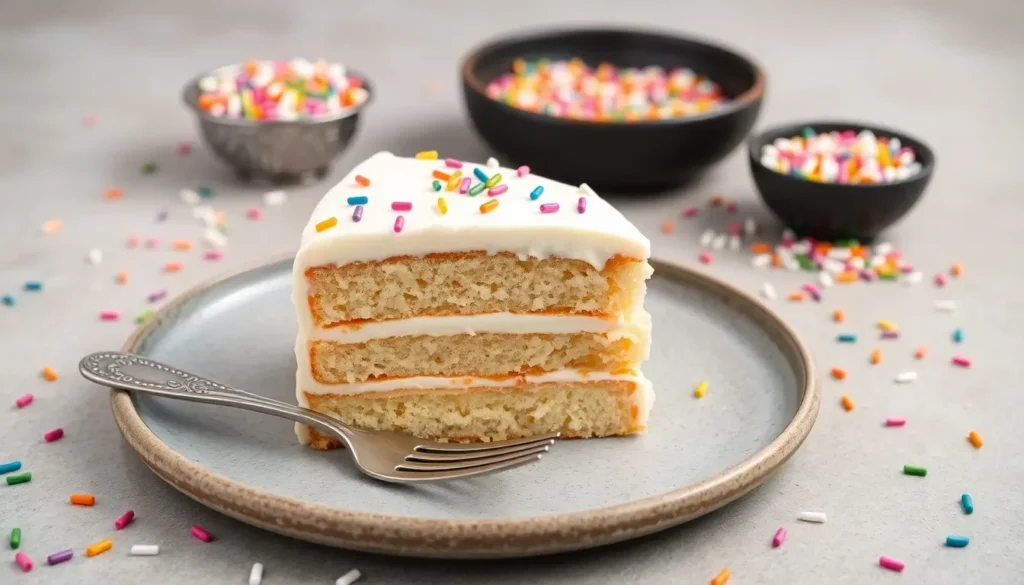
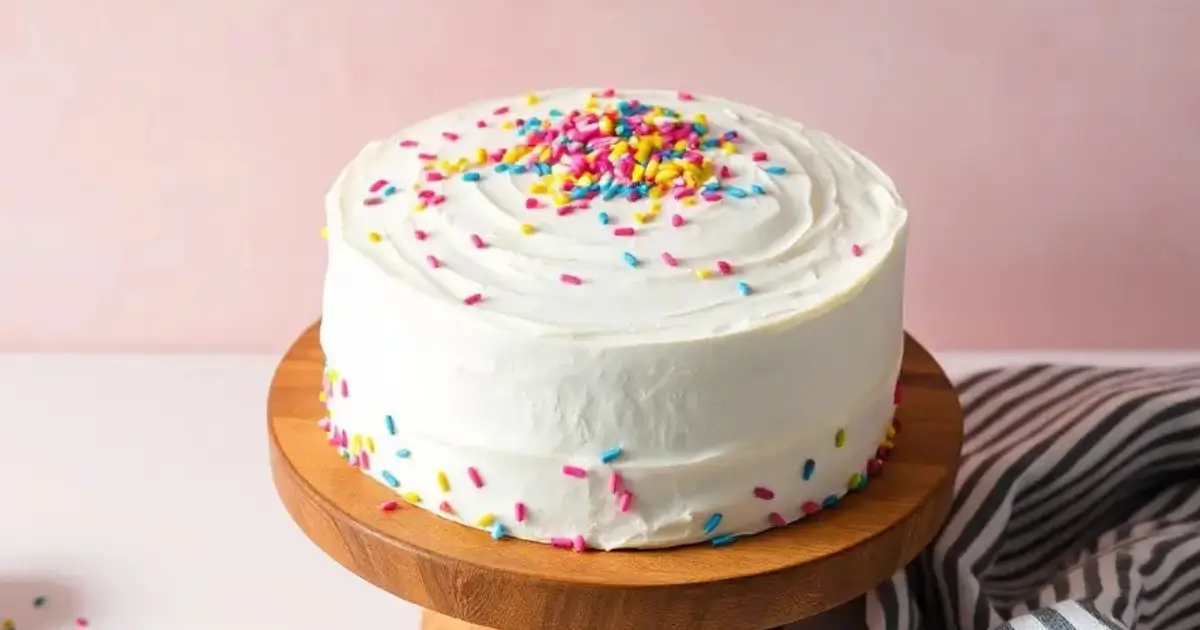
The classic 8 inch cake is the perfect balance of size, flavor, and versatility. Ideal for everything from birthdays to casual celebrations or simply when you’re in the mood for a treat, this recipe delivers a delicious, reliable result every time. Whether you prefer it as a simple single layer or want to dress it up with layers and frosting, it’s sure to be a crowd-pleaser.
Why We Love This 8 Inch Cake Recipe
You’ll love this cake recipe for many reasons:
- Perfect Size: Whether you’re celebrating with a few close friends or baking a layered masterpiece, this size is ideal.
- Rich Flavor: The blend of vanilla, butter, and a hint of sour cream creates a moist, flavorful base that’s anything but ordinary.
- Customizable: From classic buttercream to whipped cream and fresh fruit, you can dress this cake up or down.
- Beginner-Friendly: Even if you’re not a pro in the kitchen, the step-by-step guide ensures your cake will come out perfectly every time.

Ingredients for an 8 Inch Cake
Cake Flour
- Cake flour is essential for achieving a soft, tender crumb in this recipe. It has a lower protein content compared to all-purpose flour, which helps prevent a dense texture. Avoid substituting with all-purpose flour, as it may result in a coarser and slightly heavier cake.
Baking Powder
- This recipe relies on baking powder for leavening. It ensures a light and fluffy texture. Baking powder cannot be replaced with baking soda, as the two function differently in recipes.
Unsalted Butter
- Butter adds richness and moisture to the cake. For best results, use unsalted butter to control the salt level in the recipe. If you only have salted butter, reduce the added salt in the recipe by half.
Granulated Sugar
- Granulated white sugar sweetens the cake while also providing structure and moisture. Avoid using brown sugar or natural cane sugar, as they can alter the color and texture of the cake.
Pure Vanilla Extract
- Vanilla extract enhances the cake’s flavor, adding warmth and a subtle aroma. Choosing pure vanilla extract over imitation vanilla enhances the flavor and provides a more authentic taste.
Sour Cream
- Sour cream brings a slight tanginess and an extra dose of moisture to the cake. This ingredient helps create a tender crumb and should not be skipped or substituted with yogurt unless absolutely necessary.
How to Make an 8 Inch Cake
Step 1: Prep Your Pans and Oven
Preheat your oven to 350°F (175°C). Grease and flour three 8-inch round cake pans, then line the bottoms with parchment paper to ensure easy release after baking.
Step 2: Mix the Dry Ingredients
In a spacious bowl, combine the cake flour, baking powder, and salt by whisking them together.. This step ensures the leavening agents are evenly distributed for a perfectly risen cake.
Step 3: Cream Butter and Sugar
With a stand mixer fitted with the paddle attachment, beat the butter on medium speed for about 1 minute until it becomes creamy.. Gradually add the sugar, beating until light and fluffy, about 2–4 minutes.
Step 4: Add Eggs and Vanilla
Add the eggs and yolks individually, mixing thoroughly after each addition. Scrape down the sides of the bowl, then mix in the vanilla extract until just combined.
Step 5: Alternate Dry and Wet Ingredients
Reduce the mixer speed to low. Stir in half of the dry ingredients and mix carefully.. Pour in the milk and sour cream, mixing just until incorporated. Finish with the remaining dry ingredients, taking care not to overmix.
Step 6: Bake the Layers
Divide the batter evenly among the prepared pans. Bake for 24–26 minutes, or until a toothpick inserted into the center comes out clean and dry.
Step 7: Cool and Chill
Allow the cakes to cool in the pans for 20 minutes, then transfer them to a wire rack. Once fully cooled, wrap each layer in plastic wrap and refrigerate for at least 2 hours before frosting.
Expert Tips for Success
- Room Temperature Ingredients: Always bring butter, eggs, and milk to room temperature before starting. This ensures a smooth, lump-free batter.
- Use Cake Flour: Cake flour is finer and lighter than all-purpose flour, resulting in a more tender crumb.
- Measure Carefully: Baking is a science, so use a digital scale for precise measurements.
- Chill Before Frosting: Chilling the cake layers prevents crumbs from mixing into the frosting.
Common Mistakes to Avoid
- Skipping the Parchment Paper: This simple step ensures your cake released cleanly from the pan.
- Overmixing the Batter: Stop mixing as soon as the ingredients are combined to avoid a dense cake.
- Opening the Oven Door Too Early: This can cause the cake to sink. Wait until the baking time is nearly complete before checking for doneness.
Variations to Try
- Chocolate Cake: Replace ½ cup of flour with unsweetened cocoa powder for a rich chocolate flavor.
- Citrus Burst: Add 2 tablespoons of orange or lemon zest for a bright, zesty twist.
- Marble Effect: Swirl melted chocolate or a contrasting batter through the vanilla base for a marbled look.
Vegan Adaptations for Your 8 Inch Cake
Transforming this 8 inch cake recipe into a vegan version is easier than you might think. With just a few simple swaps, you can enjoy a plant-based treat that’s just as moist, fluffy, and delicious as the original.
Egg Replacement:
Replace each egg with a flaxseed egg, made by mixing:
- 1 tablespoon ground flaxseed
- 2.5 tablespoons water
Allow the mixture to rest for approximately 5 minutes until it forms a gel-like texture. This binds the ingredients and mimics the structure that eggs provide.
Butter Substitution:
Use plant-based butter as a direct substitute for regular butter. Vegan butter options, such as those made from coconut oil or avocado oil, offer the same creaminess and richness while being dairy-free.
Milk Alternatives:
Swap whole milk for non-dairy milk, such as:
- Almond milk: Light and slightly nutty in flavor.
- Oat milk: Creamy and neutral, ideal for baking.
Both options blend seamlessly into the batter, maintaining the right texture and moisture.
Sour Cream Replacement:
For the tangy texture of sour cream, use coconut yogurt. It provides the same creaminess and slight acidity, ensuring your cake remains rich and flavorful.
By incorporating these vegan-friendly substitutes, you’ll have a delectable cake that caters to all dietary preferences without compromising on taste or quality.
Serving Suggestions for Your 8 Inch Cake
Enhance your 8 inch cake’s appeal with these creative and delicious serving ideas. Whether you’re aiming for a classic presentation or something more unique, these suggestions will ensure your cake becomes the centerpiece of any occasion.
Classic Frosting Options:
- Buttercream Frosting: Smooth and creamy, buttercream is a timeless choice. Customize it with natural flavors like vanilla, chocolate, or lemon for a personalized touch.
- Cream Cheese Frosting: Add a tangy twist to your cake with this rich, velvety option. It pairs beautifully with the light and fluffy texture of the cake.
Seasonal Fruit Garnish:
Brighten your cake with fresh, vibrant fruits for a touch of natural sweetness and elegance. Some popular choices include:
- Strawberries and Blueberries: Their juicy texture and bright colors create a visually stunning topping.
- Edible Flowers: Add a whimsical, delicate flair to your cake with edible blossoms like pansies or violets.
Elegant Chocolate Drizzle:
For an indulgent finish, drizzle your cake with chocolate ganache. The glossy, decadent coating not only enhances the cake’s appearance but also adds a rich layer of flavor. You can use:
- Dark Chocolate Ganache: For a bittersweet contrast.
- White Chocolate Ganache: For a creamy, subtle sweetness.
How to Store Your 8 Inch Cake
Room Temperature
An unfrosted cake can be kept at room temperature for up to 2 days if stored properly. To maintain freshness:
- Use an airtight container to protect the cake from air exposure, which can dry it out.
- Keep the container in a cool, dry place, away from sunlight or heat sources that could cause the cake to become stale.
Refrigerator
For frosted cakes, refrigeration is essential to preserve the texture and prevent spoilage. Proper storage ensures the cake remains delicious for up to 5 days.
- Cover the cake with a cake dome or tightly wrap it to avoid absorbing odors from other foods in the refrigerator.
- Let the cake sit at room temperature for 30 minutes to 1 hour before serving to restore its soft texture.
FAQ About 8 Inch Cakes
How many people will an 8 inch cake feed?
An 8 inch cake can typically serve between 12 and 16 people. The exact number depends on the size of the slices you cut. For instance:
Smaller slices: If you’re serving a gathering where people are enjoying multiple desserts, cutting thinner slices will yield more portions, closer to 16.
Larger slices: For events like birthdays, where the cake might be the main treat, you’ll likely cut larger portions, serving closer to 12.
How big is an 8 inch round cake tin in CM?
An 8 inch round cake tin has a diameter of approximately 20.3 centimeters (cm). This measurement is crucial for ensuring your recipe matches the pan size. Using the correct tin size ensures:
Even baking: The batter spreads and rises evenly when baked in the recommended pan.
Proper proportions: An 8 inch cake tin provides the right depth for layering cakes or single-layer desserts without being too thin or thick.
How much batter do I need for an 8 inch cake?
You’ll need about 6 cups of batter to bake three layers of 8 inch cakes. This ensures each layer is:
Evenly thick: Each pan gets an equal portion of batter, leading to consistent baking results.
Perfectly baked: Using the right amount prevents underfilling (resulting in thin cakes) or overfilling (leading to spillage or uneven baking).
More Cake recipes you will love!
Equipment
Small mixing bowl
Spoon or whisk
Measuring cups and spoons

Vanilla 8 inch cake recipe
Ingredients
- 3 cups + 2 tablespoons 375g cake flour
- 1 tablespoon baking powder
- 1 teaspoon kosher salt
- 1 cup 227g unsalted butter, softened
- 2 cups 400g granulated sugar
- 3 large eggs
- 3 egg yolks
- 1 tablespoon pure vanilla extract
- 1 cup 240ml whole milk
- ½ cup 120ml sour cream
Instructions
Step 1: Prep Your Pans and Oven
- Preheat your oven to 350°F (175°C). Grease and flour three 8 inch round cake pans, and line the bottoms with parchment paper. Properly preparing your pans ensures your cake won’t stick and will release easily once baked.
Step 2: Mix the Dry Ingredients
- In a large mixing bowl, whisk together the cake flour, baking powder, and salt. This step helps evenly distribute the leavening agents, so your cake rises beautifully.
Step 3: Cream Butter and Sugar
- Using a stand mixer with a paddle attachment, beat the butter on medium speed until creamy, about 1 minute. Gradually add the granulated sugar and continue beating until the mixture is light and fluffy—this should take about 2–4 minutes.
Step 4: Add Eggs and Flavoring
- Add the eggs and yolks one at a time, mixing thoroughly after each addition. Scrape down the sides of the bowl to ensure everything is well combined. Add the vanilla extract and mix just until blended.
Step 5: Alternate Dry and Wet Ingredients
- Reduce the mixer speed to low. Add half of the dry ingredients, then mix until just combined. Pour in the milk and sour cream, mixing gently to incorporate. Finish by adding the remaining dry ingredients. Avoid overmixing, as this can make the cake dense.
Step 6: Bake
- Divide the batter evenly among the prepared pans. Bake for 24–26 minutes, or until a toothpick inserted into the center comes out clean.
Step 7: Cool and Chill
- Let the cakes cool in their pans for about 20 minutes, then transfer them to a wire rack. Once completely cool, wrap each layer in plastic wrap and refrigerate for at least 2 hours before frosting.
Send me this recipe!
Just enter your email below and get it sent straight to your inbox!


