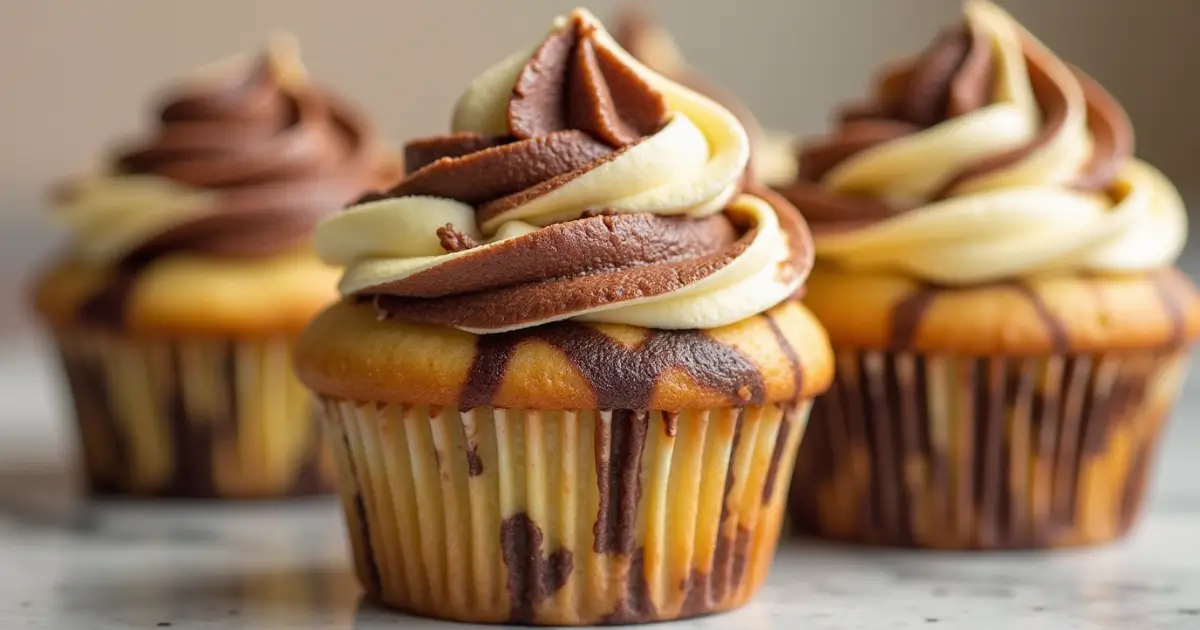
Marble cupcakes are the perfect mix of chocolate and vanilla in one bite. They’re soft, moist, and fun to make with that pretty swirl on top. I love how they look fancy but are easy enough for anyone to bake. Whether it’s for a party or a quick treat, these cupcakes always make people smile.
Why We Love This
Marble cupcakes are a classic for a reason—they bring together the best of both worlds in every bite. The soft, moist vanilla base paired with rich chocolate swirls creates not just a flavor contrast but a visual one too. They’re as pretty as they are tasty.
These two-tone cupcakes are perfect when you can’t choose between chocolate and vanilla. The marbled effect feels special, yet it’s surprisingly easy to achieve with just a few simple steps. Whether you’re baking for a birthday party, a weekend treat, or just because you love homemade cupcakes, this recipe fits the moment.
Here’s why these marble swirl cupcakes are a favorite:
- Balanced flavor – Light vanilla meets deep cocoa in every bite
- Eye-catching swirl – A beautiful marbled top makes them look bakery-made
- Moist and fluffy texture – Thanks to the perfect cupcake batter base
- Simple to make – No special tools or tricks required
- Crowd-pleasers – Loved by both kids and adults
If you’ve ever wanted a cupcake that looks impressive, tastes amazing, and is easy enough for a casual bake, this one’s it.
Ingredients
All-purpose flour – Provides the right texture for the cupcakes. Don’t substitute it with cake flour or whole wheat flour.
Baking powder – Necessary for the rise. Don’t swap it with baking soda.
Salt – Enhances the flavor without making the cupcakes salty.
Unsalted butter – Adds moisture and flavor. You can use salted butter but reduce the added salt.
Granulated sugar – Sweetens and keeps the cupcakes moist. Don’t substitute with brown sugar if you want the same texture.
Vanilla extract – Adds flavor to the vanilla batter.
Eggs – Helps with texture and moisture. Use large eggs at room temperature.
Whole milk – Keeps the cupcakes moist. Lower-fat milk may dry them out.
Unsweetened cocoa powder – Used for the chocolate batter and swirl.
Instructions
Making marble cupcakes is simpler than it looks—and the swirl effect is always a fun surprise. Just follow these easy steps, and you’ll have soft, moist cupcakes with a beautiful chocolate-vanilla twist ready in no time.
Preheat and Prep
Preheat your oven to 350°F (175°C). Line a 12-cup muffin tin with cupcake liners.
Cream Butter and Sugar
Beat the butter and sugar together until light and fluffy (2–3 minutes).
Add Eggs and Vanilla
Add the eggs one at a time, then stir in the vanilla extract.
Mix Dry Ingredients
Whisk the flour, baking powder, and salt. Gradually add this to the butter mixture, alternating with milk. Don’t overmix.
Make Chocolate Batter
Mix cocoa powder, milk, and sugar for the chocolate batter. Add 1/2 cup of vanilla batter to the chocolate mix.
Fill Cupcake Liners
Spoon both batters into each liner. Swirl with a toothpick.
Bake
Bake for 18–20 minutes, or until a toothpick comes out clean. Let them cool in the tin for 5 minutes, then transfer to a wire rack.
Pro Tips
For the best marble cupcakes that are as stunning as they are delicious, here are a few pro tips to elevate your baking game:
Room Temperature Ingredients
Always start with room temperature butter and eggs. This helps the ingredients blend together smoothly, resulting in a lighter, fluffier texture. Cold ingredients can cause the batter to seize up, leading to denser cupcakes.
Don’t Overmix the Batter
When combining the wet and dry ingredients, mix just until everything is incorporated. Overmixing can cause the cupcakes to be tough, not light and airy. A few gentle stirs will do the trick.
Swirl with Care
To get that perfect marbled effect, don’t overdo it with the swirl! A few gentle turns with a toothpick or skewer are enough to create that beautiful two-tone look. Too much swirling will blend the batters too much, losing the marble effect.
Even Batter Distribution
Use an ice cream scoop or spoon to evenly distribute the batter into the cupcake liners. This helps ensure each cupcake bakes evenly and you get a consistent rise.
Test for Doneness
To make sure your cupcakes are baked perfectly, use the classic toothpick test. Insert a toothpick into the center of the cupcake—if it comes out clean, they’re done!
Let Them Cool Completely
Don’t frost the cupcakes while they’re still warm! Let them cool completely on a wire rack so that any moisture can escape. This will keep your cupcakes from becoming soggy under frosting.
Variations
While marble cupcakes are already a treat on their own, there are plenty of fun ways to mix things up and make them your own. Here are a few variations to try that will keep your cupcakes exciting and fresh:
Chocolate Chips
Add chocolate chips to the batter for extra texture and pockets of melted chocolate in every bite. They’re especially delicious when added to the vanilla batter.
Add a Twist of Citrus
For a light, refreshing twist, try adding zest from one orange or lemon to the vanilla batter. The citrus flavor pairs beautifully with the chocolate swirl and adds a bright contrast.
Frost with Whipped Cream
If you’re looking for a lighter frosting option, try topping your marble cupcakes with whipped cream. It’s airy, slightly sweet, and doesn’t overwhelm the flavor of the cupcakes. You can even add a bit of vanilla extract to the whipped cream for a flavor boost.
Serving Suggestions
Once your marble cupcakes are out of the oven and cooled, it’s time to think about how to serve them. These cupcakes are perfect for almost any occasion, from casual get-togethers to more formal celebrations. Here are some serving ideas that will elevate your marble cupcakes and make them even more enjoyable:
Frost with Buttercream
A classic pairing for marble cupcakes is a rich, creamy buttercream frosting. You can use a vanilla buttercream to complement the vanilla batter or a chocolate buttercream for a double-chocolate treat. For an extra touch, pipe the frosting with a decorative swirl.
Serve with a Hot Drink
Pair your marble cupcakes with a warm beverage like coffee, hot chocolate, or even a chai latte. The rich flavors of the cupcakes combined with the comforting warmth of your drink will make for a cozy treat.
Add a Dusting of Powdered Sugar
For a light and simple finishing touch, dust your cupcakes with a bit of powdered sugar. This adds a delicate sweetness without overpowering the flavor and makes them look elegant.
Top with Fresh Berries
Add a pop of color and a fresh twist by topping each cupcake with a few fresh berries like raspberries, strawberries, or blueberries. The fruit not only enhances the visual appeal but also balances the richness of the cupcakes with a burst of freshness.
More Cupcake recipes you will love!
FAQs
Can I make these cupcakes in advance?
Absolutely! Marble cupcakes can be made a day or two ahead of time. After baking, let them cool completely, then store them in an airtight container at room temperature. If you plan to frost them, it’s best to do so closer to serving time to keep the frosting fresh. Alternatively, you can also freeze the cupcakes without frosting. Just wrap them tightly in plastic wrap and store them in a freezer-safe bag. When you’re ready to serve, thaw them and frost!
How do I make sure the marbled effect is perfect?
The key to a beautiful marble effect is to gently swirl the batters together. After spooning both the chocolate and vanilla batters into the cupcake liners, take a toothpick or skewer and make a few light swirls. Avoid overmixing, as this can blend the colors too much and create a more solid color instead of a marble effect.
Can I substitute the flour for a gluten-free version?
Yes! If you’re looking for a gluten-free option, you can use a gluten-free all-purpose flour blend as a substitute for regular flour. Be sure to choose a blend that includes xanthan gum for the best texture. You may also need to adjust the baking time slightly, so keep an eye on the cupcakes as they bake.
How can I make these cupcakes dairy-free?
To make dairy-free marble cupcakes, simply swap the butter for a dairy-free butter substitute or coconut oil. For the milk, use a non-dairy milk like almond, soy, or oat milk. Just be sure to check that the chocolate you’re using is dairy-free as well.
marble cupcakes
Ingredients
For the Vanilla Batter:
- 1/2 cup 113g unsalted butter, softened
- 3/4 cup 150g granulated sugar
- 2 large eggs room temperature
- 1 1/2 teaspoons vanilla extract
- 1 1/4 cups 160g all-purpose flour, spooned and leveled
- 1 1/2 teaspoons baking powder
- 1/4 teaspoon salt
- 1/2 cup 120ml whole milk
For the Chocolate Swirl:
- 2 tablespoons unsweetened cocoa powder
- 1 tablespoon milk
- 1 tablespoon granulated sugar


Instructions
Preheat and Prep
- Preheat your oven to 350°F (175°C).
- Line a 12-cup muffin tin with cupcake liners.
Cream the Butter and Sugar
- In a large bowl, use an electric mixer to beat the softened butter and granulated sugar until light and fluffy (about 2–3 minutes).
- This step adds air to the batter, giving you fluffy cupcakes.
Add the Eggs and Vanilla
- Beat in the eggs, one at a time, mixing well after each addition.
- Stir in the vanilla extract.
Mix the Dry Ingredients
- In a separate bowl, whisk together the flour, baking powder, and salt.
- Add half of the dry mixture to the butter mixture, then add the milk, and finish with the remaining dry ingredients.
- Mix until just combined—don’t overmix!
Make the Chocolate Batter
- In a small bowl, stir together the cocoa powder, milk, and sugar to create a smooth chocolate mixture.
- Scoop out about 1/2 cup of the vanilla batter and mix it with the chocolate blend to create your swirl batter.
Fill the Cupcake Liners
- Add a spoonful of vanilla batter to each cupcake liner, then a small spoonful of chocolate batter on top.
- Use a toothpick or skewer to gently swirl the two together—just a few turns will do the trick!
Bake
- Bake for 18–20 minutes, or until a toothpick inserted into the center comes out clean.
- Let the cupcakes cool in the tin for 5 minutes, then transfer to a wire rack to cool completely.
Send me this recipe!
Just enter your email below and get it sent straight to your inbox!