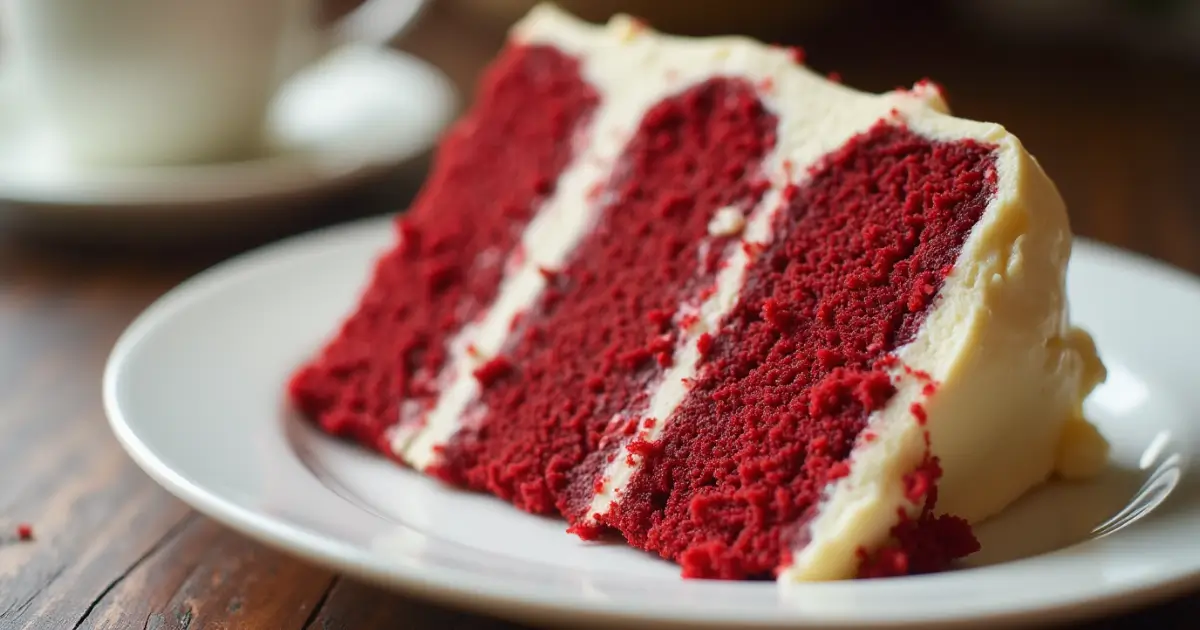
Red velvet cake is a classic dessert that’s as beautiful as it is delicious. With its soft texture and rich flavor, it’s perfect for any celebration. Topped with creamy cream cheese frosting, this cake is sure to impress. Whether you’re baking for a special occasion or just because, this easy red velvet cake recipe is a must-try.
Why We Love This red velvet cake
Red velvet cake is more than just a dessert—it’s an experience. The rich, moist texture combined with its vibrant color makes it a standout at any occasion. Whether you’re celebrating a birthday, hosting a tea party, or just craving something special, this cake fits the bill perfectly. Here’s why we love it:
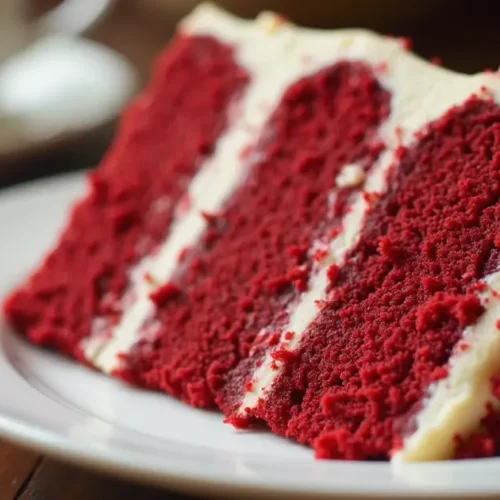
- Deliciously Moist: The combination of buttermilk and butter creates a tender, melt-in-your-mouth texture that’s hard to beat. It’s the kind of cake that feels comforting yet indulgent.
- Visually Stunning: The deep red color, paired with a creamy white frosting, makes for a beautiful contrast that’s sure to grab attention. It’s a perfect centerpiece for any celebration or gathering.
- Perfect Balance of Flavors: With a hint of cocoa, the flavor is rich but not overpowering. It’s just enough to give the cake depth without taking away from its delicate sweetness.
- Easy to Make: This red velvet cake recipe is beginner-friendly. While it looks elegant, the steps are simple and straightforward, allowing even novice bakers to create a perfect cake with ease.
- Versatile for Any Occasion: Whether it’s a casual get-together or a special event, this cake always fits. Its rich flavor and gorgeous appearance make it an all-time favorite for both small and large gatherings.
Ingredients
To make this delicious red velvet cake, you’ll need a few simple ingredients that come together to create something extraordinary. Let’s take a look at what you’ll need to gather before you start baking:
- Cake Flour – Ensures a tender texture and fine crumb.
- Baking Soda – Helps the cake rise and stay light.
- Unsalted Butter – Adds moisture and flavor.
- Granulated Sugar – Sweetens and adds moisture.
- Vanilla Extract – Adds flavor.
- Eggs – Provide structure and moisture.
- Buttermilk – Adds moisture and tang.
- Red Food Coloring – Gives the cake its signature red color.
- White Vinegar – Activates the baking soda and improves texture.
Instructions
Now that you have all the ingredients ready, let’s dive into the process of making this beautiful red velvet cake. Don’t worry; it’s simpler than it looks, and I’m here to guide you through every step!
Preheat Oven – Set your oven to 350°F (175°C).
Prepare Pans – Grease and flour two 9-inch cake pans or line with parchment paper.
Mix Dry Ingredients – Sift together flour, cocoa powder, baking soda, and salt.
Mix Wet Ingredients – Whisk buttermilk, eggs, oil, vanilla, and red food coloring.
Combine Wet and Dry – Slowly add dry ingredients to wet ingredients, mixing until just combined.
Add Vinegar – Stir in vinegar to activate the baking soda.
Bake – Divide batter between pans and bake for 25-30 minutes, checking with a toothpick for doneness.
Cool – Let cakes cool in the pans for 10 minutes, then transfer to a wire rack to cool completely.
Pro Tips
To help you make the perfect red velvet cake, here are some handy pro tips that will elevate your baking game and ensure your cake turns out as flawless as possible:
Room Temperature Ingredients
For the best texture, make sure your eggs, butter, and buttermilk are all at room temperature before you begin. This helps them mix together smoothly and prevents any lumps in the batter, giving you a perfectly even texture.
Don’t Overmix the Batter
Once you combine the wet and dry ingredients, mix just until they’re incorporated. Overmixing can lead to a dense cake, and we want that light, fluffy texture that red velvet is known for. Stir until you don’t see any more flour streaks, and that’s it!
Use Gel Food Coloring
If you’re after a rich, vibrant red color, gel food coloring is your best bet. It’s more concentrated than liquid food coloring, so you’ll need less to achieve that beautiful hue without affecting the cake’s texture. Just a tablespoon or two will do!
Proper Cake Cooling
Let the cakes cool in their pans for about 10 minutes before transferring them to a wire rack. This prevents them from breaking or falling apart. Once they’re fully cooled, they’ll be the perfect texture for stacking and frosting.
Frosting at Room Temperature
Ensure your cream cheese frosting is at room temperature before you apply it. Cold frosting can be hard to spread, and you might end up tearing the cake layers. Room-temperature frosting will glide on smoothly for a perfect finish.
Even Layers
If you want your layers to be perfectly even, use a serrated knife to level the tops of your cakes. This will help the layers stack nicely, and your cake will look professionally made.
Make Ahead
If you’re short on time, you can bake the cake layers a day ahead and store them wrapped in plastic wrap at room temperature. Frost them the next day, and they’ll still be just as fresh!
Variations
While the classic red velvet cake is absolutely perfect as is, there are plenty of ways you can add your personal touch and make it even more exciting. Here are some fun and delicious variations to try:
Red Velvet Cupcakes
If you’re looking for an easy, individual-sized treat, red velvet cupcakes are the way to go. Simply divide the batter evenly into a muffin tin and bake for 18-20 minutes. Once they’re cooled, top each one with a swirl of cream cheese frosting for an adorable, bite-sized version of this classic cake.
Chocolate Red Velvet Cake
If you’re a fan of chocolate, you can add more cocoa powder to the batter to create a richer chocolate flavor. Increase the cocoa powder by about 2 tablespoons, and you’ll get a deeper, more chocolaty twist on the classic red velvet.
Layered Red Velvet Cake with Cream Cheese and Whipped Cream
For a lighter and fluffier texture, try adding some whipped cream to your cream cheese frosting. This will give you a lighter, airier frosting that still complements the rich red velvet cake perfectly. It’s a delicious twist that makes the cake even more decadent.
Serving Suggestions
Once your red velvet cake is baked, frosted, and ready to be enjoyed, here are some fantastic serving suggestions that will elevate your dessert and make it the star of the show!
Classic with Cream Cheese Frosting
The simplest and most beloved way to serve red velvet cake is with a generous layer of cream cheese frosting. The rich, tangy frosting pairs perfectly with the moist, tender cake, creating the ultimate balance of flavors. Slice into layers for a beautifully layered presentation.
Garnished with Fresh Berries
To add a pop of color and freshness, garnish each slice with a few fresh raspberries, strawberries, or blueberries. The berries provide a slight tartness that contrasts beautifully with the sweetness of the cake.
Ice Cream Pairing
Serve slices of red velvet cake alongside a scoop of vanilla or chocolate ice cream. The creamy texture of the ice cream complements the richness of the cake, making it an indulgent treat for any occasion. You can even drizzle some chocolate syrup or caramel sauce for extra sweetness.
More Cake recipes you will love!
FAQs
Here are some frequently asked questions to help guide you through the process of making the perfect red velvet cake:
What makes red velvet cake different from regular chocolate cake?
While both cakes have cocoa powder in the batter, red velvet cake has a unique flavor thanks to the tangy buttermilk and a subtle hint of vinegar, which give it a slightly tangy taste. The addition of cream cheese frosting also sets it apart, making it richer and creamier than your standard chocolate cake.
Can I make red velvet cake without buttermilk?
If you don’t have buttermilk on hand, you can easily make a substitute by adding 1 tablespoon of lemon juice or white vinegar to 1 cup of milk. Let it sit for about 5 minutes to thicken, and you’ve got a perfect buttermilk replacement for your cake recipe.
How can I make my red velvet cake more moist?
To keep your cake moist, make sure not to overbake it. Red velvet cake should bake for 30 to 35 minutes at the correct temperature, and you can test for doneness by inserting a toothpick into the center—if it comes out clean, it’s ready. You can also add a bit more oil to the batter to enhance its moisture.
red velvet cake
Ingredients
- 2 ½ cups all-purpose flour
- 1 ½ cups granulated sugar
- 1 tablespoon unsweetened cocoa powder
- 1 teaspoon baking soda
- 1 teaspoon salt
- 1 ½ cups buttermilk room temperature
- 2 large eggs at room temperature
- 1 cup vegetable oil
- 1 tablespoon pure vanilla extract
- 2 tablespoons red food coloring liquid or gel
- 1 teaspoon white vinegar
For the frosting:
- 8 oz cream cheese softened
- ½ cup unsalted butter softened
- 4 cups powdered sugar
- 1 teaspoon vanilla extract


Instructions
Preheat the Oven
- Start by preheating your oven to 350°F (175°C). This will ensure it’s perfectly hot and ready for your cake.
Prepare the Cake Pans
- Grease and flour two 9-inch round cake pans, or you can line them with parchment paper for easier removal. This will prevent your cake from sticking and ensure a smooth finish.
Mix the Dry Ingredients
- In a medium bowl, sift together the flour, cocoa powder, baking soda, and salt. Sifting ensures an even distribution of the dry ingredients and helps avoid clumps.
Combine Wet Ingredients
- In a large mixing bowl, whisk together the buttermilk, eggs, oil, vanilla extract, and red food coloring. The oil will give your cake its moist, tender texture, and the red food coloring will give it that iconic red hue.
Add Dry Ingredients to Wet Ingredients
- Gradually add the dry ingredients to the wet mixture, stirring just until combined. Be careful not to overmix, as this can result in a denser cake. You want a smooth batter with a velvety texture.
Add Vinegar
- Finally, stir in the vinegar. This will help activate the baking soda and create that perfect light texture in the cake.
Bake the Cake
- Divide the batter evenly between the two prepared cake pans. Smooth the tops with a spatula, then place the in the oven to bake for 25-30 minutes. Check for doneness by inserting a toothpick into the center of the cakes—if it comes out clean, they’re ready!
Cool the Cakes
- Allow the cakes to cool in the pans for about 10 minutes before transferring them to a wire rack to cool completely. This step prevents the cakes from breaking apart when removing them from the pans.
Send me this recipe!
Just enter your email below and get it sent straight to your inbox!